Curb rash on rims can dull the appearance of a vehicle and potentially affect resale value. This guide explains practical, step-by-step methods using common rim repair tools and polishing kits to restore alloy wheels. The focus is on safe, at-home repair with commercially available products that are suitable for most common curb damage.
Quick Answer
Assess the damage to determine if repair is feasible at home. For light scratches or scuffs, a rim repair kit for alloy wheels combined with sanding and filler can restore the surface. Deeper gouges may require professional service. Use masking tape, protect adjacent brake components, and work in a well-ventilated area.
What You’ll Need
- Rim repair kit alloy wheel curb rash repair
- Wheel curb rash repair kit for alloy rims
- Mag wheel repair kit curb rash
- Alloy wheel repair polishing kit
- Rim repair sanding and filler kit


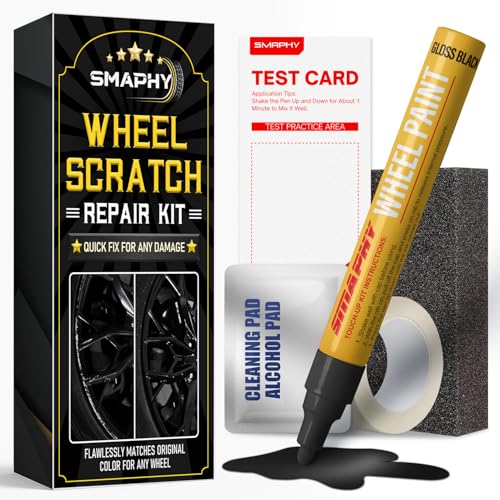
Before You Start
Inspect the rim carefully to gauge damage depth. For polished or painted alloys, match the repair kit to the wheel finish. Gather PPE: safety glasses, respirator mask, and nitrile gloves. Work in a dust-free, well-ventilated area, away from children and pets. Time estimate: 2–6 hours total, depending on damage and curing times. Important: avoid using high-grit abrasives on highly polished surfaces, and never sand through the protective coating or paint.
Step-By-Step: How To Repair Curb Rash On Rims
- Prepare the wheel: Remove the wheel from the vehicle if possible, or rotate the tire to access the damaged area. Clean the rim with mild soap and water, then dry completely.
- Mask adjacent areas: Use masking tape to protect the tire bead, brake rotor, and other wheels. This keeps dust and filler away from unintended surfaces.
- Assess and sand: If using a rim repair sanding and filler kit, start with a coarse sanding block to feather the damaged edge. Progress to finer grits to create a smooth transition to the surrounding alloy.
- Apply filler: Mix the filler per kit instructions and apply sparingly to gouges and scratches. Build in thin layers, allowing each to cure fully before adding the next.
- Shape and smooth: Once cured, sand the filled areas with progressively finer grits until the surface is flush with the surrounding wheel. Wipe clean with a debris-free cloth.
- Prime and paint (if needed): If the wheel has a painted or coated surface, apply a compatible primer, then color-matched paint or a gloss finishing coat. Allow proper curing time between coats.
- Polish the rim: Use the alloy wheel repair polishing kit to restore shine. Polish in small circular motions, applying even pressure until the surface reflects and matches the rest of the wheel.
- Final cleanup and reinstall: Remove masking tape, clean the area again, and reinstall the wheel. Check tire pressure and overall wheel balance before driving.
Troubleshooting
| Symptom | Likely Cause | Fix | Prevention |
|---|---|---|---|
| Poor adhesion of filler | Improper surface prep or incompatible filler | Re-sand, clean, and reapply filler per kit directions | Follow prep steps exactly; use the recommended filler for alloy wheels |
| Uneven surface after sanding | Inconsistent pressure or sanding too aggressively | Even, light passes with finer grits | Use a sanding block; maintain consistent motion |
| Paint flaking after drying | Inadequate curing or incompatible paint | Re-prime and re-paint with proper drying time | Gloss coat after primer; allow full cure |
| Persistent scratches visible after polishing | Deep gouges | Consider professional repair or wheel replacement | Address shallow damage promptly |
Common Mistakes
- Over-sanding the rim edge, which can weaken the wheel
- Skipping masking, leading to debris on brake components
- Using the wrong filler or primer for alloy wheels
- Rushing curing times, causing poor adhesion
Tips For Best Results
- Test a small area first to ensure color and finish match
- Work in dry, dust-free conditions to avoid contaminants
- Use a magnetic paint remover if necessary to clean steel parts near the alloy
- Keep solvents away from rubber tires and seals to prevent damage
- Balance the wheel after repair to prevent vibration
Call A Professional
Consider professional help if any of the following apply: the damage is deeper than a scratch or the wheel is cracked, bent, or structurally compromised; the garage lacks proper ventilation or safety gear for paints and fillers; the wheel is a high-end alloy with special coatings. If you notice cracks around the spoke area or severe corrosion, stop repairs and seek expert service.
FAQ
Can curb rash be repaired at home, or is replacement necessary?
Many light to moderate curb rash repairs can be completed at home using a rim repair kit and polishing supplies, but severe gouges or structural damage may require replacement or professional refurbishment.
Will repairing curb rash affect wheel balance?
Repair work can alter wheel balance if material is added unevenly. Have the wheel balanced after repair to ensure proper handling.
Do I need to remove the tire to fix curb rash?
Removing the tire provides easier access and safer work, but some repairs can be done with the tire mounted if access and safety allow.
What finishing steps improve durability after repair?
Proper curing times, a compatible primer, color-matched paint, and a clear protective coat improve durability and appearance.
Buying Guide
Choosing the right products for curb rash repair on alloy rims involves considering several factors. Size matters because rims vary in diameter and width; compatibility with your wheel type is essential. Noise and vibration are not typical concerns for wheel repair kits, but working area ventilation and dust control improve results. Energy efficiency applies mainly to tools like polishers; look for cordless models with adequate battery life if you plan mobile work. Controls should be simple and intuitive, with clear instructions for mixing, applying, and curing. Placement considerations include storing supplies in a dry, organized space and keeping solvents away from heat sources. When comparing kits, evaluate whether they include sanding blocks, fillers, primers, paints, and a polishing compound. For a balanced approach, assess durability of the filler, ease of color matching, and curing times. If you frequently perform maintenance across multiple vehicles, consider a kit that covers both repair and polishing for alloy wheels. Do you want a compact solution for occasional use or a comprehensive system for ongoing rims upkeep? A complete kit may provide greater value and consistency across projects.