Floor grout can dull quickly, but with a clear plan and the right tools, stubborn stains lift without harsh scrubbing. This guide outlines practical methods and recommended tools to restore grout to a fresh, uniform look across ceramic, porcelain, and stone tile surfaces.
Quick Answer
Choose the right tool for the job. For light staining, a sponge and scrubber kit or a grout cleaning brush set works well. For deeper grime, an electric handheld grout cleaner or a steam mop with a grout nozzle delivers faster results. Always test a small area first and work in small sections to prevent over-wetting.
What You’ll Need
- Stiff nylon grout cleaning brush set for tile floors
- Electric handheld grout cleaner tool
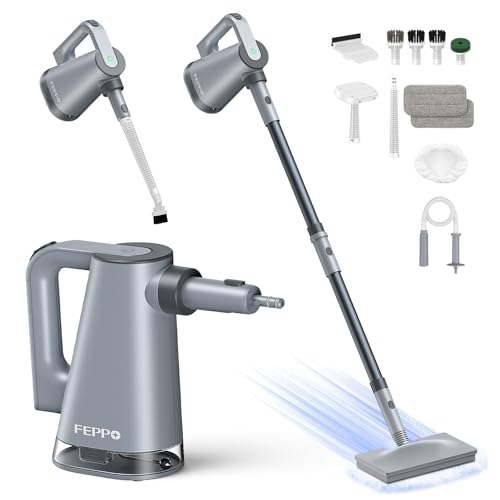
- Steam mop with grout cleaning attachment nozzle
- Grout cleaning drill attachment spiral brush
- Grout cleaning sponge and scrubber kit for ceramic tiles


Before You Start
Assess grout condition: surface stains respond differently than deep-set mold. Ventilate the area and wear gloves and eye protection when using cleaners. For natural stone or untreated grout, avoid acidic cleaners that can etch grout and nearby tiles. Allow the area to dry between passes to gauge progress. Time range: 30–120 minutes depending on the size of the area and the level of staining. Critical cautions: never mix cleaners, avoid high-alkaline might stain lighter grout, and don’t saturate fragile substrates with water.
Step-By-Step: How To Clean Floor Grout Easily
- Clear the area and protect surrounding surfaces with towels or plastic sheeting. Remove loose debris from the tile surface to prevent grinding debris from embedding into grout lines.
- Dry scrub each section with a stiff nylon grout brush to disrupt surface grime, working in a consistent pattern along the grout lines.
- Apply a recommended grout cleaner or a baking soda paste mixed with hydrogen peroxide. Let it sit for 5–10 minutes to loosen stains, then scrub again with the brush.
- For heavy staining, switch to an electric handheld grout cleaner tool or a grout cleaning drill attachment spiral brush and work slowly along each line. Use steady pressure and small circular motions.
- Rinse the area with clean water and wipe with a damp sponge. Check grout appearance and re-treat any persistently dirty lines, repeating steps as needed.
- If mold or mildew is present, use a solution containing chlorine-free mold cleaner or a hydrogen peroxide-based product, following the manufacturer’s instructions. Rinse thoroughly after treatment.
- For large areas, consider a steam mop with grout cleaning attachment nozzle to lift embedded grime while sanitizing. Move the nozzle along grout lines slowly to maximize contact time.
- Allow the floor to air-dry completely before walking on it. Inspect all grout lines; repeat steps for sections requiring deeper cleaning.
- Finish with a grout sealant if the grout is unsealed or very porous. Apply per product directions after the grout has fully dried, typically 24–72 hours.
- Document areas that consistently require maintenance for future cleaning cycles to prevent heavy buildup.
- Optional maintenance: periodically refresh with a grout-specific cleaner to maintain brightness and inhibit staining.
- Store tools properly after use, ensuring brushes are clean and dry to prevent mildew growth on tools themselves.
Troubleshooting
| Symptom | Likely Cause | Fix | Prevention |
|---|---|---|---|
| Discolored grout returns after cleaning | Grout is porous or stained deeply | Re-clean with a more concentrated cleaner or consider sealing | Seal grout after initial cleaning to prevent future staining |
| Streaks or residue after rinsing | Soap or cleaner residue | Rinse with clean water and wipe dry; repeat if needed | Use minimal cleaner and ample water during rinse |
| Weak or crumbling grout | Old, damaged grout | Spot-repoint or replace grout in affected sections | Regularly seal and avoid harsh chemicals on damaged grout |
| Mold returns quickly | Poor ventilation and damp environment | Improve drying area and run fan; treat with mold-safe cleaner | Keep bathroom or kitchen area drier; use dehumidifier |
| Tools wear out quickly | Aggressive scrubbing or hard deposits | Switch to softer attachments for delicate grout; replace worn brushes | Clean tools after use and avoid metal-on-grout friction |
Common Mistakes
- Using acidic cleaners on marble or calcitic grout, which can etch and weaken grout.
- Over-wetting grout lines, which can promote mold growth or warping in some substrates.
- Scrubbing too harshly with soft grout, causing damage to the grout or tile edge.
- Skimping on rinsing, leaving cleaner residues that attract more dirt.
Tips For Best Results
- Test cleaners in a small, inconspicuous area before wide application to avoid discoloration.
- Work in small sections to keep the grout from drying out between passes.
- Use the right tool for the job: manual for light grime, electric or steam for heavy buildup.
- Consider applying a grout sealer after cleaning to protect the grout from future staining.
- Maintain a regular cleaning schedule to prevent deep staining from taking hold.
Call A Professional
Seek professional help if grout is cracked, crumbling, or if there is persistent mold that does not respond to cleaning. Signs to call a pro include extensive grout damage across large areas, spreading mold on multiple rooms, or recurring staining after sealing. A professional can assess substrate integrity, perform grout restoration, and apply appropriate sealants to extend tile life.
FAQ
What is the best tool for cleaning grout fast?
The best tool depends on the degree of staining. An electric handheld grout cleaner or a steam mop with a grout nozzle often provides faster results than manual scrubbing for heavy grime.
Can I use bleach to clean grout?
Bleach can be effective on white or color-safe grout, but it may discolor or damage some tiles or sealers. Always test first and use proper ventilation.
Is sealing grout necessary after cleaning?
Sealing is recommended for unsealed or porous grout to reduce staining and make future cleaning easier.
How often should grout be cleaned?
High-traffic areas may require monthly cleaning, while less-trafficked areas can be cleaned every few months. Regular maintenance helps prevent deep-set stains.
What about natural stone grout?
Natural stone grout requires mild, pH-neutral cleaners to avoid etching. Avoid acidic products and consult manufacturer guidelines for stone-safe options.
Can I use a mop with grout cleaning attachment on all tiles?
Most tile types tolerate a steam or mopping attachment, but always check tile and grout compatibility with the tool manufacturer’s instructions.
Buying Guide
Choosing the right grout-cleaning tools depends on tile type, grout condition, and maintenance goals. Consider size, noise level, energy efficiency, controls, and placement when comparing options.
- <bSize and reach: For large bathrooms or kitchens, choose a tool with a wider cleaning head or extended reach to minimize bending and time spent.
- <bNoise level: If you are cleaning in a shared living space, look for quieter electric cleaners or battery-powered options with reasonable decibel ratings.
- <bEnergy efficiency: Battery-powered devices with efficient motors extend run time and reduce charging frequency.
- <bControls: Simple on/off controls, variable speed, and ergonomic handles improve comfort and precision during use.
- <bPlacement: For tight grout lines, a slender nozzle or spiral brush attachment helps access corners and between tiles.
Multiple tool perspectives help: manual brush sets are affordable and reliable for small jobs, while electric handheld tools accelerate heavy cleaning. Steam-assisted devices sanitize grout without harsh chemicals, but verify compatibility with your tile surface. For routine maintenance, a sponge-and-scrubber kit supports gentle upkeep, while specialized drill attachments tackle persistent grime.