Preparing walls correctly is essential for long-lasting paint results. A thorough cleaning removes dirt, grease, and chalky film that can prevent adhesion. This guide outlines practical steps and the best tools to use for a clean, paint-ready surface.
Following a structured cleaning routine helps ensure a smooth finish and reduces the chance of peeling or uneven coverage. The methods below focus on common household surfaces and use readily available supplies to achieve professional-like prep at home.
Quick Answer
For most interior walls, start with a light dusting, then clean with a degreasing solution or a TSP substitute, rinse, and let dry completely. If walls have heavy grease or staining, use a dedicated grease remover spray, followed by a scrub with a non-scratch sponge and a microfiber cloth. Finally, wipe down with clean water, let dry, and inspect for any remaining spots before painting.
What You’ll Need
- Grease remover spray walls 32 oz for paint prep
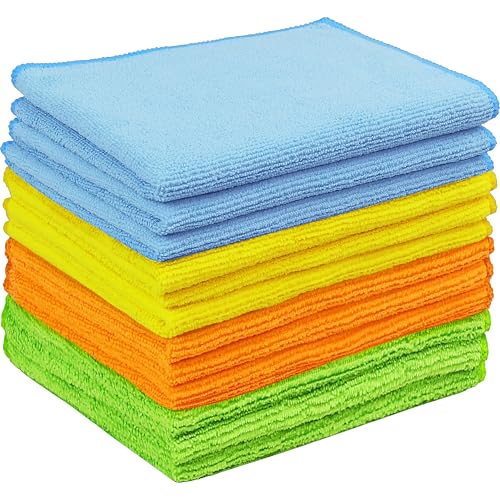
- Microfiber cleaning cloths 12×12 walls paint prep pack
- Paint scraper set 2 inch blade wall prep
- Non-scratch scrubbing sponge wall cleaning for paint prep
- TSP substitute cleaner wipes wall prep 6 pack


Before You Start
Clear the area and cover floors with drop cloths. Ventilate the room to reduce fumes from cleaners. Test cleaners on a small, inconspicuous area to ensure they don’t damage the paint or wallpaper. Wear gloves to protect skin and eye protection if splashes are possible. Allow surfaces to dry completely before applying primer or paint. Important: avoid using overly abrasive tools on delicate surfaces to prevent scratches.
Step-By-Step: How To Clean Before Painting
- Remove loose dust from walls with a dry microfiber cloth to minimize streaks during cleaning.
- Inspect walls for peeling paint or cracks; scrape away loose material using a paint scraper set 2 inch blade to create a smooth edge.
- Use a grease remover spray walls 32 oz for paint prep on areas with oil or cooking splatter, then wipe clean with a microfiber cloth.
- For stubborn spots, apply a TSP substitute cleaner wipes wall prep 6 pack and gently scrub with a non-scratch sponge.
- Rinse surfaces with a clean damp cloth or sponge to remove cleaner residues, starting from the top and moving down.
- Follow with a final wipe using dry microfiber cloths to remove any remaining moisture.
- Inspect walls in good lighting for missed spots or smears; touch up as needed with a clean cloth.
- Allow walls to dry completely, typically 1–2 hours depending on ventilation and humidity.
- If needed, do a light dusting again after drying to ensure a pristine surface before priming.
- Proceed to prime or paint once the wall is fully dry and free of residue.
- Store cleaning supplies in a safe, ventilated area and clean brushes or sponges promptly after use.
- Note any areas that required extra attention for future touch-ups or repainting schedules.
Troubleshooting
| Symptom | Likely Cause | Fix | Prevention |
|---|---|---|---|
| Streaks after cleaning | Residual cleaner or water spots | Rinse thoroughly and dry with microfiber cloths | Use clean water and multiple passes with a dry cloth |
| Grease remains on panels | Heavy grime | Apply grease remover spray, re-scrub, then rinse | Wipe down areas prone to splatter before painting |
| Rough texture after drying | Scrubbing too hard or abrasive sponge | Switch to non-scratch sponge and gentler strokes | Test on a small area first |
| Sticky surface after cleaning | Cleaner residue | Rinse with clean water and dry | Follow cleaner instructions for rinsing |
Common Mistakes
- Skipping the rinse step after using degreasers or TSP substitutes
- Using abrasive pads that gouge plaster or drywall
- Not allowing sufficient drying time before priming
- Over-wetting walls, which can cause warping or paint adhesion issues
Awareness of these pitfalls helps ensure the surface is truly ready for primer and paint.
Tips For Best Results
- Work from top to bottom to prevent dirty streaks on already-cleaned areas.
- Keep a dedicated cleaning wipe or cloth for heavily soiled spots to avoid cross-contamination.
- Use a consistent scraping angle with the paint scraper set 2 inch blade to avoid gouges.
- Test cleaner compatibility on a hidden area before full application.
- Ventilate the room well to reduce chemical odor and speed up drying times.
Call A Professional
Consider hiring a pro if walls show extensive mold, unknown staining, or if the room contains lead paint in older homes. Seek immediate help for exposed electrical fixtures or structural damage. If DIY attempts don’t achieve a clean, smooth surface, a licensed contractor can assess and remediate safely.
FAQ
What is the best order to clean walls before painting?
Dust, then wipe with a degreasing cleaner, rinse, and dry. Finally, inspect for any residues and smooth areas as needed.
Can I use regular dish soap to clean walls before painting?
Mild soap can work for light cleaning, but for greasy or tough stains, a dedicated cleaner or grease remover is more effective.
Do I need to rinse after using cleaners?
Yes, to remove residues that interfere with primer adhesion, followed by thorough drying.
How long should walls dry before painting after cleaning?
Drying times vary with humidity and ventilation, but plan for at least 1–2 hours, longer in humid conditions.
Buying Guide
When choosing cleaning supplies for painting prep, consider the following factors:
- Size and coverage: Larger spray bottles reduce reapplication during prep, but allow for easy storage.
- Noise level and ease of use: Handheld scrapers and wipes are typically quiet and quick for small jobs; power scrapers are not usually necessary for benign walls.
- Energy efficiency is less about tools here, but choosing reusable microfiber cloths improves waste reduction.
- Controls and formulas: Look for surfaces-safe cleaners suitable for painted walls and avoid harsh solvents that can strip paint.
- Placement of tools: Keep cleaners within reach on a stable tray; protect floors with drop cloths and ensure good airflow in the room.
For best results, select a cohesive kit that includes a degreasing option, microfiber cloths, a gentle sponge, and a small paint scraper. This combination supports consistent, reliable prep across most interior painting projects.