Headlight covers tend to accumulate oxidation, haze, and yellowing over time, reducing beam clarity and safety. This guide provides a practical, step-by-step approach to restore clarity using common DIY tools and proven techniques. The focus is on safe methods that work for most vehicles and minimize material damage.
The goal is to remove grime, restore transparency, and protect the lens from future UV damage. By following these steps, drivers can improve nighttime visibility without costly professional services.
Quick Answer
Begin with a basic cleaning to remove surface dirt, then evaluate depth of haze. For light oxidation, a 3-step plastic headlight restoration kit can restore clarity. For deeper yellowing, consider a ceramic headlight restoration kit with polishing compound or a UV-reactive kit with sealant for long-lasting protection. Always finish with a sealant or protective coating to minimize future discoloration.
What You’ll Need
- Ceramic headlight restoration kit with polishing compound
- Plastic headlight lens restoration kit 3-step
- UV-reactive headlight restoration kit with sealant
- Headlight cleaning kit microfiber polishing pad
- Motor vehicle headlight restoration kit sandpaper 4000 grit

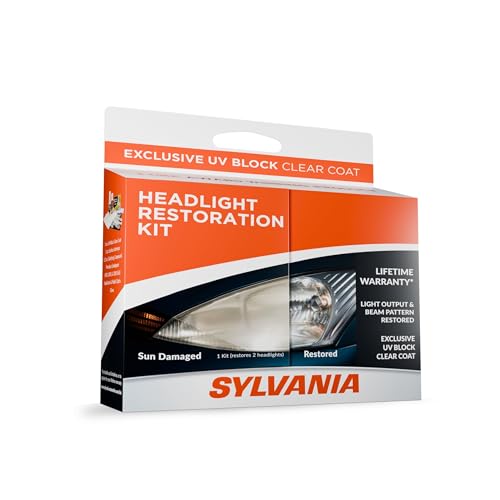

Before You Start
Assess the headlight condition: light surface contamination vs. deep yellowing. Protect surrounding trim and painted surfaces with painter’s tape, and work in a shaded, well-ventilated area. Gather all supplies before starting, and set aside 30–90 minutes depending on the kit and haze level. If the lens shows deep cracks or clouding beyond typical oxidation, replacement may be necessary rather than restoration.
Step-By-Step: How To Clean Headlight Covers
- Wash the headlights with soap and water to remove loose dirt and grime, then dry thoroughly.
- Mask the surrounding areas with tape to keep cleaners off the paint and lenses.
- If using sandpaper, start with a low abrasive level and gradually move to 4000 grit for the smoothing pass. Use water to lubricate the surface during sanding.
- Apply the chosen restoration compound according to the kit’s instructions, using a microfiber polishing pad to rub in a consistent, circular motion.
- For multi-step kits, complete each stage in order: polish, compound, and final sealant or protective layer as specified by the package.
- Wipe away residue with a clean microfiber cloth, checking for uniform clarity across the entire lens.
- If a sealant or UV protector is included, apply a thin, even coat and let it cure as directed before exposing the headlights to nighttime driving.
- Inspect under a bright light for any remaining haze or uneven patches and reapply the appropriate step if necessary.
- Reinstall any masking, remove protective tape, and wash the area lightly to remove any leftover residues.
- Test beam brightness at night and adjust aim if needed for optimal road visibility.
- Store unused portions per the kit’s instructions, keeping lids tightly closed to prevent premature drying.
Troubleshooting
| Symptom | Likely Cause | Fix | Prevention |
|---|---|---|---|
| Persistent haze after polishing | Overly worn lens or deep yellowing | Try a higher grit sanding pass or switch to a ceramic kit with stronger polishing compounds | Perform maintenance every 1–2 years |
| Scratches visible after finishing | Too aggressive sanding or abrasive residue | Repeat with finer grit and thorough cleaning between steps | Keep surface wet during sanding |
| Sealant fails to cure | Improper surface prep or excessive thin film | Re-clean surface and apply with even, thin coats | Follow cure times precisely |
| Discoloration returns quickly | Under- or over-application of sealant | Apply final coat evenly and allow full cure | Use recommended products only |
Common Mistakes
- Cleaning with abrasive pads alone without polishing or sealing
- Skipping masking, leading to damaged trim and paint
- Rushing through steps, especially sealant application
- Using improper grit progression, causing micro-scratches
Attention to detail reduces the risk of permanent damage and ensures longer-lasting clarity.
Tips For Best Results
- Work in a shaded area to prevent premature drying of compounds and sealants.
- Keep lenses and pads damp during polishing to avoid heat buildup and swirls.
- Test a small area first to gauge the kit’s effectiveness before full application.
- Pair a polishing step with a final UV sealant for extended protection against sun damage.
Call A Professional
Consider professional help if the lenses are deeply etched, cracked, or if restoration yields inconsistent results after multiple attempts. Stop and consult a pro if heat or pressure is needed beyond standard DIY practices, or if the headlights are part of a safety recall or damaged wiring system.
FAQ
Can I use household cleaners to clean headlight covers?
Avoid household cleaners that contain ammonia or harsh solvents; they can degrade plastics and reduce clarity.
How long does a headlight restoration last?
Results typically last several months to a couple of years, depending on exposure to UV light and environmental factors.
Is it safe to use sanding on headlights?
Light sanding with proper technique and lubrication can restore clarity, but excessive sanding risks damaging the lens.
Do I need to remove the bumper for restoration?
Most restorations can be done with the bumper in place; remove only if the kit instructions require better access.
Buying Guide
Choosing the right headlight restoration approach depends on the lens condition and desired durability. Consider the following factors to compare options:
- Size and shape compatibility: Ensure the kit fits your vehicle’s headlight design and lens material.
- Noise and ease of use: Some kits use simple three-step processes, while others require sanding and multiple polishings.
- Energy efficiency and long-term protection: Sealants with UV blockers offer longer-lasting clarity and protection.
- Controls and application method: Manual polishing vs. pre-mixed compounds; choose what fits your comfort level.
- Placement considerations: Most kits are suitable for standard headlights; check for compatibility with polycarbonate lenses.
For many drivers, a mid-range kit that includes both polishing compounds and a protective sealant provides a balanced result. If the haze is severe, a ceramic headlight restoration kit with polishing compound may deliver deeper restoration and longer-lasting protection, albeit with additional steps. Always follow the manufacturer’s instructions to maximize safety and effectiveness.