Foggy or dull fog lights can reduce nighttime visibility and driving safety. Proper cleaning and restoration can restore clarity without replacing parts. This guide walks through practical, step-by-step methods using common headlight restoration tools available in the market.
Whether you own a sedan, SUV, or truck, keeping fog lights clean helps ensure you get the full benefit of your lighting system. The steps below are designed for quick DIY fixes that work with typical automotive lighting assemblies.
Quick Answer
For quick improvement, start with a basic cleaning using a polishing compound and microfiber cloth. If clarity remains limited, move to a sanding and polishing kit designed for polycarbonate lenses. Use a drill-powered restoration kit for even, consistent results, and finish with a protective sealant to prevent future oxidation.
What You’ll Need
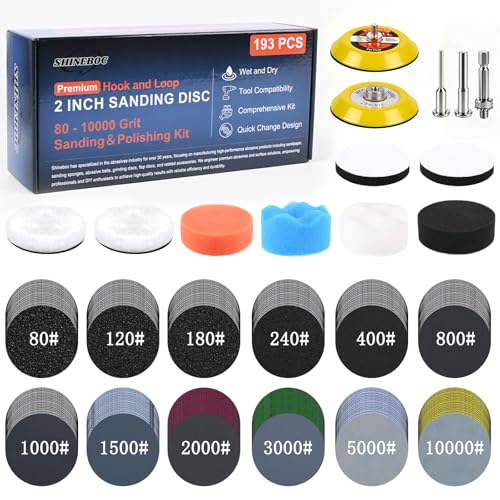
- Fog light restoration kit with sanding discs
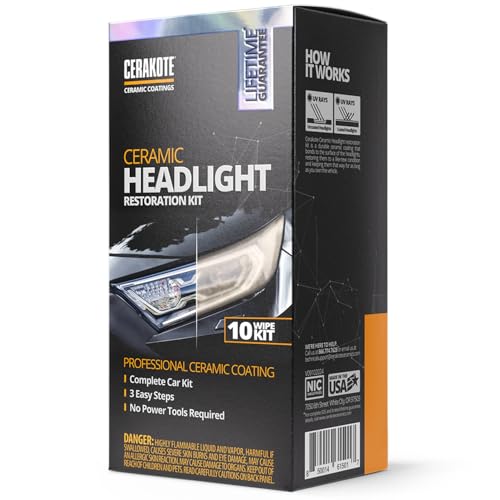
- Headlight cleaning and polishing kit
- Polycarbonate headlight sanding and polishing kit
- Drill-powered headlight restoration kit
- Headlight polishing compound kit with microfiber cloth

Before You Start
Before beginning, ensure the vehicle is parked on a flat surface and the engine is off. Protect the surrounding paint with painter’s tape around the fog lights. Work in a well-ventilated area and wear eye protection. Time estimate: 45–90 minutes depending on lens condition. Do not use abrasive tools on coated or non-polycarbonate lenses, as this can damage the light housing.
Step-By-Step: How To Clean Fog Lights
- Remove or access the fog light lens according to the vehicle manual or simply mask around the housing for in-place work.
- Clean the lens surface with a mild soap solution to remove surface dirt and debris.
- Inspect the lens for deep scratches or oxidation; determine if polishing alone will suffice or if sanding is required.
- If using a polishing compound, apply a small amount to a microfiber cloth and rub in a circular motion with medium pressure until the haze starts to fade.
- For heavy oxidation, attach a sanding disc to the drill-powered restoration kit and sand with light, even strokes following the lens curvature. Start with a coarser grit, then progress to finer grits as needed.
- Progress to polishing again with a finer compound or headlight polishing kit until clarity improves. Wipe clean frequently to inspect progress.
- Rinse the lens thoroughly and dry with a clean microfiber cloth to prevent water spots.
- Apply a protective sealant or UV-reducing coating included in many headlight kits to slow future yellowing and haze.
- Reinstall or reassemble the fog light assembly and test brightness in a dim area to verify improvement.
- Clean and store tools properly after the job to maintain kit performance for future use.
Troubleshooting
| Symptom | Likely Cause | Fix | Prevention |
|---|---|---|---|
| Haze remains after polishing | Deep oxidation or sun damage | Proceed with light sanding and re-polish | Use UV sealant after cleaning |
| Scratches visible | Overly aggressive sanding | Switch to finer grit and lighter strokes | Follow kit instructions precisely |
| Paint around fog light dulls | Masking tape not applied | Retape edges and re-clean | Protect surrounding areas during work |
| Fog light not improving after kit | Damaged housing or lens replacement needed | Consider professional assessment | Regular maintenance to catch early wear |
Common Mistakes
- Using household abrasives or cleaners not designed for polycarbonate lenses
- Overheating lens with excessive rubbing or high-speed sanding
- Skipping masking and risking paint damage
- Rushing through steps, especially during sanding and polishing
Tips For Best Results
- Work in short, controlled sessions to monitor improvements closely
- Keep the sanding discs perpendicular to the lens surface for even results
- Test clarity from multiple angles to ensure even transparency
- Finish with a UV-resistant sealant to slow future hazing
Call A Professional
Consider a professional if fog lights are severely cracked, heavily oxidized, or if they operate improperly after cleaning. Stop and seek expertise if you notice water intrusion, unusual electrical flickering, or persistent moisture behind the lens, which may indicate a seal failure.
FAQ
Is it safe to use a drill-powered restoration kit on all fog lights?
Most polycarbonate fog light lenses tolerate controlled drilling-powered polishing, but avoid aggressive speeds and follow manufacturer instructions.
How long does fog light cleaning typically last?
Results vary, but protective sealants can extend clarity for several months with regular maintenance.
Can I clean fog lights without removing the bumper?
Yes, many maintenance steps can be done in place, though removal may provide easier access for stubborn fog lights.
What if the fog light housing is cracked?
A cracked housing generally requires replacement of the fog light unit or lens assembly.
Buying Guide
When selecting a fog light cleaning setup, consider the following:
- Size and compatibility: Ensure the kit fits your fog light shape and housing type, whether compact or larger aftermarket units.
- Noise level: Power tools can create noise; look for kits with smooth operation and adjustable speeds.
- Energy efficiency: While cleaning does not affect energy use, some kits include energy-saving features on drill attachments.
- Controls: Simple, intuitive controls help prevent mistakes during sanding and polishing.
- Placement: Tools that work in tight spaces are beneficial for recessed fog light housings.
Multiple product options exist, from simple polishing kits to comprehensive polycarbonate sanding and polishing sets. For best results, choose a system that includes both sanding discs and polishing compounds, plus a microfiber cloth and protective sealant. Do you need a drill-powered option, or a manual approach with hand polishing?