Shower door seal strips keep water inside the shower and prevent mold growth, but they can collect soap scum, minerals, and grime over time. Regular cleaning extends their life and helps maintain a clear shower enclosure. This guide walks American homeowners through a practical, step-by-step approach using common tools and affordable products.
Quick Answer
Target the seal’s edges and grooves with a soft brush and gentle cleaner, rinse well, then dry to prevent mold. For stubborn deposits, try a silicone scraper to lift buildup, followed by a microfiber squeegee to remove moisture and prevent streaks.
What You’ll Need
- Stiff nylon scrub brush shower door seal
- Silicone scraper shower door seal cleaning tool
- Bathroom grout brush for shower door tracks
- Microfiber squeegee for shower door and seal
- Caulk removal tool silicone sealant remover

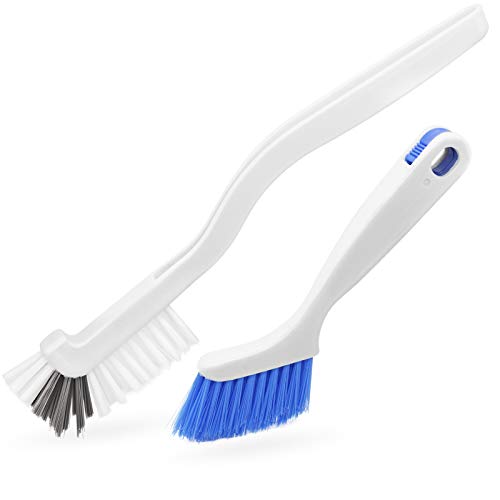
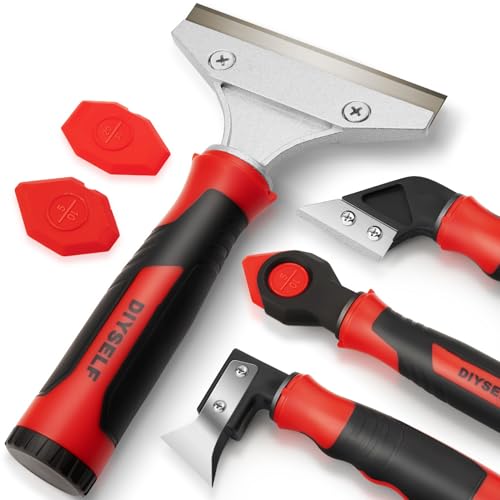
Before You Start
Assess the seal type and condition. Most shower door seals are made of vinyl or silicone. Ventilate the area and wear gloves to protect skin. Move any decor, remove loose debris, and dampen the area before cleaning. Time estimate: 10–20 minutes for routine cleaning, longer for heavy buildup.
Step-By-Step: How To Clean A Shower Door Seal Strip
- Put on gloves and lightly dampen the seal with warm water to loosen grime.
- Apply a mild cleaner or white vinegar solution (1:1 with water) to the seal, focusing on corners and crevices.
- Use the stiff nylon scrub brush to gently scrub along the edges and grooves of the seal.
- For mineral deposits, scrub with the bathroom grout brush for shower door tracks to dislodge buildup in the track area.
- Wipe away loosened residue with the microfiber squeegee, pulling from the door toward the frame to prevent drips.
- If buildup clings stubbornly, use the silicone scraper shower door seal cleaning tool to lift it without scratching the surface.
- Rinse the seal with clean water and recheck for remaining residue. Repeat as needed.
- Dry the seal completely with a towel or the microfiber cloth to prevent mold growth.
- Inspect seals periodically; replace if cracks or tears appear, ensuring a tight seal against water spray.
- Optional: after drying, apply a thin layer of spray-on silicone lubricant on silicone seals to maintain flexibility (follow product directions).
- Re-clean monthly as part of a routine bathroom maintenance to avoid heavy buildup.
Troubleshooting
| Symptom | Likely Cause | Fix | Prevention |
|---|---|---|---|
| Stubborn white film on seal | Soap scum or hard water minerals | Reapply vinegar solution and scrub; consider a dedicated bathroom cleaner | Wipe down after every shower; run fan |
| Mildew near seal | Moisture trap and organic growth | Treat with diluted bleach solution or peroxide; rinse well | Keep area dry; improve ventilation |
| Seal feels stiff or cracked | Age and wear | Inspect for replacement; install new seal if needed | Replace proactively every few years |
| Seal pulls away from door | Adhesive failure or damage | Regroup with silicone sealant remover and reapply new adhesive | Clean mounting surfaces before resealing |
Common Mistakes
- Using abrasive scrubs that scratch the seal surface
- Applying bleach directly to colored or dyed seals
- Skipping drying, which invites mold growth
- Neglecting to clean tracks where the seal sits
Tips For Best Results
- Schedule a quick weekly wipe-down with a microfiber cloth to keep buildup low.
- Use warm water rather than hot to avoid warping delicate seals.
- Test any cleaner on a small area first if unsure of material compatibility.
- Store a dedicated silicone scraper tool in a reachable spot for quick touch-ups.
- Pair cleaning with a light routine monthly to maintain seal integrity.
Call A Professional
Consider a pro if seals are cracked, loose, or water leaks persist after cleaning. Stop signs include persistent leaks after resealing, visible mold behind panels, or damage to the metal frame. A plumber or bathroom remodeling specialist can assess seal material compatibility and ensure proper installation.
FAQ
Can I use bleach on shower door seals?
Bleach can be effective for mold but may discolor some seals. Dilute and test first, then rinse thoroughly.
What is the best cleaner for vinyl seals?
A mild bathroom cleaner or white vinegar solution works well without harsh chemicals.
How often should I clean the seal strip?
Light weekly wipes plus a deeper clean every 2–4 weeks, depending on usage and mineral content in water.
When should I replace a shower door seal?
Replace if there are cracks, tears, warping, or persistent leaks after cleaning and resealing attempts.
Buying Guide
Choosing the right shower door seal and related tools involves considering size, material, and maintenance needs. This guide outlines key buying factors to help homeowners compare options and make an informed choice.
Size and fit: Measure the door width and track depth to select seals that fit snugly without creating gaps. Some doors use universal strips with adjustable lengths.
Material: Vinyl and silicone seals are common. Silicone remains flexible in temperature fluctuations and resists mold better, while vinyl may be more affordable.
Noise and water control: A well-fitted seal reduces water spray and door slams. Look for seals with tight contact surfaces and a durable backing.
Ease of maintenance: Tools like a silicone scraper and microfiber squeegee simplify cleaning. Choose materials that withstand regular scrubbing.
Installation and compatibility: Check mounting type (adhesive-backed vs. clip-in). Ensure compatibility with existing tracks and door materials to avoid damage.
Placement considerations: For sliding doors, seals should align with the track without obstruction. Consider corner clearance for easy opening and closing.
Smart shoppers compare multiple options, read product reviews, and verify warranties. Do you need a complete seal kit or replacement strips only for targeted sections? If replacing, measure twice and install slowly for a secure seal.