Copper bottom pots add a distinctive shimmer to any kitchen, but keeping them pristine requires a simple routine. This guide outlines practical steps, safe products, and pro tips to restore shine without damaging the copper or the cookware’s surface. Readers will find a clear method that works for everyday tarnish and more stubborn buildup.
Whether you’re beginning a routine clean after a meal or tackling a long-neglected pot, understanding the right tools and steps helps protect copper’s beauty while extending the pot’s lifespan.
Quick Answer
Best first step: use a non-scratch copper pot scrub brush with a gentle copper cleaner or a specialized copper pot cleaning paste. For heavy tarnish, apply tarnish remover cream and buff with a polishing cloth. Finish with a light rinse and dry to prevent water spots.
What You’ll Need
- copper pot cleaning paste for copper cookware
- bowl of warm, soapy water
- non-scratch copper pot scrub brush
- tarnish remover cream for copper pots
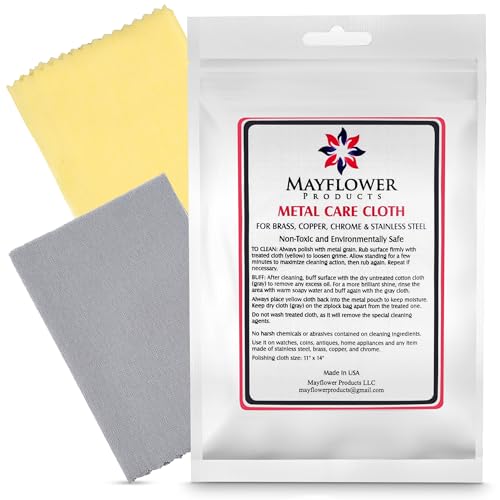
- copper polishing cloth for copper pots
- copper cookware cleaning kit with polishing cloth and cleaner
- soft microfiber towel for drying


Before You Start
Prepare a clean workspace and protect nearby surfaces from cleaners. Turn off heat sources and allow the pot to cool completely before cleaning. Safety notes: avoid harsh abrasives that can scratch copper’s surface; never use steel wool on copper pots. Work in a well-ventilated area if you plan to use chemical cleaners. Time estimate: 15–30 minutes for routine clean, 30–60 minutes for heavy tarnish restoration.
Critical cautions: always test cleaners on a small, inconspicuous area first; follow product directions; wear gloves if you have sensitive skin.
Step-By-Step: How To Clean Copper Bottom Pots
- Rinse the pot with warm water to remove loose debris and food particles.
- Mix a light, gentle cleaning solution by adding a drop of mild dish soap to warm water.
- Use the non-scratch copper pot scrub brush to loosen surface grime on the copper exterior and the bottom interior. Do not scrub vigorously on any etched or blackened areas.
- Apply a copper pot cleaning paste for copper cookware directly to the tarnished areas or a cleaning cloth, then rub in small circular motions until residues lift.
- For stubborn tarnish, apply tarnish remover cream for copper pots according to the label. Let it sit briefly if recommended, then buff with the scrub brush or a soft cloth.
- Rinse thoroughly with warm water to remove all cleaner residues, ensuring no slick film remains on the copper.
- Dry completely with a microfiber towel to prevent water spots and further oxidation.
- Finish with a copper polishing cloth for copper pots, buffing in circular motions until a bright, even sheen appears on the copper exterior.
- Inspect for any remaining dull areas. Repeat steps 4–7 if needed, focusing on persistent spots.
- Store in a dry place to minimize future tarnish. Regular light cleaning helps maintain shine and reduces the need for aggressive cleaners.
Troubleshooting
| Symptom | Likely Cause | Fix | Prevention |
|---|---|---|---|
| Dull, uneven shine after cleaning | Uneven application of cleaner or insufficient buffing | Reapply cleaner to dull spots and buff with a polishing cloth | Buff thoroughly in small sections; use a polishing cloth weekly |
| New scratches after cleaning | Use of abrasive pads or harsh scrubbers | Switch to non-scratch brush and gentle paste | Avoid metal scouring tools; follow product directions |
| Persistent black tarnish | Exposure to acidic foods or long storage | Apply tarnish remover cream as directed; re-treat if needed | Wipe after cooking acidic foods; store properly |
| Sticky residue after cleaner | Insufficient rinsing | Rinse thoroughly; re-wash with mild soap if needed | Rinse completely during every cleaning session |
Common Mistakes
- Using steel wool or metal scouring pads on copper surfaces
- Over-cleaning with harsh chemicals that strip patina or protective coatings
- Letting cleaners sit too long on the copper, causing discoloration
- Neglecting to dry the pot completely after cleaning, which invites water spots
Tips For Best Results
- Develop a regular cleaning routine with a mild copper cleaner to prevent heavy tarnish buildup.
- Store copper pots in a dry, low-humidity area to minimize oxidation.
- Use a dedicated polishing cloth after each wash to maintain a bright finish.
- For cookware with copper bottoms that are also lacquered, follow the manufacturer guidance to avoid removing protective coatings.
Call A Professional
When should professional help be considered? If tarnish is deeply set, if copper shows green verdigris, or if the pot has significant pitting or copper erosion, consult a professional restorer. If the cookware holds historical or value considerations, professional assessment is wise before aggressive restoration attempts.
FAQ
What is the best product for cleaning copper pots?
The combination of a specialist copper pot cleaning paste and a non-scratch copper pot scrub brush provides effective cleaning with minimal risk of scratching.
Can I use lemon and salt to clean copper?
Lemon and salt can work for lightweight tarnish, but for best results use purpose-made cleansers to avoid uneven patina or damage.
How often should I polish copper bottom pots?
Light polishing after routine cleaning maintains shine; deeper polishing can be done monthly or as tarnish returns.
Is it safe to use tarnish remover cream on all copper pots?
Most copper pots tolerate tarnish remover creams when used as directed; always read the label first and test on a small area.
Should I remove lacquer before polishing?
If the pot has a lacquer finish, follow the maker’s guidance. Some lacquers are designed to protect copper and may require special care.
Can I use a dishwasher to clean copper bottom pots?
Dishwashers can damage copper finishes; hand washing with mild cleaners is recommended.
What is the best way to prevent future tarnish?
Dry thoroughly, avoid prolonged contact with acidic foods, and perform light cleaning regularly using non-abrasive products.
Buying Guide
When shopping for copper bottom pots, consider the following factors to ensure long-lasting shine and practical use:
- Size and capacity: Choose sizes that fit your cooking needs and storage space. Consider a set with a range of small to large pots for versatility.
- Finish and construction: Pure copper bottoms with a stainless steel or aluminum core often balance durability and cooking performance. Check handles and lids for sturdy, heat-resistant materials.
- Coatings and patina: Some pots are naturally aged copper with patina; others are polished. Decide whether you prefer a traditional look or a bright, modern finish.
- Cleaning compatibility: Ensure the included cleaners and polishing cloths are suitable for your cookware and your preferred care routine.
- Weight and heat response: Copper heats quickly and evenly. Heavier pots may require more careful handling but offer superior heat control.
- Maintenance needs: Sets with a built-in cleaning kit or polishing cloths can simplify upkeep; consider whether you want to invest in a dedicated cleaner or a complete kit.
- Placement options: Consider how you store pots—on racks, hanging by handles, or nesting. A well-organized setup reduces clutter and protects finishes.
- Budget and value: High-quality copper sets last for years with proper care. Balance price against durability, warranty, and included maintenance items.
Whether you’re refreshing a newly acquired copper pot or maintaining a beloved family piece, a thoughtful routine and the right tools make cleaning efficient and satisfying. Ready to start? A good cleaning kit and a polishing cloth can transform dull copper into a bright, showroom-ready surface with minimal effort.