Acrylic windows offer clarity and lighter weight compared to glass, but they require careful cleaning to avoid scratching or clouding. This guide provides a practical, step by step approach using consumer friendly tools and materials that are widely available in the United States. Readers will learn safe cleaning methods that preserve the shine of acrylic panes while removing dirt, fingerprints, and smudges with minimal risk.
Quick Answer
Use a gentle, ammonia-free cleaner designed for acrylic, paired with a soft microfiber cloth and a squeegee with a soft rubber blade. Avoid abrasive cleaners and rough tools. Clean with light, overlapping strokes and dry with a clean cloth to prevent streaks.
What You’ll Need
- Ammonia-free acrylic window cleaner spray
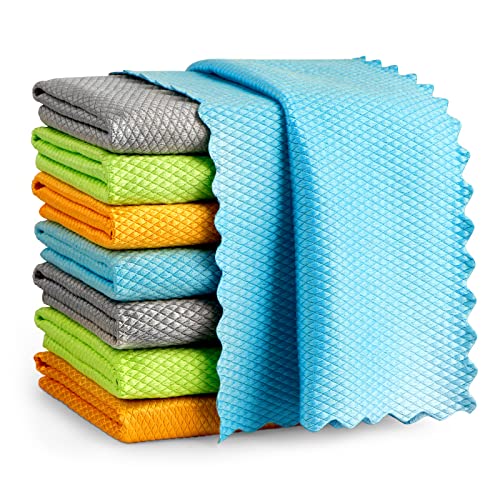
- Soft microfiber cleaning cloth for acrylic windows
- Non-abrasive cleaner for acrylic panes
- Squeegee with soft rubber blade for acrylic windows
- Acrylic window cleaning kit with microfiber cloths and spray


Before You Start
Prior to cleaning, remove dust with a gentle dry wipe to minimize scratching. Cover nearby frames if they may be damaged by moisture. Work in a shaded area or indoors to reduce rapid evaporation and prevent streaks. Time estimate for a standard window: about 15–25 minutes. Critical cautions include avoiding window cleaners containing ammonia for acrylics, using only soft tools, and never applying heavy pressure that could chip or scratch the surface.
Step-By-Step: How To Clean Acrylic Windows
- Prepare cleaning tools and a spray bottle with ammonia-free acrylic cleaner for easy access.
- Lightly mist the cleaner onto the window surface from top to bottom, avoiding oversaturation that could drip behind frames.
- Gently wipe with a soft microfiber cloth in straight or circular motions, ensuring even coverage without pressing hard.
- For stubborn smudges, use a squeegee with soft rubber blade to lift grime without scratching; work in a consistent vertical or horizontal motion.
- Wipe remaining moisture with a dry microfiber cloth, using light, overlapping strokes to prevent streaks.
- Check for streaks under a bright light; if needed, buff with a clean, dry cloth in a second pass.
- Avoid cleaning in direct sun or on hot surfaces which can cause cleaner to dry too quickly and leave marks.
- For corners and edges, use a corner of the microfiber cloth to reach tight spaces without applying harsh pressure.
- Rinse the cloth frequently to prevent transferring dirt back onto the pane, and replace the cloth if it becomes heavily soiled.
- Return to the window for a final wipe with a fresh microfiber cloth until the surface is clear and glossy.
- Store cleaners and tools in a dry place between uses to maintain effectiveness and longevity.
Troubleshooting
| Symptom | Likely Cause | Fix | Prevention |
|---|---|---|---|
| Streaks after cleaning | Residue from cleaner or cloth fibers | Switch to a fresh microfiber cloth and re-wipe with minimal cleaner | Use ammonia-free cleaner and rinse cloths frequently |
| Cloudy appearance | Scratches or hard residue | Use only non-abrasive products and soft tools; avoid scrubbing pads | Clean with light pressure and soft materials consistently |
| Stubborn tape or adhesive marks | Adhesive residue on surface | Apply a small amount of non-abrasive cleaner; gently lift with cloth | Remove tape carefully and wipe immediately after |
| Surface feels rough | Dirt embedded in the surface | Use a cleaner designed for acrylic panes and a microfiber cloth | Avoid abrasive cleaners entirely |
Common Mistakes
- Using harsh or ammonia-based cleaners on acrylic surfaces
- Scrubbing aggressively with hard-bristle brushes
- Cleaning in direct sunlight or on hot surfaces
- Using dirty cloths that re-deposit grime
- Rubbing edges too hard and causing micro-scratches
Tips For Best Results
- Always start with a dry dusting to reduce abrasive contact from the outset.
- Choose a dedicated microfiber cloth for acrylic surfaces to avoid lint and fibers.
- Keep the cleaning spray at a light mist level to prevent pooling.
- Work from top to bottom for consistent streak control.
- Regular cleaning preserves clarity and reduces the need for intensive scrubbing later.
Call A Professional
Consult a pro if acrylic panes show deep scratches, yellowing, or clouding that persists after standard cleaning. Signs to seek help include any cracking sounds during wiping, visible cracks along the edges, or a persistent hazy film that resists routine care. A specialist can assess underlying issues and recommend safe restoration options.
FAQ
What cleaner is safest for acrylic windows?
Use an ammonia-free acrylic window cleaner spray designed specifically for acrylic surfaces.
Can I use paper towels to clean acrylic windows?
Paper towels can leave lint; prefer soft microfiber cleaning cloths for best results.
Is it okay to use a standard glass cleaner on acrylic panes?
No, many glass cleaners contain ammonia or solvents that can damage acrylic over time.
How do I prevent streaks on acrylic windows?
Wipe with a fresh microfiber cloth, use light pressure, and buff in a single direction or circular motion until clear.
Buying Guide
Key factors influence the best choice for acrylic window cleaning tools and kits. Size and window type determine which squeegee width and cloth quantity are needed. Noise level matters for indoor use in quiet spaces. Energy efficiency is less relevant for cleaning tools, but choose durable, reusable cloths to reduce waste. Controls and ease of use are improved by spray bottles with even mist settings. Placement considerations include shelf or storage space for cleaners, and whether tools must be compact to reach high or awkward angles. A complete kit that includes microfiber cloths and a spray bottle offers a balanced package for most households, while individual components allow customization for specific window configurations. When shopping, compare kits that feature a soft rubber blade squeegee, an ammonia-free cleaner, and a dedicated microfiber cloth set to ensure compatibility with acrylic surfaces.