Cleaning the inside of an ear piercing hole is a crucial step in preventing infection and ensuring proper healing. The right routine uses gentle, effective solutions and proper applicators to reach the piercing channel without causing irritation. This guide outlines a practical, step-by-step approach suitable for most fresh or healed piercings, with practical safety notes and product recommendations.
Quick Answer
Clean the inside of the piercing once or twice daily using a sterile saline solution or a dedicated ear piercing cleaning solution. Use a soft applicator or syringe to flush the canal gently, then pat dry with a clean tissue. Avoid harsh chemicals and irritants, and do not rotate or move the jewelry unnecessarily during healing.
What You’ll Need
- Ear piercing aftercare kit saline solution
- Sterile saline spray for new ear piercings
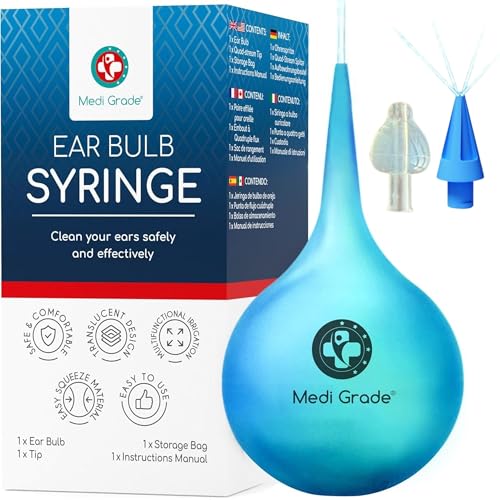
- Ear piercing cleaning syringe 5ml irrigation kit
- Piercing aftercare kit with antiseptic wipe
- Ear piercing cleaning solution 4oz bottle


Before You Start
Before cleaning, wash hands with soap and water and ensure the area around the ear is dry. Use only recommended cleaning solutions and apply with clean tools to prevent introducing bacteria. For fresh piercings, clean twice daily as directed by the piercer. Avoid touching or twisting the jewelry, and never substitute household cleaners or alcohol for saline solutions. If you experience excessive redness, swelling, or discharge, consult a professional.
Step-By-Step: How To Clean The Inside Of Your Ear Piercing Hole
- Prepare your cleaning area and gather supplies from the kit before touching the piercing.
- Wash hands thoroughly to reduce the risk of contamination.
- Rinse the outer ear with a small amount of sterile saline spray to loosen crusts without soaking the piercing.
- Fill the 5ml irrigation syringe with sterile saline solution or use the spray as needed.
- Gently insert the syringe tip or apply the spray at the entrance of the piercing and flush the canal toward the back of the ear tissue.
- Wipe away any excess solution and crusts with a clean tissue or antiseptic wipe from the kit, avoiding friction.
- Allow the piercing to air-dry for a minute or two; avoid blowing air directly into the hole.
- Repeat the process twice daily or as advised by a professional, updating technique if irritation occurs.
- Monitor the area for signs of infection, such as escalating redness, warmth, or pus, and seek care if symptoms worsen.
- Finish with a gentle pat-down of the surrounding area and store all tools in a clean, dry place.
- Keep jewelry in place unless a professional instructions to remove temporarily; do not remove during the cleaning routine unless advised.
- For ongoing care, rotate between different compatible cleaning methods from the kit to avoid irritation and promote healing.
Troubleshooting
| Symptom | Likely Cause | Fix | Prevention |
|---|---|---|---|
| Persistent redness | Irritation or early infection | Reduce cleaning frequency and use a gentler solution | Keep area dry after cleaning; avoid touching |
| Pus or foul odor | Infection | Consult a clinician; stop twisting jewelry | Maintain hygiene and use antiseptic wipes as directed</ |
| Excessive itching | Allergic reaction or sensitivity | Switch to hypoallergenic products | Patch test new products before full use |
| Crust formation | Normal healing by-product | Soften crusts with saline before cleaning | Regular, gentle cleaning |
| Jewelry snagging | Piercing site irritation | Check jewelry size and backing | Avoid sleeping on the pierced side |
Common Mistakes
- Using hydrogen peroxide or alcohol on new piercings
- Over-cleaning or scrubbing the hole vigorously
- Removing or rotating jewelry during healing without professional guidance
- Relying on a single cleaning method for extended periods
Sticking to a gentle, multi-method routine helps prevent irritation and supports proper healing.
Tips For Best Results
- Alternate between saline solution and a mild ear piercing cleaning solution to reduce irritation risk.
- Keep sprays and solutions at room temperature for comfort during application.
- Use a dedicated syringe or applicator to target the inside of the hole precisely.
- Follow professional guidance on duration and frequency during healing, especially for fresh piercings.
- Maintain overall ear hygiene; avoid swimming in potentially contaminated water during healing.
Call A Professional
Consult a piercer or healthcare professional if there is: increasing pain, spreading redness beyond the immediate area, fever, or swelling that worsens after cleaning. Signs that require urgent care include drainage with a strong odor, severe warmth, or the piercing looking tied down by tissue. Professional evaluation is essential if the piercing appears to be rejecting or migrating.
FAQ
How often should I clean inside ear piercing holes?
Typically twice daily for new piercings and once daily for healed ones, or as advised by a professional.
Can I use saline spray directly in the ear canal?
Yes, but apply gently to the entrance of the hole and avoid forcing solution deep into the canal.
Is hydrogen peroxide safe for cleaning ear piercings?
No, hydrogen peroxide can irritate tissue and delay healing; use sterile saline solutions instead.
What should I do if I notice signs of infection?
Stop aggressive cleaning, keep the area clean and dry, and seek professional care promptly.
Can I remove the jewelry during cleaning?
Only if advised by a professional; otherwise, leave jewelry in place to avoid closing the piercing.
Should I use the irrigation syringe every day?
Follow your piercer’s guidance; some people use it daily during healing, others may reduce frequency as healing progresses.
Are antiseptic wipes necessary for cleaning?
Antiseptic wipes are helpful for exterior surfaces, but focus cleaning inside the hole with saline solutions and gentle methods.
Buying Guide
When selecting ear piercing care products, consider factors such as size, packaging, and ease of use. A 4oz bottle provides a steady supply for ongoing care without frequent replacements. Look for sterile saline and non-irritating formulas designed for piercings. A syringe-based irrigation kit can help reach inside the piercing safely, while a dedicated antiseptic wipe adds convenience for exterior cleaning. Noise-free or simple spray applicators minimize contamination risk. Ensure products are clearly labeled as safe for new piercings and compliant with American health standards. If multiple products are recommended, ensure compatibility with your piercing stage and personal sensitivities. Consider a kit that combines cleansing solutions with convenient tools for a streamlined routine.