Properly cleaning wood after sanding is essential to reveal a smooth surface ready for finishing. Removing dust and debris prevents imperfections in stains and coatings and protects the integrity of the final look. This guide lays out practical steps, tools, and tips tailored to American workshops, using common sanding dust cleanup methods and equipment.
From choosing the right dust collection setup to finishing touches like tack cloths, readers will learn a clear, repeatable process to achieve a clean, ready-to-finish wood surface.
Quick Answer
Start with a proven dust collection setup to capture most of the airborne particles, then follow with a meticulous wipe-down using tack cloths or microfiber dust cloths. Finish by a final inspection for stray dust before applying stain, sealer, or topcoat.
What You’ll Need
- HEPA dust extractor for woodworking or a high-quality shop vac for sanding dust 2 gallon
- tack cloth wood finishing dust removal or microfiber dust cloth for woodworking sanding cleanup
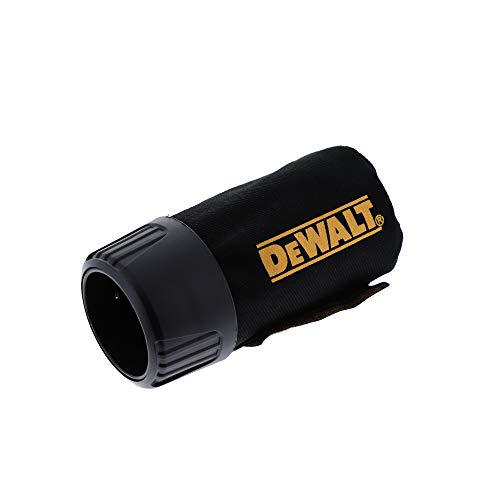
- dust collection bag for palm sander or compatible canister bags


Before You Start
Prepare the work area by removing nearby items and ensuring good ventilation. Wear a dust mask or respirator rated for fine particles and eye protection. If working indoors, seal off the space to prevent dust migration to other rooms. Time estimate: 20–40 minutes for initial cleaning, plus a final inspection before finishing. Critical cautions include never leaving dust on a hot surface and avoiding water on unfinished wood during the cleaning phase, which can raise grain or warp edges.
Step-By-Step: How To Clean Wood After Sanding
- Set up a HEPA dust extractor for woodworking or a suitable shop vac to capture airborne dust as you finish sanding.
- Inspect the workpiece for visible dust clusters, especially in grain pores and concave edges.
- Wipe the surface with a dry microfiber dust cloth to remove loose particles from the top layers.
- Lightly dampen a microfiber cloth or tack cloth and wipe along the grain, applying minimal moisture to avoid raising the wood’s fibers.
- Go over the entire surface again with the dust extractor running, focusing on tight corners, joints, and sanding scratches.
- Use a tack cloth and run along the wood grain in long, even strokes to pick up any remaining fine dust.
- If residue persists, use a second tack cloth or microfiber cloth to ensure a uniform surface.
- Empty and clean the dust bag or bin of the extractor regularly to maintain suction.
- Perform a final visual check under good lighting, looking for any lingering specks or dull patches.
- Allow the surface to dry completely before applying stain, sealer, or topcoat, even if the cloth felt dry to the touch.
- Consider an additional light sanding with very fine grit (e.g., 320–400) after dust removal if the surface still appears rough.
- Proceed with the chosen finish, applying thin, even coats and avoiding dust pickup between coats.
Troubleshooting
| Symptom | Likely Cause | Fix | Prevention |
|---|---|---|---|
| Visible dust particles after cleaning | Incomplete dust extraction or damp cloth leaving residue | Increase suction; re-wipe with a fresh tack cloth | Use a clean, dry cloth and proper technique |
| Grain raise or fuzzy surface | Excess moisture during wipe-down | Use minimal moisture or dry wipe only; allow to dry completely | Test cloth moisture on a scrap area first |
| Residue in pores after finish | Dust trapped in pores during sanding | Re-clean with tack cloth, possibly re-sand with finer grit | Maintain a clean working area and bags |
| Dust in joints or dovetails | Insufficient extraction near complex geometry | Extend extraction coverage and use small brushes to loosen dust | Move equipment closer to problem areas |
Common Mistakes
- Using water or a soaking cloth on unfinished wood, which can raise fibers
- Rushing cleaning before the surface is fully dry
- Neglecting tight corners where dust hides
- Relying on a single pass with a shop vac without maintaining suction
Tips For Best Results
- Always run a HEPA dust extractor for woodworking during and after sanding to capture fine particulates.
- Keep a dedicated dust collection bag for palm sander ready and empty it frequently to avoid clogging.
- Use microfiber dust cloth for woodworking sanding cleanup for effective pickup without scratching.
- Maintain a clean workspace, including a lint-free surface for the final inspection.
- Test dust removal methods on a scrap piece to determine the best moisture level for cloths.
Call A Professional
Contact a professional if the wood shows warping, deep staining, or suspected finishing defects after cleaning. Seek expert help if you notice persistent dust entrapment in pores that resists standard cleaning methods, or if finishing problems persist after multiple cleanings.
FAQ
What is the best method to remove sanding dust from hardwood floors?
Use a high-efficiency vacuum with a soft-bristle attachment, followed by a damp microfiber cloth for any remaining particles.
Can I use water to clean wood after sanding?
Water should be avoided on bare, unfinished wood during initial cleaning to prevent grain raise; use a dry or barely damp cloth if necessary.
How often should I clean during a multi-pass sanding job?
Clean after each major sanding pass to prevent dust from entering the finish later.
Is an extra sanding pass helpful for dust removal?
Lightly sanding with a very fine grit can help remove embedded dust before finishing, but avoid overworking the surface.
What tools help reach tight corners?
A small brush or nozzle attachment on a vacuum helps access joints and intricate profiles.
Should I use tack cloths between coats?
Yes, tack cloths remove dust that could interfere with adhesion between coats.
What finishes benefit from extra dust removal before application?
All clear finishes, stains, and sealers benefit from a dust-free surface for a smoother appearance.
Buying Guide
Choosing the right setup for cleaning wood after sanding depends on several factors. Consider size and space—smaller workshops may rely on a compact shop vac or palm sander dust bags, while larger shops benefit from a full dust extractor system. Evaluate noise level and energy efficiency, especially for extended sessions. Look for effective controls, such as variable suction or easy bag changes, to minimize downtime. Placement matters: position the dust collector near the sanding area to maximize airflow and minimize dust spreading. Compare different dust collection bags and cloths to ensure compatibility with your tools and finishes. A practical setup often blends a reliable dust extractor, dedicated cloths, and well-maintained bags for consistent results.
In practice, users typically pair a HEPA dust extractor for woodworking with high-quality tack cloth wood finishing dust removal materials for final cleanup. This combination supports a clean, finish-ready surface and reduces the risk of defects caused by residual dust. When selecting products, verify compatibility with your sander type and the volume of dust produced in typical sessions. A thoughtful buying choice can simplify maintenance and improve finishing outcomes over time.