Textured walls can add character to a room, but many homeowners eventually want a smooth finish for paint or wallpaper. This guide covers practical, step-by-step methods to safely remove common wall textures in American homes, with tips on tools, safety, and finishing touches.
Quick Answer
For a straightforward approach, use a drywall texture removal scraper tool, a handheld wall texture scraper with replaceable blades, and a dustless drywall sander vacuum attachment to minimize dust. Apply a joint compound skim coat to even out irregularities, then sand lightly for a smooth, paint-ready surface.
What You’ll Need
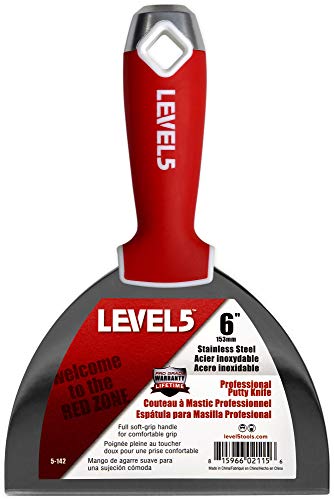
- Drywall texture removal scraper tool stainless steel 6 inch
- Handheld wall texture scraper with replaceable blades
- Dustless drywall sander vacuum attachment 5 inch
- Joint compound skim coat kit for textured walls
- Drywall sanding block 6 inch for removing textures


Before You Start
Assess the texture type on your walls (popcorn, skip-tt, knockdown, orange peel) and plan your approach. Remove outlet covers, mask floors and adjacent surfaces, and seal off the room if possible to control debris. Protect your eyes, ears, and lungs from dust with safety gear. Expect dust and some mess, and plan for multiple sessions if needed. Important cautions: avoid excessive moisture on plaster surfaces, test a small area before wide removal, and turn off power to nearby outlets during work.
Step-By-Step: How To Remove Texture From Walls
- Prepare the workspace by laying down plastic sheeting and removing fixtures that may be damaged by dust or moisture.
- Score the textured surface lightly with a dry scoring tool to help loosen the top layer.
- Use the dry wall texture removal scraper tool stainless steel 6 inch to lift and scrape the texture in small sections, working in a steady, downward motion.
- Switch to the handheld wall texture scraper with replaceable blades for stubborn spots, keeping blades sharp for effective removal.
- For large, loose texture areas, apply a light mist of water or a specialized solvent cautiously, then resume scraping after a few minutes to soften the material.
- Spot-check for high or uneven areas and use the drywall sanding block 6 inch for initial smoothing where necessary.
- Attach the dustless drywall sander vacuum attachment 5 inch to create a cleaner sanding process and minimize airborne dust.
- Apply a thin skim coat with the joint compound skim coat kit for textured walls over any remaining imperfections, letting it dry fully between coats.
- Once the skim coat is dry, sand lightly with the sanding block or sander until the surface is uniformly smooth.
- Wipe down the walls to remove dust, then apply a primer suitable for new drywall surfaces before painting.
- Inspect for nail pops or cracks and repair as needed before final painting or wallpapering.
- Reattach outlets and fixtures, remove masking, and perform a final cleaning of the room.
Troubleshooting
| Symptom | Likely Cause | Fix | Prevention |
|---|---|---|---|
| Dusty air after sanding | Insufficient ventilation | Run a fan or open windows; use vacuum with filtration | Seal off room and use dust containment methods |
| Texture flakes after skim coat | Uneven application or moisture | Apply a thin, even skim coat; allow thorough drying | Keep humidity controlled during drying |
| Blisters under paint later | Moisture trapped behind skim coat | Ensure surface is dry before priming; use appropriate primer | Acclimate walls to room conditions |
| Excess sanding marks | Rough blades or grit | Switch to finer grit and sand gradually | Keep blades sharp and use light passes |
Common Mistakes
- Over-wetting plaster or drywall during texture removal, causing damage or sagging.
- Skipping masking or failing to protect adjacent surfaces, leading to messy cleanup.
- Rushing skim coat application, resulting in visible seams or uneven texture.
- Neglecting ventilation, which increases dust exposure and slows drying times.
Tips For Best Results
- Work in small sections to maintain control and consistency across walls.
- Keep a damp sponge handy to wipe surfaces as you go and prevent dust buildup.
- Test different blades for the scraper tools to find the most efficient option for your texture type.
- Use a vacuum with a HEPA filter when sanding to reduce airborne dust exposure.
- Seal joints and corners with drywall tape before skim coating to minimize cracking.
- Prime after the finish coat fully dries to improve paint adhesion and longevity.
Call A Professional
Consider a professional if wall integrity appears compromised, if there are underlying moisture issues, or if you are unsure about electrical safety when removing textures near outlets and fixtures. Signs to consult a pro include persistent cracking, bulging walls, or uncertain moisture sources that could indicate leaks.
FAQ
What is the easiest method to remove textured walls?
The combination of a scraper tool and a dustless sander, followed by a skim coat and light sanding, offers a balanced approach for most textures.
Can I remove texture from plaster walls?
Yes, but plaster requires careful moisture control and may need patching or reinforcement after removal.
Is there a mess-free way to handle dust?
Using a dustless vacuum attachment and sealing rooms with plastic reduces cleanup significantly.
How long does it typically take?
Most projects take 1–3 days depending on room size, texture type, and drying times between coats.
Do I need to prime after removal?
Yes. Priming after skim coat and sanding ensures even paint adhesion and coverage.
Should I remove all texture in one go?
It depends on the texture and room conditions. For large rooms, doing it in manageable sections helps maintain quality.
When should I call a professional after starting?
If you encounter persistent cracking, moisture intrusion, or structural concerns, stop and consult a licensed professional.
Buying Guide
When selecting tools to remove texture from walls, consider size, weight, and ease of use. For most residential projects in the United States, a 6-inch scraper and a 5-inch dustless sander offer a good balance of control and productivity. Look for durable stainless steel blades to resist wear and rust. Noise and dust control are important; choose attachments with integrated dust collection if possible. Energy-efficient, lightweight tools reduce fatigue during longer jobs. Consider a skim coat kit with easy-to-use patch compounds and flexible knives for a smooth finish. Finally, evaluate compatibility with common American drywall standards and ensure you have appropriate masks, eye protection, and ventilation for safe operation.