Yellowed or cloudy headlights can reduce nighttime visibility and make a vehicle look older. With a few common tools and a little patience, most drivers can restore clarity and improve beam strength without professional help. This guide covers practical steps, safety considerations, and product options commonly found in U.S. retailers.
Choosing the right kit and following best practices can extend the life of headlights and keep them looking clear for months. The focus here is on do-it-yourself methods using widely available headlight restoration products and safe, effective techniques.
Quick Answer
For fast improvement, start with a basic headlight restoration kit and a polishing compound with UV sealant. Use wet sanding only if the lens is deeply oxidized, then apply the UV sealant to protect against future yellowing. A dual-action polisher can speed the process, but hand work with included discs and cloths also yields solid results.
What You’ll Need
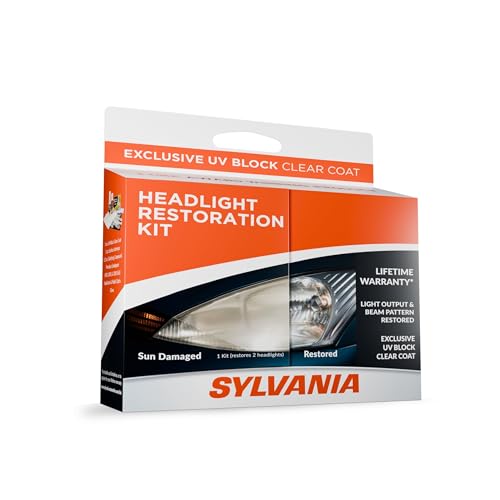
The following tools and materials cover common headlight restoration needs. Each item is designed to address yellowing, oxidation, and surface scratches while adding protective UV sealant.
- Headlight restoration kit with drill attachment
- Wet sanding headlight restoration kit 1000-3000 grit
- Headlight polishing compound kit with UV sealant
- Car headlight restoration kit with sanding discs and microfiber cloths
- Dual-action polisher headlight restoration kit


Before You Start
Prepare the work area indoors or in shade to keep residues from drying too fast. Wash the vehicle’s front end to remove dirt and grime, then dry thoroughly. Protect surrounding paint with masking tape and soft rags. Read all safety instructions on each product label, especially those related to dust, chemical exposure, and eye protection. Typical job time ranges from 45 minutes to 2 hours, depending on lens condition and equipment used. Avoid using high-speed buffers directly on plastic lenses if the kit’s discs are not designed for it.
Step-By-Step: How To Restore Yellow Headlights
- Inspect the headlight lens to determine oxidation depth. If the lens is lightly cloudy, start with the sanding discs and polishing compounds; for heavy yellowing, plan for wet sanding first.
- Protect surrounding surfaces with tape. Cover paint and chrome to prevent accidental scuffing during sanding or buffing.
- Attach the appropriate sanding disc to the drill or dual-action polisher. Begin with the lowest grit (often 1000) for deep oxidation; keep the surface wet during sanding.
- Progressively move to higher grits (2000–3000) to refine the surface. Maintain an even pressure and keep the pad flat to avoid gouging.
- Rinse and wipe the lens frequently to observe progress. When the cloudiness fades and the surface appears clear, switch to a polishing compound kit with UV sealant.
- Apply a polishing compound with a microfiber cloth or pad, following the product’s instructions. Work in small sections with consistent circular motions until a clear film forms.
- Rinse again and dry. Apply the UV sealant or protective coating to seal the surface and slow future oxidation.
- Let the sealant cure as directed by the product and perform a final wipe-down. Inspect both headlights for uniform clarity and even shine.
Troubleshooting
| Symptom | Likely Cause | Fix | Prevention |
|---|---|---|---|
| Residual haze after polishing | Insufficient polishing pass or dirty cloth | Re-polish with clean microfiber and fresh compound | Clean cloths; follow recommended passes |
| Streaks or uneven shine | Inconsistent pressure or incorrect pad choice | Redistribute compound with even pressure and switch to a softer pad | Use a dual-action polisher for uniform results |
| Foggy film reappears | Sealant not applied or cured too quickly | Re-clean, re-seal after proper cure time | Follow cure times precisely |
| Scratches visible after sanding | Grit sequence skipped or over-sanded | Start over with appropriate grit and progress slowly | Follow the recommended grit progression |
Common Mistakes To Avoid
- Skipping the cleaning and masking steps, which leads to debris scratching the lens.
- Using too much pressure during sanding or buffing, causing gouges.
- Not keeping the surface wet enough while sanding, which can create micro-scratches.
- Applying sealant outdoors in direct sun or high heat, which hinders cure time.
- Rushing the process when deep yellowing is present, leading to unsatisfactory results.
Tips For Best Results
- Work in a shaded area and keep a steady, slow pace for uniform results.
- Check your progress frequently: cleaner lenses reflect light better, making issues easier to spot.
- Use the appropriate grit sequence: 1000 for deep oxidation, then 1500–2000, and finish with 3000 for a glassy finish.
- Choose a headlight polishing compound with UV sealant for longer-lasting protection.
- For stubborn lenses, a dual-action polisher can deliver more even coverage than manual rubbing.
Call A Professional
Consider professional help if headlights show severe cracking, deep pitting, or if the restoration fails to achieve clarity after multiple attempts. Stop and seek a pro if there is any laser-like haze or yellowing that might indicate deeper structural damage or a need for lens replacement. In addition, if headlights appear hazy after a DIY attempt despite repeated refinishing, a certified technician can advise on higher-grade solutions or lens replacement options.
FAQ
Is headlight restoration permanent?
Restoration lasts for months to a couple of years depending on exposure to sun and weather. Regular maintenance and a protective sealant extend the life.
Can I use household sandpaper for sanding headlights?
Household sandpaper is not recommended. Use kits designed for automotive headlights with appropriate grit increments to avoid scratching sensitive plastics.
Do I need a drill or polisher to restore headlights?
Both options work. Drill-attached systems speed the process, while manual methods can yield good results with patience.
Will restoration improve all headlights equally?
Results vary with lens material, level of oxidation, and prior damage. Some cases may require replacement lenses.
Can I apply UV sealant after any restoration kit?
Yes, but ensure the lens is fully dry and the sealant cure time is observed for best protection.
How often should I reapply protection?
Reapply sealant every 6–12 months or as recommended by the product guidelines, and rewash headlights regularly.
Buying Guide
Choosing the right kit depends on your lens condition, tools, and desired longevity. Consider these factors:
- Size and surface area: Larger lenses may benefit from kits with multiple sanding discs or a dual-action polisher.
- Noise level and vibration: Some drills and polishers generate more vibration; look for a model with variable speed and cushioned grips.
- Energy efficiency: Electric tools with brushless motors often consume less energy and run cooler during extended sessions.
- Controls and ease of use: Simpler kits with clear instructions reduce risk of error for first-timers.
- Protection options: A kit with UV sealant provides ongoing protection and reduces future yellowing.
- Placement and storage: Compact kits fit easily in a garage or trunk, while larger kits may require more storage space.
When comparing products, assess whether a kit includes the essential components: sanding discs, microfiber cloths, a polishing compound, and a UV sealant. Some kits pair a drill attachment or dual-action polisher with equivalent discs and cloths for a streamlined workflow. If a kit offers add-ons like extended warranty or replacement discs, these can be worth considering for long-term use. Finally, evaluate user reviews for real-world performance and durability under U.S. climate conditions.