Keeping ceilings clean in homes and offices can be tricky, especially when aiming to avoid streaks, water spots, or dusty smudges. With the right tools and techniques, a fresh, uniform finish is achievable without climbing repeatedly or using harsh chemicals. This guide outlines practical, tested methods for safe ceiling cleaning that minimizes marks and residue.
Quick Answer
Use a long-handled microfiber tool to dust and damp-clean ceilings in sections, starting from the farthest corner and working toward the door. Light, even strokes and a microfiber cloth minimize lint and water marks. Avoid soaking the ceiling; use a barely damp cloth and let it dry naturally.
What You’ll Need
- extendable ceiling duster microfiber
- ceiling cleaning wand microfiber washable
- adjustable head ceiling cleaning mop
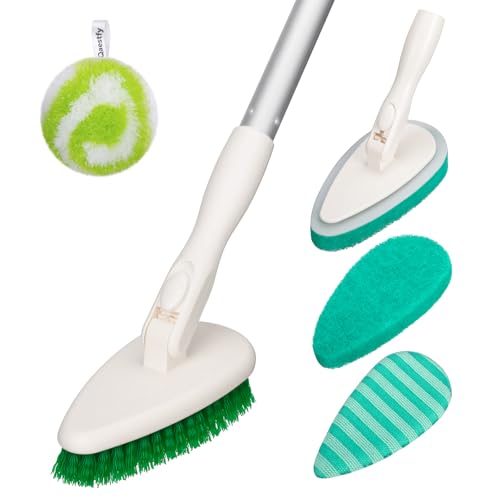
- microfiber ceiling scrub brush with long handle
- ceiling dusting kit with extension pole


Before You Start
Prepare the area by removing fragile decor and laying drop cloths to catch dust and drips. Inspect ceilings for water stains or mold; address leaks or damage before cleaning. Use a gentle touch to prevent gouges or paint lifting. Consider a two-step approach for stubborn spots: a dry-dusting pass, then a barely damp wipe with a microfiber tool. Time estimate: about 30–60 minutes for a standard room.
Safety notes: work from a stable ladder or extendable pole, maintain three points of contact, and avoid overextending the arm. Do not use harsh chemicals that can damage paint or create fumes. If ceilings show signs of mold, consult a professional before proceeding.
Step-By-Step: How To Clean Ceiling Without Leaving Marks
- Attach a microfiber ceiling scrub brush with long handle or extendable ceiling duster microfiber to the pole, choosing a tool with a wide, soft head to cover more area.
- Begin with a dry dust pass in sweeping motions along the corners and edges to remove loose dust and cobwebs.
- Switch to a barely damp microfiber cloth or a tool with a damp sponge; wring well to avoid pooling moisture on the surface.
- Dust the ceiling in sections, moving from the far corner toward the door to prevent re-soiling already cleaned areas.
- For sticky spots or grime, use a light, streak-free wipe in a circular motion. Avoid pressing hard to prevent paint lift or texture damage.
- Rinse the cloth frequently. If using a cleaning wand, rinse the tool head as needed to prevent transferring dirt back onto the ceiling.
- Work in a grid pattern if the ceiling has a textured finish, following the direction of the texture to respect its contours.
- After cleaning each area, allow a few minutes for air drying before moving to adjacent sections to reduce visible lines.
- Check for remaining marks after the ceiling dries; repeat only on targeted spots to minimize over-wetting.
- Finish by giving edges and fixtures a light pass to remove any residual dust that may settle during drying.
- Clean and store tools according to manufacturer instructions to maintain softness and performance.
- Dispose or launder microfiber heads as recommended to preserve absorption and lint-free performance.
Troubleshooting
| Symptom | Likely Cause | Fix | Prevention |
|---|---|---|---|
| Dark streaks after cleaning | Moisture pooling or over-wetting | Wring cloth well; use a drier stroke and lighter dampness | Wrings cloth frequently; use a smaller damp area |
| White lint on ceiling | Low-quality microfiber or dirty pad | Switch to clean, high-quality microfiber; launder pads before reuse | Cross-check fabric type and wash per instructions |
| Paint lifting or discoloration | Excessive pressure or rough cleaning | Light touch; avoid scrubbing; test on inconspicuous area | Use soft heads and controlled pressure |
| Streaks in textured ceilings | Not following texture direction | Clean along the texture lines; use a brush with a compatible nap | Match tool to ceiling texture |
| Persistent spots after drying | Grease or nicotine buildup | Apply a mild cleaner designed for ceilings and repeat | Spot treat with appropriate product before full cleaning |
Common Mistakes
- Using overly wet cloths, which causes runs and water marks.
- Choosing stiff or dirty tools that scratch or smear residue.
- Cleaning from the doorway outward, which can recoat cleaned areas with dust.
- Overlooking corners and edges where dust accumulates first.
- Neglecting to test a small patch before full application on painted ceilings.
Tips For Best Results
- Choose microfiber tools with soft, dense fibers designed for dust capture without lint.
- Work in well-lit rooms to spot marks clearly during the cleaning process.
- Maintain a consistent rhythm and technique to avoid creating new marks.
- Schedule periodic dusting to prevent heavy buildup that causes more noticeable marks when cleaned.
- For high ceilings, a telescoping tool reduces ladder use and improves control.
Call A Professional
Consider hiring a pro if the ceiling shows extensive water damage, mold growth, or peeling paint. Stop and consult a specialist if you notice persistent staining that recurs after cleaning, or if the surface feels soft to the touch, which may indicate structural or moisture problems.
FAQ
Can I use water on textured ceilings without causing marks?
Yes, but use a barely damp cloth and gentle strokes, following the texture direction to minimize marks.
What type of microfiber tool works best on ceilings?
Long-handle microfiber wands and scrubbing brushes designed for ceilings offer the best balance of reach, softness, and dust capture.
How often should ceilings be cleaned to avoid marks?
Light dusting every few weeks and a deeper wipe every 3–6 months helps prevent heavy buildup and marks.
Is it safe to use cleaning sprays on all ceiling paints?
Most water-based paints tolerate mild cleaners, but always test on a hidden area and avoid ammonia-based products near delicate finishes.
What should I do if I see streaks after cleaning?
Wipe again with a barely damp microfiber cloth, drying promptly, and ensure the area isn’t over-wet.
Are there any ceiling-specific cleaners to recommend?
Look for mild, pH-balanced cleaners compatible with painted ceilings and readily rinse with water.
Buying Guide
Choosing the right ceiling cleaning setup involves several factors. Size and reach matter for high ceilings; extendable tools reduce ladder use and fatigue. Noise level is less critical indoors but consider irrigation in quiet spaces. Energy efficiency comes into play with powered gear, though most ceiling cleaning relies on manual wands and microfiber heads. Look for controls that allow adjustable angles to match ceiling contours. Placement considerations include storage space for poles and heads and ease of cleaning in rooms with limited access. Compare kits and individual tools by head size, handle length, material quality, and compatibility with washable microfiber components to ensure long-lasting performance.