Irrigation filters protect lawn and garden systems from debris that can clog emitters and reduce efficiency. Regular cleaning keeps water flowing freely and extends the life of the entire irrigation setup. This guide explains a practical, safe approach suitable for most homeowner systems in the United States.
By following these steps, gardeners and homeowners can maintain peak performance without expensive professional help. The methods below reference common tools found in typical irrigation kits and maintenance sets.
Quick Answer
Turn off the water, relieve pressure, remove the filter housing, clean the screen with a dedicated irrigation filter cleaning kit or brush set, reassemble, and slowly reintroduce water to check for leaks and proper flow.
What You’ll Need
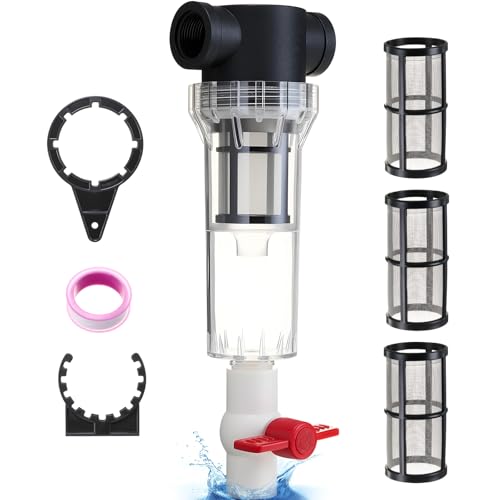
- irrigation filter cleaning brush set
- inline irrigation filter cleaner tool
- irrigation system filter housing wrench
- irrigation filter screen cleaning kit
- garden irrigation filter maintenance tool kit


Before You Start
Before beginning, plan a repair window during lower irrigation demand. Have a bucket or tray ready to catch dirty water, and wear gloves to protect hands from sharp edges. Ensure the main water supply is turned off and that any pressure in the system is released by opening a downstream valve. Never work on live electrical connections or zones that are actively irrigating. Expect a typical cleaning session to take 20–40 minutes, depending on system size and filter type.
Step-By-Step: How To Clean An Irrigation Filter
- Shut off the irrigation water supply and relieve pressure by opening a downstream valve for a few minutes.
- Place a bucket under the filter housing to catch any escaping water and deactivate the filter’s locking ring or screws with the irrigation filter housing wrench.
- Carefully twist the housing cap counterclockwise and remove the cap along with the filter screen.
- Inspect the filter screen for debris, then use the irrigation filter cleaning brush set to brush away sediment, algae, and mineral buildup without bending the mesh.
- If buildup persists, rinse the screen under running water or in a basin of clean water to dislodge stubborn particles. For stubborn deposits, soak briefly in a mild vinegar-water solution if manufacturer guidelines allow.
- Clean the housing interior with a cloth or brush, removing any sediment or mineral deposits. Wipe seals and O-rings clean and inspect for wear or cracks.
- Reassemble the filter, making sure the O-rings and seals are seated properly. Use the irrigation system filter housing wrench to snug the cap without overtightening, then restore the water supply slowly.
- Open a downstream valve to flush the line and observe for leaks around the housing. If leaks appear, reseat the cap or replace any worn seals.
- Run the system for a short period to ensure clean flow and check for abnormal sounds or reduced pressure, which may indicate a reseating issue or larger irrigation problem.
- Schedule regular maintenance based on water quality: monthly during dusty seasons or after heavy rainfall, and at least seasonally for well water users.
- Document the maintenance event in a log to establish a routine and identify any recurring issues that may signal a larger problem.
Troubleshooting
| Symptom | Likely Cause | Fix | Prevention |
|---|---|---|---|
| Low or no water flow after cleaning | Partially seated cap or damaged seal | Recheck seating and replace worn seals | Inspect seals during every cleaning |
| Persistent leaks at housing | Cracked housing or O-ring failure | Replace housing or O-rings | Inspect parts for wear before reinstall |
| Debris remains after cleaning | Screen damaged or valve upstream dirty | Replace screen; clean upstream filtration or screens | Pre-rinse water and protect from heavy debris |
| Frequent clogs after maintenance | Low-quality water or inadequate filtration | Upgrade filters or add pre-filtration | Regularly check and clean to prevent buildup |
Common Mistakes
- Over-tightening the housing cap, which can damage seals
- Using harsh cleaners that degrade O-rings or the screen mesh
- Forgetting to re-seat O-rings after cleaning
- Not flushing the line after reassembly, hiding potential leaks
- Neglecting to log maintenance, leading to irregular schedules
Keeping a consistent routine helps prevent clogging and extends filter life, ensuring reliable irrigation performance.
Tips For Best Results
- Match cleaning frequency to water quality; system filters may need more frequent attention after storms or in sandy soils.
- Use dedicated cleaning brushes rather than improvised tools to protect mesh integrity.
- Inspect seals and O-rings for cracks or wear and replace as needed to prevent leaks.
- Label filter components for easy reassembly and create a simple maintenance log with dates.
Call A Professional
Stop and call a professional if you notice persistent leaks after reassembly, cracked housings, or if the water pressure remains abnormal even after cleaning. Also seek help if you suspect a larger irrigation issue, such as a failing pump, clogged mainline, or widespread water waste. Quick professional attention can prevent costly damage and ensure long-term system efficiency.
FAQ
How often should I clean an irrigation filter?
Frequency depends on water quality and system use; inspect monthly and clean when you notice reduced flow or visible debris in the filter.
Can I use vinegar to clean the filter screen?
Yes, for some filters, a short soak in a mild vinegar solution can help loosen mineral buildup. Always check manufacturer guidelines before using cleaners.
Is it necessary to replace O-rings during every clean?
Not every time, but inspect O-rings for wear and replace if they show cracks, nicks, or deformation.
What should I do if the filter screen is torn?
Replace the screen or entire filter housing, as a torn screen can allow debris to pass through the system.
Do I need to flush the irrigation lines after cleaning?
Yes, flush slowly to clear any residual debris and confirm there are no leaks or blockages.
Will cleaning frequency depend on filter type?
Yes, cartridge and screen filters require different maintenance intervals; consult the product manual for specifics.
Can I perform maintenance while a zone is active?
No. Always shut down the system and relieve pressure before starting maintenance activities.
Buying Guide
When selecting irrigation filter tools, consider size, compatibility, and ease of use. A compact inline cleaning kit is convenient for small systems, while a robust maintenance tool kit suits larger installations. Evaluate noise levels if used in a quiet yard or near living spaces, and prioritize durable, corrosion-resistant materials for outdoor use. Look for a kit that includes a dedicated filter cleaning brush set, an inline cleaner tool, a housing wrench, and a screen cleaning kit to cover common maintenance tasks. Ensure replacement parts, such as O-rings and seals, are readily available. Finally, a well-organized kit with labeled components helps streamline routine upkeep and reduces downtime during maintenance.