Headlights can fade from clear to cloudy due to oxidation, UV exposure, and environmental grime. This practical guide explains a safe method using WD-40 for cleaning and optional restoration steps with commonly available headlight kits and materials. Readers will find step-by-step instructions, risk notes, and pro tips to maximize brightness and longevity.
The method centers on cleaning the lens surface, assessing damage, and, if needed, restoring clarity with a dedicated restoration kit and protective sealant. While WD-40 can help remove surface grime, using purpose-built products can yield longer-lasting results. The guidance below blends basic cleaning with product-specific steps designed for American households.
Quick Answer
Best quick method: Wipe the lens with a microfiber cloth dampened with WD-40 to remove surface film, then move to a headlight restoration kit with sanding pads if the lens is heavily oxidized. Finish with a UV sealant to protect against future fading.
What You’ll Need
- Headlight restoration kit with sanding pads
- Plastic headlight polishing compound set
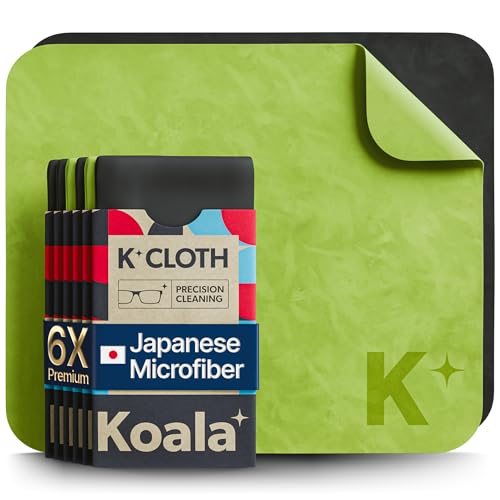
- Microfiber cloth for headlight cleaning
- 3M headlight restoration kit
- UV sealant for headlight after restoration
- WD-40 spray (for initial cleaning of surface grime)


Before You Start
Before beginning, wash the vehicle surface and protect surrounding areas from overspray. Work in a shaded, well-ventilated area to prevent premature drying of products. Ensure the headlights are cool to the touch and not cracked or deeply pitted, which may require replacement rather than restoration. Safety note: Wear eye protection and gloves when using chemical products. Do not apply solvents directly to painted surfaces or electronic components near the headlight housing.
Step-By-Step: How To Clean And Restore Headlights
- Rinse and wipe the headlight lenses with a microfiber cloth to remove loose dirt.
- Spray a small amount of WD-40 onto a clean cloth and gently wipe the lens surface to lift grime and oxidation.
- Dry the lens with a fresh microfiber cloth.
- Prepare the restoration kit by choosing the correct sanding pad grade based on lens clarity. Use light, even pressure to sand the surface in a single direction.
- Apply the sanding compound or polishing paste from the kit in a circular motion, continuing until the lens appears clearer. Wipe away residue frequently.
- Switch to finer pads and compounds as directed by the kit instructions, repeating until the lens is evenly clear.
- Rinse thoroughly and dry the lens. Inspect for remaining cloudiness or scratches; repeat polishing if needed.
- Apply a UV sealant over a clean, dry lens to seal in the restoration and provide UV protection. Allow the sealant to cure per product instructions before exposure to the elements.
Troubleshooting
| Symptom | Likely Cause | Fix | Prevention |
|---|---|---|---|
| Cloudy, milky appearance persists after polishing | Deep oxidation or irreversible pitting | Consider professional refinishing or lens replacement | Regular sealing and storage away from harsh UV |
| Scratch marks after sanding | Excessive pressure or wrong pad | Start with lighter pressure and correct pad grit | Follow kit instructions precisely |
| Sealant peeling after cure | Improper surface prep or contamination | Re-clean surface, re-apply sealant with proper drying time | Ensure surface is dust-free before application |
| Streaky finish or uneven shine | Uneven polishing or insufficient cleaning | Re-polish with finer compounds | Even, consistent motions during application |
Common Mistakes
- Over-sanding or using aggressive pads on a new lens.
- Skipping a thorough cleaning before applying sealant.
- Not following the drying time on sealants, leading to premature dullness.
- Using wax or cleaners not designed for plastic lenses, which can cause cloudiness.
Awareness of these pitfalls helps ensure clearer results and longer-lasting protection.
Tips For Best Results
- Work in a shaded area to prevent rapid drying of compounds.
- Use a consistent, light touch when sanding and polishing to avoid gouges.
- Keep cleaning cloths lint-free to prevent fibers from embedding in the plastic surface.
- Test a small area first to gauge how the lens reacts to sanding and polishing.
- Finish with a high-quality UV sealant to extend the clarity life.
Call A Professional
Consider professional help if the headlights are deeply yellowed, cracked, or heavily pitted, or if multiple attempts fail to restore clarity. Stop and consult a pro when the lens shows structural damage, or when restoration yields inconsistent results across different parts of the lens.
FAQ
Can I use WD-40 on all headlight types?
WD-40 can help remove surface grime, but it is not a long-term solution for whitening or UV protection. Rely on headlight restoration kits and UV sealants for lasting results.
Is a headlight restoration kit necessary for cloudy lenses?
Not always, but the kit provides the abrasives and compounds needed to remove oxidation and restore clarity more reliably than household cleaners alone.
Will the restoration affect headlight brightness?
Yes, restoring clarity typically increases brightness by reducing surface hazing and improving light transmission.
How long does a headlight restoration last?
Durability varies by exposure and maintenance; resealing every 1–2 years is common to maintain clarity.
Can I reuse any products later on?
Most restoration products are designed for single use on a given pair of headlights; follow manufacturer guidance for longevity and storage.
Buying Guide
When choosing headlight restoration products, consider factors that affect performance and value. Size and type of lenses, kit contents, and application steps influence results. Look for clear instructions and compatible pads or compounds that match your lens material and oxidation level.
Key buying factors include:
- Size and compatibility: Ensure the kit covers both standard and compact headlights used on most American cars.
- Noise level and ease of use: Some kits include easier-to-use pads and grip-friendly handles to reduce user fatigue.
- Energy efficiency and surface safety: Look for non-abrasive compounds for lighter oxidation to preserve plastic integrity.
- Controls and drying time: Shorter drying times can speed up the process but may require strict application accuracy.
- Placement and coverage: Kits with flexible pads or multiple pads help ensure even coverage around curves and corners.
- Protection: UV sealants add durable protection against future haze and yellowing.
- Brand and warranty: Reputable brands with clear instructions and warranty provide confidence in results.
For most users, a combination of a dedicated headlight restoration kit, a plastic headlight polishing compound set, microfiber cloths, a reputable restoration kit from 3M, and a UV sealant offers a balanced approach to achieving clear, bright headlights with lasting results. Would you like help tailoring a kit combination to your specific vehicle and lens condition?