Stone veneer adds timeless appeal to homes, but keeping it clean requires choose-and-use care to protect its texture and color. This guide covers practical steps, safe tools, and common pitfalls to maintain a fresh appearance without damaging the surface.
Whether you’re refreshing a fireplace surround or an exterior façade, following best practices helps prevent staining, mortar damage, and streaking while maximizing curb appeal.
Quick Answer
Use mild cleaners and soft brushes, avoid high-pressure washing on delicate surfaces, and test a small area first. For tough grime, combine a stone veneer cleaner concentrate with a soft scrub brush, then rinse gently. A dedicated stone veneer cleaning kit streamlines the process and minimizes guesswork.
What You’ll Need
- Stone veneer cleaning brush long handle
- Soft bristle scrub brush for stone veneer cleaning
- Stone veneer cleaning kit
- Pressure washer nozzle stone veneer safe
- Stone veneer cleaner concentrate

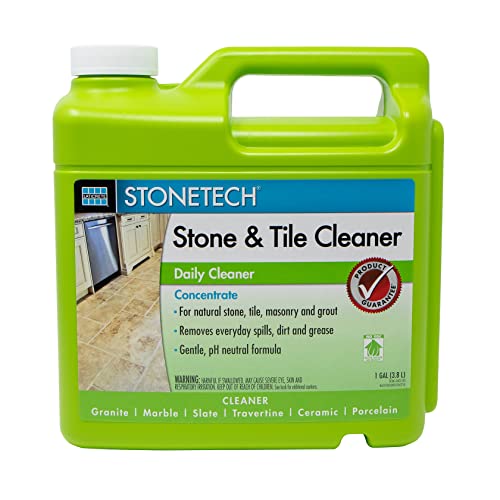

Before You Start
Inspect the area for loose mortar or damaged veneer and repair before cleaning. Work in shaded conditions to avoid rapid drying that can leave streaks. Wear eye protection and gloves, and protect nearby plants with plastic sheeting or a drop cloth. Estimate 30 minutes to several hours depending on area size and grime level. Important: never use bleach on dark stones or acid-based cleaners that can etch natural stone.
Step-By-Step: How To Clean Stone Veneer
- Prepare your workspace and assemble tools from the stone veneer cleaning kit and brushes.
- Test a small, inconspicuous area with a diluted cleaner to confirm colorfastness.
- Mix cleaner concentrate with the recommended water ratio according to the product label.
- Begin at the top and work downward using a soft bristle scrub brush for stone veneer cleaning to avoid pushing grime upward.
- Use the stone veneer cleaning brush long handle for higher or hard-to-reach sections to prevent bending or strain.
- Gently scrub stained spots; for stubborn deposits, let the cleaner sit for a few minutes before brushing again.
- Rinse the area with a pressure washer nozzle stone veneer safe set to a low pressure; keep the spray at a safe distance to avoid mortar damage.
- Work in sections, overlapping each pass to prevent uneven cleaning or streaks.
- Inspect for remaining stains and repeat steps where necessary, then allow to air dry completely.
- If moisture beads or darkens after cleaning, repeat with a lighter cleaner or switch to a gentler rinse approach.
- Dry all surfaces fully and remove protective coverings from plants or landscaping.
Troubleshooting
| Symptom | Likely Cause | Fix | Prevention |
|---|---|---|---|
| Streaks after cleaning | Uneven cleaning or improper rinsing | Re-clean with light mist and thorough rinse | Rinse from top to bottom with consistent overlap |
| Discoloration or dark patches | Residue or overly strong cleaner | Rinse with clean water; repeat with milder solution | Test area first; dilute cleaner as recommended |
| Cracking or chipping veneer | High-pressure spray or aggressive scrubbing | Switch to low-pressure rinse and soft brushes | Avoid forceful scrubbing; inspect mortar |
| Persistent staining | Porous stone absorbing stains | Apply stain-specific cleaner or reapply cleaner per label | Address stains promptly; use barrier products if appropriate |
Common Mistakes
- Using harsh chemical cleaners not designed for stone veneer
- Direct high-pressure washing on delicate surfaces
- Neglecting to test cleaners on small areas first
- Forgetting to protect plants and landscaping from runoff
These missteps can cause surface damage or uneven results. A careful, methodical approach minimizes risks and yields better outcomes.
Tips For Best Results
- Choose a cleaning kit tailored for stone veneer to simplify ratios and application.
- Work when temperatures are cool to avoid rapid drying and water spotting.
- Use long-handled brushes to reach ledges without ladders when possible.
- Rinse thoroughly to prevent cleaner residues that can attract dirt.
- For exterior installations, schedule cleaning during seasons with lower rainfall to ensure complete drying.
Call A Professional
If you notice water intrusion around joints, extensive mortar damage, or persistent staining after multiple attempts, consider hiring a stone veneer specialist. Look for professionals who are experienced with veneer maintenance and can assess structural concerns without compromising surfaces.
FAQ
What cleaner is safe for stone veneer?
Use a cleaner formulated for stone veneer or a soft-bristle approach with mild, neutral cleaners; avoid acidic or bleach-heavy products on most veneers.
Can I use a pressure washer on stone veneer?
Only with a stone-veneer-safe nozzle and low pressure, and never on loose or damaged veneer slices.
How often should stone veneer be cleaned?
Depending on climate and exposure; a light annual cleaning is common, with more frequent cleanings for high-dirt areas.
Is whitening or whitening cleaners safe for stone veneer?
Generally not; avoid whitening agents that may alter color or damage protective sealants.
Should I seal stone veneer after cleaning?
Sealing can help protect porous surfaces; follow manufacturer guidelines and apply after complete drying.
Buying Guide
When choosing products for stone veneer care, consider size and spacing of the veneer, surface porosity, and the level of maintenance desired. Look for a comprehensive kit that includes ergonomic tools, a safe cleaning solution, and a dedicated nozzle. Noise levels and energy use are typically not major factors for cleaning tools, but consider a comfortable, low-effort setup for regular upkeep. Evaluate whether you need extendable brushes for high sections or a compact kit for interior applications. Compare a standalone stone veneer cleaner concentrate versus a ready-to-use cleaning kit to determine what best fits your routine and budget. Placement matters: exterior walls facing weather and interior fireplaces require more frequent care and gentler methods to preserve aesthetics and longevity.