Window sills collect dust, dirt, and fingerprints just like the rest of a home, but they’re easy to refresh with basic tools and a small time investment. This guide covers practical, step-by-step methods using common cleaning tools to restore their look without damaging surfaces.
Quick Answer
For a fast refresh, dust first, then wipe with a damp microfiber cloth. Use a gentle cleaner for grime buildup, followed by a dry microfiber cloth to remove streaks. For stubborn corners, a dedicated window sill brush with soft bristles can lift embedded dirt without scratching paint or wood.
What You’ll Need
- Extendable window sill cleaning brush microfiber sleeve
- Telescoping window frame and sill scrub brush
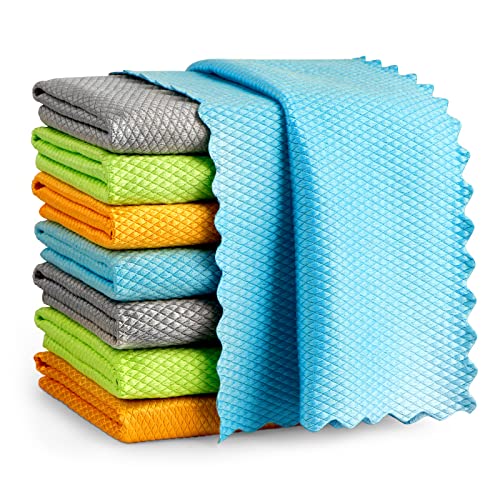
- Microfiber cleaning cloths for window sills pack
- Stiff nylon bristle window sill scrub brush
- Angled corner cleaning brush for window sills


Before You Start
Prepare the area by removing any objects from the window ledge and laying down a drop cloth to catch dust and drips. Ventilate the room if you’re using cleaners other than water. Choose a cleaning solution appropriate for the sill material—painted wood, varnished wood, or vinyl may react differently. Take care around electrical outlets and switches near windows. Time estimate: 15–30 minutes depending on grime level.
Step-By-Step: How To Clean Window Sills Effectively
- Dust the sill with a dry microfiber cloth to remove loose dirt and cobwebs.
- Extend the brush with a microfiber sleeve and gently agitate any surface grime in circular motions.
- Wipe with a damp microfiber cloth, working from the center toward the edges to catch loosened dust.
- For stubborn spots, use the stiff nylon bristle window sill scrub brush to lift embedded grime without scratching the surface.
- Use the angled corner cleaning brush to reach inner corners and edge grooves.
- If needed, apply a small amount of mild cleaner appropriate for the sill material and wipe clean with a fresh cloth.
- Rinse the cloth frequently to prevent re-depositing dirt on the sill.
- Finish with a dry microfiber cloth to remove streaks and moisture.
- Inspect for any remaining spots and repeat steps as needed.
- Clean adjacent window ledges and tracks to maintain overall cleanliness.
- Return items to place and dispose of used cloths in accordance with local guidelines.
- For high-traffic windows, perform a monthly refresh to prevent buildup.
Troubleshooting
| Symptom | Likely Cause | Fix | Prevention |
|---|---|---|---|
| Dull finish or streaks after cleaning | Residue from cleaner or water spots | Wipe with a dry microfiber cloth; avoid abrasive cleaners | Rinse cloth frequently; use distilled water if hard water is an issue |
| Scratches on wood or paint | Rough bristles or harsh cleaner | Switch to soft-bristle brushes and gentle cleaners | Test cleaner on a hidden area first |
| Persistent grime in corners | Grooves and crevices | Use angled corner brush and extendable tools | Perform regular light cleaning to prevent buildup |
| Water running onto the sill after cleaning | Excess cleaner or large damp area | Wipe excess moisture promptly with a dry cloth | Use minimal moisture during cleaning |
Common Mistakes
- Using harsh chemical cleaners on painted or wood sills that cause damage
- Rubbing with abrasive pads that scratch surfaces
- Neglecting corners and edge grooves, allowing grime to accumulate
- Skipping drying after cleaning, which can lead to moisture damage
Tips For Best Results
- Start with dry dusting to reduce wet cleanup time
- Work from the center outward to prevent re-depositing dirt
- Rotate microfiber cloths to maintain cleaning efficiency
- Use extendable tools for hard-to-reach areas without climbing ladders
- Choose tools with soft bristles to protect delicate finishes
Call A Professional
Consider a professional if window sills show extensive water damage, peeling paint, warped wood, or persistent staining that does not respond to cleaning. Seek expert help for structural repairs, repainting, or refinishing projects beyond routine maintenance.
FAQ
What is the best sequence for cleaning window sills?
Dust, scrub with a gentle brush, wipe with a damp cloth, then dry to prevent water spots.
Can I use vinegar on window sills?
Vinegar can be effective on some surfaces but test first on painted or delicate finishes to avoid damage.
Are microfiber cloths better than paper towels?
Yes, microfiber cloths trap dust and reduce streaks more effectively than paper towels.
How often should window sills be cleaned?
Light monthly cleaning keeps dust under control; deeper cleaning every 2–3 months is common depending on exposure.
What if my sill is wooden and painted?
Use mild cleaners and soft brushes; avoid saturating wood and consider re-sealing or repainting if finish is compromised.
Buying Guide
When selecting tools for cleaning window sills, consider size, material compatibility, and ease of use. A set that includes an extendable window sill cleaning brush with a microfiber sleeve, a telescoping window frame scrub brush, microfiber cleaning cloths, a stiff nylon bristle scrub brush, and an angled corner brush covers most common scenarios. Look for soft, non-scratch bristles for painted or varnished finishes and a lightweight handle for comfortable long-term use.
Size and Fit
Choose tools with adjustable lengths to reach low and high sills without bending or climbing. For tight spaces, a narrow, angled corner brush helps access small crevices.
Noise, Energy And Efficiency
Manual cleaning tools are quiet and energy-efficient. Prefer lightweight, durable materials that don’t require power or motors. Quick-dry fabrics and microfiber sleeves speed up cleaning and reduce waste.
Controls And Maintenance
Look for simple tool handles that offer a comfortable grip and secure brush heads. Rinse cloths and brushes after use and air-dry to prevent mold. Replace worn bristles or sleeves to maintain cleaning effectiveness.
Placement And Storage
Store tools in a dedicated cleaning caddy or closet to keep extensions free of dust. Keep microfiber cloths in a breathable bag to prevent dampness and mildew between cleaning sessions.