Caulking projects can leave behind smears, ridges, and hardened residue that dull the finish of a bathroom, kitchen, or exterior seam. This guide outlines practical, step-by-step methods to clean up a messy caulk job, restore smooth lines, and prevent future mistakes. It leverages common tools and a few specialty items to streamline cleanup and improve results.
Quick Answer
Quick fix: If caulk is still pliable, wipe with a damp sponge to remove excess, then use a caulk finishing tool to reshape edges. For dried residue, gently scrape with a caulk removal scraper blade, then use a silicone caulk remover tool and smoothing spatula to rework joints. Clean, prime, and recaulk for best results.
What You’ll Need
- Silicone caulk remover tool
- Caulk finishing tool smoothing spatula
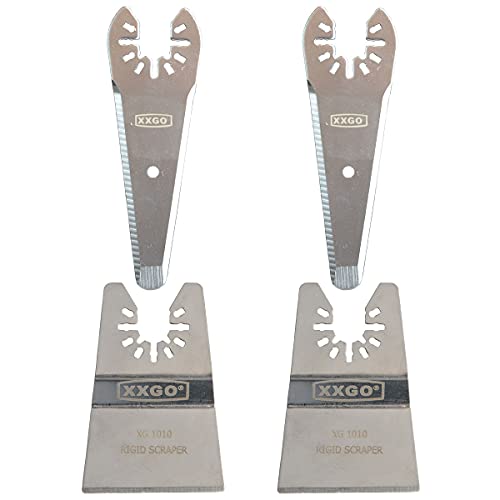
- Caulk removal scraper blade
- Silicone sealant removal tool kit
- Caulk cleanup smoothing tool plastic
- Spray bottle with water and mild soap
- Razor blade or utility knife (careful use)
- Masking tape for clean edges


Before You Start
Assess the surface to determine if it’s silicone or acrylic caulk, as the removal method can differ. Ensure the area is well-ventilated and protected from moisture during the process. Clear the area of toiletries, tiles, or cabinetry that could be damaged or stained. Plan for a time window that allows for cure after resealing, typically 24 hours, depending on the product. Avoid using metal tools that can scratch or gouge surfaces. Wear gloves to protect hands and eye protection if cutting caulk with a sharp blade.
Step-By-Step: How To Clean Up A Messy Caulk Job
- Inspect the caulk: Identify areas with smeared, cracked, or missing sealant and determine whether removal is needed or if smoothing is sufficient.
- Soften dried residue: Lightly mist the surface with a solution of mild soap and warm water to soften the caulk for easier removal. Let it sit for a minute.
- Remove excess material: Use a silicone caulk remover tool to lift smeared edges and pull away loose material without scratching the substrate.
- Scrape stubborn portions: For stubborn dried sections, gently use a caulk removal scraper blade at a shallow angle to lift the residue. Work in small sections.
- Wipe clean: Wipe the joint with a damp plastic smoothing tool to collect residue and shape the area toward a clean line.
- Prepare for recaulk: If resealing, wipe the joint dry and apply painter’s tape along both edges to protect surrounding surfaces.
- Apply fresh caulk: Load a high-quality silicone sealant into a caulking gun and apply a steady bead along the joint. Maintain even pressure to avoid gaps.
- Smooth the bead: Immediately smooth the bead with a caulk finishing tool smoothing spatula or a damp finger for a uniform, rounded edge.
- Remove tape and finish: Retract masking tape after smoothing to reveal crisp edges. Wipe away any excess caulk before it cures.
- Clean tools: Clean all tools with water or the manufacturer’s solvent while the caulk is still soft to prevent build-up.
- Allow curing: Let the caulk cure fully before exposing to moisture or heat, following the product’s recommended cure time.
- Final check: Inspect the seal for gaps or ridges and touch up any spots as needed.
Troubleshooting
| Symptom | Likely Cause | Fix | Prevention |
|---|---|---|---|
| Ridged line after smoothing | Too much pressure or dry caulk | Re-wet surface and smooth lightly | Practice with a scrap area first |
| Gaps in bead | Insufficient caulk or uneven gun pressure | Apply a steady bead and re-smooth | Maintain consistent speed during application |
| Sensitive substrate staining | Solvent contact or excessive scraping | Use milder cleaner and gentler tools | Protect surfaces with tape |
| Caulk won’t stick after cleaning | Residual cleaner or moisture | Dry surface completely before resealing | Premoisten tools and keep area dry |
Common Mistakes
- Overworking the caulk bead, which creates ridges that are hard to smooth
- Using metal tools on delicate surfaces, risking scratches
- Allowing moisture to sit on the joint before curing
- Skipping masking tape, leading to cleanup on adjacent surfaces
Tips For Best Results
- Test a small area first to confirm compatibility with the substrate
- Keep tools damp when smoothing for a cleaner finish
- Choose a quality silicone sealant formulated for bathroom or kitchen use
- Work in sections to prevent the caulk from skinning over before you can shape it
- Store tools in a dedicated container to prevent cross-contamination of cleaners
Call A Professional
Consider a pro if the joint spans large gaps, involves complex angles, or the substrate shows water damage or mold behind the old caulk. Signs to seek professional help include persistent leaks, crumbling substrate, or repeated failure after resealing. If the project requires removal of old sealant from porous stone, metal, or glass, a specialist can ensure proper adhesion and long-lasting results.
FAQ
What’s the fastest way to remove messy caulk?
Use a caulk removal scraper blade to lift dried edges, then a silicone caulk remover tool to ease residue before smoothing.
How long should I wait before applying new caulk?
Wait until the surface is completely dry and free of moisture; follow the adhesive’s cure time recommendations to avoid trapping moisture.
Can I reuse old caulk if it’s still pliable?
It’s usually best to remove old caulk and apply new sealant for a reliable seal and clean finish.
Is silicone caulk remover safe for ceramic tile?
Yes, most silicone caulk remover tools are designed to be safe on ceramic and similar bathroom surfaces when used as directed.
What tools help achieve a smooth edge?
A dedicated caulk finishing tool smoothing spatula or a damp finger typically yields the smoothest edge.
Should I seal to prevent mold after cleaning?
Yes, choose a mold-resistant silicone sealant and ensure proper ventilation during and after installation.
Buying Guide
Choosing the right tools and supplies impacts the final look and durability of the caulk job. Key factors include size and accessibility of the joint, noise level of power tools (for professional setups), energy efficiency of the sealant (in terms of longevity and maintenance), and control features on tools like caulking guns. Consider placement: tight corners may benefit from a small, angled finishing tool, while wide seams need a flexible, smooth bead. Compare silicone caulk remover tools and kit options to secure a complete cleanup and resealing solution that reduces cleanup time and improves edge quality.