Cabinet hardware can accumulate fingerprints, grease, and dust over time, diminishing the look of kitchen and bathroom cabinetry. A careful cleaning routine helps restore shine without damaging delicate finishes. The following steps emphasize safe techniques and product options available in American retailers.
By following a structured approach, homeowners can refresh knobs, pulls, and hinges alike, improving aesthetics and longevity. This guide outlines practical methods, safety notes, and troubleshooting tips to keep hardware looking its best with minimal effort.
Quick Answer
For most finishes, wipe with a mild soap solution, rinse, and dry. For stubborn tarnish or grime, use a dedicated cleaner matched to the hardware finish, then buff with a soft cloth. Always test a small area first and avoid abrasive pads that can scratch delicate surfaces.
What You’ll Need
- stainless steel cabinet hardware cleaner spray 12 oz
- brass cabinet knob cleaning kit with polishing cloth
- oil-rubbed bronze cabinet hardware restoration kit
- antique brass cabinet pull cleaning solution and polish
- brushed nickel cabinet hardware polish microfiber cloth
 |
Weiman Stainless Steel & Granite Cleaner – 12 Ounce | |
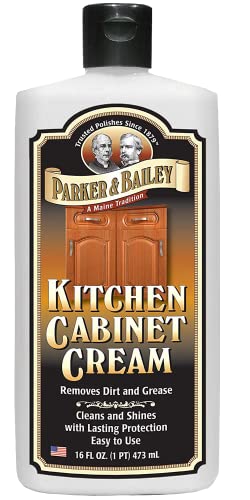 |
Parker and Bailey Kitchen Cabinet Cream-Wood Cleaner-Grease Remover 16 oz (1) |
Before You Start
Clear the area around the cabinets to protect countertops and floors from drips. Remove hardware if possible for thorough cleaning, labeling screws to reattach correctly. Wear gloves if you have sensitive skin and work in a well-ventilated space when using chemical cleaners. Plan a cleaning session that fits your time budget; a typical wipe-down and polish takes 20–60 minutes depending on the number of pieces.
Step-By-Step: How To Clean Cabinet Hardware
- Remove all cabinet hardware from doors and drawers when feasible for full access.
- Dust surfaces with a soft microfiber cloth to remove loose debris.
- Prepare a mild cleaning solution using warm water and a few drops of mild dish soap.
- Gently wipe each piece with the solution using a soft cloth, paying attention to crevices and engraved areas.
- Rinse with a clean cloth dampened with plain water to remove soap residue.
- Pat dry with a dry microfiber cloth, then apply a dedicated cleaner suitable for the finish, following the product instructions.
- Buff to a shine with a clean microfiber cloth or polishing cloth, removing any streaks.
- Reattach hardware, ensuring screws are snug but not overtightened to avoid mounting damage.
- If tarnish persists on metal finishes, use the appropriate kit (brass, brushed nickel, or oil-rubbed bronze) and repeat as needed.
- For antique or heavily lacquered finishes, test any cleaner on a hidden corner before full application.
- Store leftover cleaners in a cool, dry place away from children and pets.
- Record a brief maintenance schedule to perform a light wipe-down every 1–3 months to maintain appearance.
Troubleshooting
| Symptom | Likely Cause | Fix | Prevention |
|---|---|---|---|
| Streaks after cleaning | Residue from cleaner or hard water | Wipe with plain water, then buff with dry cloth | Use distilled water or a wipe-down with a damp microfiber only |
| Scratches on finish | Abrasive scrub or rough cloth | Switch to soft microfiber; avoid scrubbing pads | Select finish-specific cleaners and follow instructions |
| Discoloration on brass | Oxidation or tarnish | Apply a brass-specific cleaner or restoration kit per label | Clean regularly to slow tarnish buildup |
| Finish wears away after polishing | Over-polishing or inappropriate product | Switch to a product designed for the specific finish; reduce frequency | Test on inconspicuous area first |
Common Mistakes To Avoid
- Using abrasive pads or harsh chemicals on delicate finishes
- Cleaning hardware while attached to doors with wet mounting hardware
- Ignoring test patches on unseen areas before full application
- Over-tightening screws during reinstallation, which can crack mounting holes
Tips For Best Results
- Do a quick wipe-down weekly to prevent buildup and reduce heavy scrubbing later.
- Use a dedicated cleaner that matches the hardware finish for optimal results.
- When reassembling, consider applying a small amount of thread locker or lubricant if hardware squeaks.
- Store cloths separately by finish type to avoid cross-contamination between products.
- Keep a small kit with your chosen cleaners for touch-up maintenance between deep cleans.
Call A Professional
Consult a professional if hardware is heavily corroded, peeling, or if finishes are valuable or antique. Stop cleaning and seek help if there is any risk of damaging cabinetry or removing enamel, lacquer, or patina. If you notice expense or risk related to adhesives or mounting hardware, a pro can advise on restoration or replacement options.
FAQ
What cleaner should I use for stainless steel cabinet hardware?
A dedicated stainless steel cabinet hardware cleaner spray is typically effective and safe for most finishes when used as directed.
Can I polish brass cabinet hardware at home?
Yes, with a brass cabinet knob cleaning kit and polishing cloth designed for brass finishes.
Is there a solution for oil-rubbed bronze finishes?
Yes, an oil-rubbed bronze cabinet hardware restoration kit can restore luster without damaging patina.
How often should I clean brushed nickel hardware?
Light maintenance every 1–2 months, with a deeper clean every few months or as needed depending on tarnish development.
Should I remove all hardware before cleaning?
Removing hardware typically allows for a more thorough clean, especially on intricate pieces, but it’s optional for smaller projects.
Buying Guide
When choosing products to clean cabinet hardware, consider finish compatibility, ease of use, and safety. Key buying factors include size, noise level of sprayers or polishes, energy efficiency of small devices (where applicable), control options (spray vs. wipe), and placement compatibility with your cabinet finishes. Compare finishes such as stainless steel, brass, antique brass, oil-rubbed bronze, and brushed nickel to ensure you buy the right cleaners or polishers for each type. Look for multi-finish kits if you maintain varied hardware across your space and check product reviews for real-world performance.