The look and longevity of a tile floor can hinge on how well cracks are addressed. This guide lays out practical steps to clean, repair, and maintain cracked tile joints and surfaces using common epoxy and sealant products. By following a structured approach, homeowners can prevent further damage and restore a clean, uniform floor appearance.
Quick Answer
Begin by assessing crack size and type, then clean the area, remove loose debris with a grout saw and tile repair tool set, and apply a suitable repair product such as an epoxy crack repair kit for tile floor or tile floor crack filler epoxy resin kit. End with a flexible silicone sealant for cracked tile joints to prevent water intrusion.
What You’ll Need
- Epoxy crack repair kit for tile floor
- Tile floor crack filler epoxy resin kit
- Grout saw and tile repair tool set
- Silicone sealant for cracked tile joints
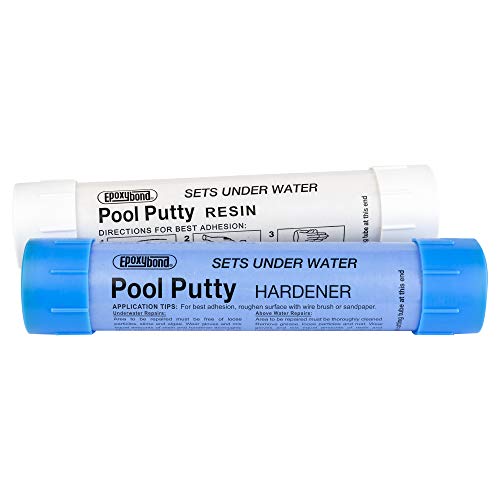
- Tile repair epoxy stick and putty set


Before You Start
Clear the area and protect nearby surfaces with tape and plastic. Remove loose material from cracks using the grout saw and tile repair tool set. Read product instructions carefully and wear gloves and eye protection. Work in a well-ventilated space. Time estimates assume minor cracks; larger repairs may require more preparation and curing time. Avoid using hardware-store fillers that bond poorly to porcelain or glazed tile, which can trap moisture.
Step-By-Step: How To Repair Cracks In Tile Floor
- Inspect all cracks to determine if they are cosmetic or structural. If movement is continuous or cracks widen, consider an inspection by a professional.
- Clean the crack area with a stiff brush to remove dust and debris. A vacuum can help reach tight channels.
- Use the grout saw and tile repair tool set to remove loose material around the crack so the repair product adheres properly.
- Mix or apply the epoxy product as directed: choose an epoxy crack repair kit for tile floor or a tile floor crack filler epoxy resin kit based on crack size and tile type.
- Inject or pack the epoxy into the crack, ensuring full saturation. Use a putty knife to smooth the surface flush with the surrounding tile.
- Allow the epoxy to cure per label instructions. If a deeper repair is needed, apply a second layer once the first has cured.
- For joints, apply a silicone sealant for cracked tile joints to create a flexible, water-resistant edge. Smooth with a damp finger or tool for a clean line.
- Wipe away excess sealant before it sets. Return to use only after the sealant has cured completely.
- Optionally, if gaps reappear, fill with a tile repair epoxy stick and putty set for small, tight repairs that require precise shaping.
- Reassess the floor after 24–48 hours of curing for any remaining gaps or rough spots and address as needed.
Troubleshooting
| Symptom | Likely Cause | Fix | Prevention |
|---|---|---|---|
| Cracks reappear after curing | Movement or poor initial fill | Reopen crack, clean, reapply with proper epoxy and ensure complete fill | Address substrate movement before repairing; use flexible sealants for joints |
| Epoxy not adhering or peeling | Contaminants or moisture in crack | Clean thoroughly, dry completely, reapply | Label-specified prep; avoid repairing in damp conditions |
| Surface is uneven after repair | Uneven filling or over-smoothing | Sand lightly after cure and re-smooth | Apply thin, even layers and feather edges |
| Sealant cracks within days | Insufficient cure or temperature swings | Ensure curing conditions and re-apply with fresh sealant | Sealants cure best in stable temperatures and dry surfaces |
Common Mistakes
- Using non-flexible fillers on joints that experience movement
- Skipping surface cleaning, which reduces adhesion
- Overfilling cracks, causing high spots and new cracks
- Not allowing full cure time before foot traffic or moisture exposure
Tips For Best Results
- Test a small, inconspicuous area first to verify color and adhesion.
- Choose a repair kit that matches your tile material (ceramic, porcelain, or stone) for best results.
- Work in moderate temperature and low humidity to optimize cure times.
- Match sealant color to grout for a cohesive look, or use clear sealant for minimal visual impact.
Call A Professional
Consider professional help if cracks span large areas, show signs of structural movement, or the substrate underneath appears compromised. Stop work if there is continuous cracking across multiple tiles, or if water intrusion is evident behind the tile. A pro can assess substrate stability, select industrial-grade repair materials, and ensure compliance with building codes.
FAQ
Can I repair tile cracks myself, or is replacement better?
Minor, non-structural cracks are often repairable with epoxy and sealant; extensive or shifting cracks may require tile replacement and substrate assessment.
How long does epoxy repair take to cure?
Most epoxy systems cure within 6–24 hours, but full strength may take longer depending on product and conditions.
Will epoxy color match my tile?
Color-matched mixes are available; test a small area to ensure the finish blends with the surrounding tile.
Is silicone sealant necessary after repairing cracks?
Sealing joints helps prevent moisture ingress and future cracking; use a flexible silicone sealant for cracked joints.
What maintenance helps prevent future cracks?
Regular cleaning, prompt repair of minor flaws, and controlling moisture behind tiles help prevent new damage.
Are there risks with using epoxy around grout lines?
Yes, epoxy can bond differently to grout than tile; use products labeled for grout and follow manufacturer directions.
Buying Guide
When choosing products to fix tile floor cracks, consider the following factors to optimize results and value:
- Size and type of cracks: Minor surface cracks respond to crack fillers and putty, while deeper or structural cracks may require epoxy repair kits designed for tile floors.
- Material compatibility: Ensure epoxy and sealants are compatible with ceramic, porcelain, or stone tiles and existing grout.
- Flexibility and cure time: Flexible sealants absorb movement; quicker-curing formulas reduce downtime.
- Color and finish: Select epoxy kits or putty sets that match or blend with tile color to minimize visible repairs.
- Application method: Some kits are stick-and-fill, others require mixing; choose based on user comfort and project scale.
- Water exposure: In wet areas, choose waterproof sealants and moisture-resistant epoxies to prevent future deterioration.
- Safety and ventilation: Follow safety instructions, wear gloves and eye protection, and work in a well-ventilated area.
- Cost versus coverage: Compare kits by coverage area and curing time to balance upfront cost with long-term durability.
With the right tools and steps, maintaining a crack-free tile floor becomes a straightforward DIY task. Do you want a quick, staged plan that fits your schedule, or a broader approach for recurring maintenance? The right choice helps keep floors looking pristine and lasting longer.