Cleaning bathroom floor grout can restore a tile job’s look and prevent moisture-related issues. Grout is porous and can hold dirt, mold, and mildew if not treated regularly. This guide walks through practical methods using common tools and gadgets to fit different budgets and needs.
Whether you prefer manual scrubbing, electric power scrubbing, or steam cleaning, the steps below cover safe and effective techniques for most homes in the United States.
Quick Answer
Best overall approach: use a grout brush and a dedicated cleaning solution, then finish with a steam or power scrubber for tough stains.
For heavy mold: a steam cleaner or enzymatic cleaner helps kill mold at the source.
What You’ll Need
- Stiff nylon grout cleaning brush bathroom floor or a stiff-bristled brush
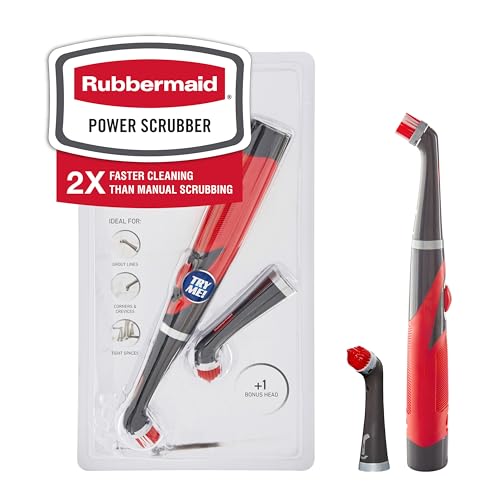
- Electric grout cleaner oscillating brush attachment or a power scrubber grout cleaning kit for bathroom
- Steam cleaner for grout bathroom tiles (optional but effective for deep cleaning)
- Drill powered grout cleaning brush attachment for any drill-based setup
- Appropriate cleaning solutions (grout haze remover, oxygen bleach or a pH-neutral tile cleaner)


Before You Start
Prepare the area by removing mats and toiletries to give full access to the grout lines. Ventilate the bathroom well and wear protective gloves and eye protection if using strong cleaners. Time estimates vary: 15–30 minutes for light touch-ups; 60–90 minutes for large or heavily soiled areas.
Test cleaners on a small, inconspicuous area first to ensure no tile discoloration. Avoid acidic cleaners on natural stone or unsanded grout; use non-acid alternatives for these materials.
Step-By-Step: How To Clean Bathroom Floor Grout
- Prepare the grout and surface: Sweep or vacuum to remove dust. Pre-wet the area to help cleaning agents penetrate.
- Apply cleaner to grout lines: Use a spray bottle or squeeze bottle to apply solution along the grout. Let it sit for 5–10 minutes for stains to loosen.
- Scrub with a grout brush: Use a stiff nylon grout cleaning brush bathroom floor and scrub with firm, short strokes along the grout lines. Rinse periodically to remove debris.
- Use a rotating or oscillating attachment: For stubborn grout, switch to an electric grout cleaner oscillating brush attachment or a drill powered grout cleaning brush attachment to increase agitation.
- Rinse and inspect: Rinse with clean water and check for remaining haze or discoloration. Repeat cleaning if necessary.
- Deep clean with steam (optional): If using a steam cleaner for grout bathroom tiles, pass slowly along grout lines to target hidden mold or deeply ingrained dirt. Allow to dry completely.
- Dry and seal (if applicable): After drying, consider sealing the grout if you have unsanded or cementitious grout that requires sealing to resist future staining.
- Address remaining stains: For persistent stains, apply a targeted grout stain remover or oxygen bleach solution, following label directions, and re-clean.
- Regular maintenance: Repeat every 3–6 months depending on foot traffic and moisture levels.
- Cleanup: Clean brushes and tools after use and store them dry to prevent odor or mildew.
Troubleshooting
| Symptom | Likely Cause | Fix | Prevention |
|---|---|---|---|
| Grout still looks dirty after cleaning | Stubborn staining or sealant buildup | Spot-clean with enzymatic cleaner or oxygen bleach; re-clean with power attachment | Regular maintenance; seal grout if appropriate |
| Mold returns quickly | Moisture lingering or grout porosity | Use steam cleaner for deep mold, apply mold-inhibiting cleaner, ensure area dries | Improve ventilation; dry after showers; consider sealing |
| Tile discoloration after cleaner | Harsh cleaner on sensitive grout or tile | Switch to pH-neutral cleaner; test first on inconspicuous area | Use manufacturer-approved products |
| Scrubbing brush wears out | Overuse or improper pressure | Use shorter, controlled strokes; rotate brushes | Choose appropriate brush for grout type |
Common Mistakes
- Using overly acidic or bleach-heavy cleaners on all grout types.
- Rushing the dwell time, leading to incomplete stain removal.
- Neglecting to rinse thoroughly, leaving residue that attracts more dirt.
- Overly aggressive scrubbing that erodes grout depth or tiles.
Tips For Best Results
- Test a small area before full-scale cleaning to avoid color changes.
- Alternate methods: start with manual scrubbing, then finish with a power scrubber or steam for deep cleaning.
- Choose tools that match grout width and depth; narrow grout lines respond to fine brushes, wider lines to larger brushes.
- Schedule maintenance after heavy moisture exposure (bathrooms with frequent showers) to prevent mold growth.
- Store tools dry between uses to prevent mildew and odors.
Call A Professional
When grout lines are severely damaged, discolored beyond restoration, or show persistent mold despite cleaning, consider a professional tile and grout service. Stop signs include extensive cracking, crumbling grout, or tiles that loosen easily. A pro can regrout or reseal as needed and provide guidance on long-term maintenance.
FAQ
What is the best tool for cleaning bathroom grout?
The best tool depends on grout condition. A stiff nylon grout cleaning brush bathroom floor works for regular cleaning, while an electric grout cleaner oscillating brush attachment or drill powered grout cleaning brush attachment helps when stains are tougher.
How often should grout be cleaned?
Light maintenance can occur every 1–3 months; deep cleaning is recommended every 3–6 months depending on moisture and wear.
Can steam cleaning damage grout?
When used correctly, steam cleans grout effectively; avoid prolonged exposure on delicate tiles and ensure grout is heat-tolerant.
Is sealing grout necessary?
Sealing protects cement-based grout from staining and moisture. Porous, unsanded, or cementitious grout typically benefits from sealing after cleaning and curing.
What should I do first if I see mold?
Begin with a bleach-free cleaner or enzymatic solution, then progress to steam cleaning if needed. Ensure adequate ventilation and drying afterward.
What is a safe alternative to harsh cleaners?
Enzymatic cleaners and oxygen bleach options provide effective cleaning with lower risk of tile damage when used as directed.
Buying Guide
Choosing the right tools for bathroom grout cleaning involves considering size, noise, energy use, controls, and placement ideas. A compact handheld scrubber is convenient for smaller bathrooms, while a heavier-duty power scrubber accelerates large jobs. For homes with sensitive surfaces, a steam cleaner offers deep cleaning without harsh chemicals, though it can be bulkier and noisier. Consider a versatile kit that includes multiple attachments to handle different grout widths and tile types. If mold is a recurring issue, ensure the kit includes strong mold-killing options or compatible enzymatic cleaners. Review storage space for bulky devices and look for devices with variable speeds and easy-to-clean brushes. For placement, choose a tool that reaches corners, edges, and under fixtures without a heavy bend—ergonomics matter for longer cleaning sessions. Always follow manufacturer instructions for compatibility with your tile and grout type.