Permanent markers can leave stubborn traces on plastic surfaces, from plastics in kitchens to school supplies and car parts. This guide provides practical, at-a-glance steps to restore plastic items using common household products and purpose-made cleaners. The methods prioritize safety, effectiveness, and preserving the plastic’s finish.
Quick Answer
Easy first step: wipe the area gently with a microfiber cloth dampened with isopropyl alcohol 70% or a dedicated permanent marker remover for plastic. If marks persist, try a magic eraser lightly, then finish with a plastic-safe cleaner. For delicate surfaces, test in an inconspicuous spot first.
What You’ll Need
The following tools and products cover most plastic surfaces and marker types. Gather these before starting to keep the process smooth:
- Isopropyl alcohol plastic cleaner spray 70%
- Permanent marker remover for plastic spray
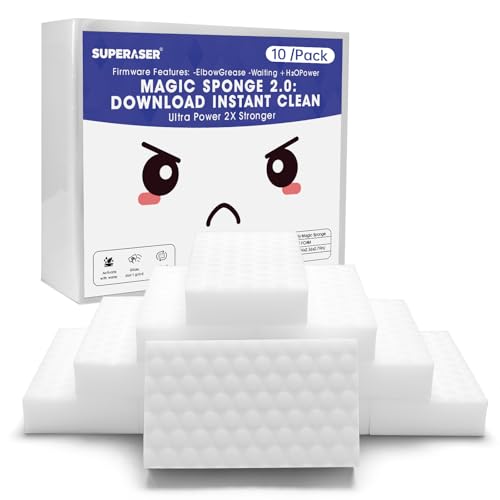
- Magic eraser for plastic stains
- Microfiber cleaning cloth for marker removal on plastic
- Plastic surface marker stain remover wipes


Before You Start
Identify the plastic type (hard, glossy surfaces vs. matte finishes) and check the product label for compatibility. Work in a well-ventilated area and wear gloves if you have sensitive skin. Place a soft covering beneath the item to catch drips. Plan for several short sessions rather than one long attempt to avoid surface wear. Important cautions: avoid abrasive scrubs on glossy or delicate plastics, and never mix solvents with ammonia-based cleaners, which can produce fumes or damage finishes.
Step-By-Step: How To Remove Permanent Marker From Plastic
- Prepare the surface by wiping with a dry microfiber cloth to remove loose dust or debris.
- Apply a small amount of isopropyl alcohol 70% directly to a clean microfiber cloth or spray onto the marker stains.
- Gently rub the stained area in a circular motion, using light pressure to avoid scratching the plastic.
- If the marker begins to lift, repeat the motion until the stain fades. For stubborn marks, switch to a plastic-safe remover spray and follow the product directions.
- For persistent stains, dampen a magic eraser and test on a hidden area. Lightly rub the area until the marker is removed, pausing to wipe away residue with a microfiber cloth.
- Wipe the surface with a clean cloth dampened with plain water to remove any residue from solvents or erasers.
- Dry with a soft towel and inspect for any remaining trace. If needed, repeat the process with caution on a small section.
- Finish with a plastic surface cleaner to restore gloss and remove any sticky residues from wipes or sprays.
- For large or multi-surface projects, clean one area at a time to maintain uniform results and prevent transfer to uncontaminated parts.
- Store products in their original containers and away from heat or direct sunlight to preserve effectiveness.
- Consider applying a light protective spray designed for plastics after cleaning to help resist future staining.
- Dispose of used wipes and cloths according to local guidelines and keep cleaning solutions out of reach of children and pets.
Troubleshooting
| Symptom | Likely Cause | Fix | Prevention |
|---|---|---|---|
| Stain remains after alcohol | Surface finish resistant or color-set | Try a dedicated marker remover spray; test a small area first | Test cleaners on hidden spots before broad use |
| Surface becomes dull or hazy | Overzealous scrubbing | Use gentler motions and reduce pressure; wipe with clean water | Limit contact time of solvents; use milder cleaners |
| Marker reappears after drying | Residual solvent left behind | Flush area with water and re-wipe with a clean cloth | Rinse thoroughly after every step |
| Scratches or scuffs appear | Excessive rubbing or abrasive product | Stop using abrasive tools; switch to non-scratch-safe methods | Use protective finishing after cleaning |
Common Mistakes
- Using strong solvents on soft or matte plastics—these can dull finishes.
- Scrubbing aggressively, which risks scratching or dulling the surface.
- Skipping a test spot on a discreet area before full cleaning.
- Mixing cleaners hastily; some combinations create fumes or damage the surface.
Being deliberate and patient with each step minimizes risk and improves final results.
Tips For Best Results
- Always start with the mildest method (water and microfiber) and progress to alcohol, then to special removers as needed.
- Use a fresh cloth for each stage to avoid re-depositing ink.
- For large surfaces, divide the area into sections to maintain control and consistency.
- Keep a dedicated plastic-safe cleaner on hand for future touch-ups to maintain the finish.
- If the marker marks edges or seams, work along the grain of the plastic and avoid seepage into crevices.
Call A Professional
Seek professional help if the marker covers a delicate or high-value surface, such as automotive interiors, electronics casings, or transparent plastics where clarity is essential. Stop immediately if the surface shows discoloration, warping, or coating damage. A pro can assess whether refinishing or replacement is necessary and suggest compatible products for restoration.
FAQ
Can I use household bleach to remove marker from plastic?
Bleach is not recommended for most plastics as it can discolor or degrade finishes. Use milder cleaners first and consult product guidelines.
Will alcohol damage clear acrylic or polycarbonate surfaces?
Alcohol can cause micro-scratching or hazing on certain plastics. Test first on a hidden spot and follow with a gentle cleaning method if unsure.
Is a magic eraser safe on all plastics?
Magic erasers are abrasive and can dull or scratch some surfaces. Test on a hidden area and use light pressure only.
How should I clean marker residue from curved plastic surfaces?
Wipe gradually with small circular motions, using a soft cloth and minimal liquid to avoid pooling in crevices.
Can I reuse cleaning cloths for future marker removal?
Yes, but wash them separately from other fabrics to prevent ink transfer. Use clean, dry cloths for best results.
What’s the best long-term protection after cleaning?
Apply a plastic-safe protective spray or conditioner to help reduce future staining and make future cleanups easier.
Buying Guide
When choosing products to remove permanent marker from plastic, consider several factors to ensure compatibility and effectiveness:
- Surface compatibility: Check whether the cleaner is labeled for the specific plastic type (polypropylene, polystyrene, acrylic, etc.).
- Cleaning power: For stubborn stains, select products with proven stain-removing chemistry designed for plastics.
- Safety profile: Look for low-odor, non-abrasive formulas, and clear safety instructions. Personal protective equipment may be advised.
- Ease of use: Sprays and wipes offer quick cleanup, while erasers require gentle pressure and can wear the surface if overused.
- Residue and finish preservation: Choose products that leave minimal residue and won’t haze or dull glossy surfaces.
- Application area: For large surfaces, sprays are convenient; wipes provide controlled application on smaller items.
- Maintenance: Aftercare products like plastic cleaners or conditioners can help maintain appearance and resist future staining.
Thinking through these factors helps ensure you pick the right tools for home projects, school items, or office plastics. If in doubt, start with the mildest option and test in an inconspicuous area before proceeding widely.