Wood rot undermines structural integrity and shortens the life of decks, beams, and siding. This guide outlines practical, step-by-step methods to identify, treat, and prevent wood rot using commonly available products in the American market. It blends tested techniques with product suggestions to help homeowners restore rotted wood effectively.
Quick Answer
Identify affected areas with a moisture meter, treat with a rot repair epoxy kit or wood hardener consolidant, fill with epoxy wood filler for rotted exterior wood, and prevent future moisture intrusion with proper sealing and ventilation. For extensive rot, replace the damaged joists or beams and re-seal the area.
What You’ll Need
The following tools and materials cover common repair scenarios. They align with typical rotted-wood projects around homes and outdoor structures.
- Wood rot treatment epoxy kit for rotted wood repair
- Wood hardener consolidant for rotted wood
- Epoxy wood filler for rotted exterior wood
- Moisture meter for wood rot detection and moisture content
- Rot repair epoxy kit for exterior wooden beams and decking
- Putty knife or trowel
- Protective gloves and eye protection
- Sandpaper or sanding block
- Masking tape and drop cloths


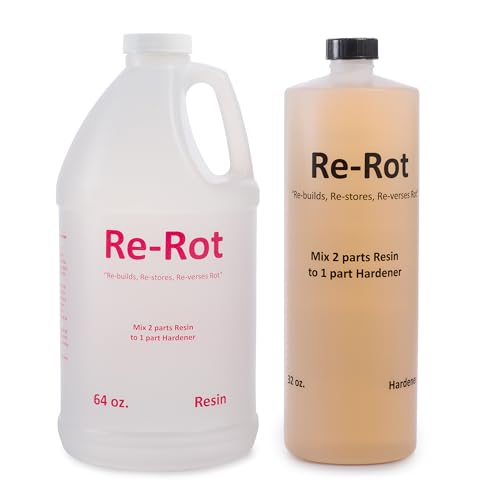
Before You Start
Before beginning, confirm the extent of the rot with a moisture meter and visually inspect for soft, crumbly, or hollow sections. Work in a well-ventilated area and wear safety gear. Plan for moisture control after repair—labels on sealants often emphasize proper curing times. Allow time for the epoxy to set fully according to product instructions, typically 24–72 hours depending on humidity and temperature. Consider weather windows, since rain can compromise cure and adhesion.
Step-By-Step: How To Get Rid Of Wood Rot
- Use a moisture meter to measure moisture content in the affected area. Mark any spots above 15% moisture as high-risk for ongoing rot.
- Remove all visibly rotted wood with a sharp chisel or saw. Create a sound, solid base by cutting back to healthy wood.
- Apply wood hardener consolidant to the exposed edges to stabilize the remaining wood and enhance adhesion for subsequent fills.
- Let the consolidant cure per manufacturer instructions. Clean the surface of dust and loose fibers to ensure proper bonding.
- Spread a thin layer of rot repair epoxy kit or epoxy wood filler over the prepared area. Build in stages if filling large voids to avoid excessive shrinkage.
- Allow the epoxy to cure fully. Lightly sand the repaired area to create a smooth transition with surrounding wood.
- Seal the repaired surface with a compatible exterior wood sealant or paint. Recheck moisture levels after sealant curing to confirm the area remains dry.
- If rot extends beyond a simple repair, replace the damaged beam or board and treat adjacent wood to prevent recurrence.
- Inspect surrounding structures after installation for signs of moisture intrusion: leaks, poor drainage, or vegetation contact.
- Document the repair and schedule periodic inspections, especially in damp climates or shaded areas prone to moisture buildup.
- Maintain proper drainage, trim vegetation near wood, and reapply protective coatings as part of routine maintenance to prevent future rot.
Troubleshooting
| Symptom | Likely Cause | Fix | Prevention |
|---|---|---|---|
| Soft, crumbly wood after repair | Insufficient removal of rotted material or under-curing epoxy | Reassess area, remove more wood, reapply epoxy with proper curing time | Ventilate during curing, follow product instructions precisely |
| Epoxy not adhering to surface | Dust, oil, or moisture on surface | Clean and dry surface; lightly sand to expose fresh fibers | Ensure dry conditions before application |
| Moisture meter stays high after repair | Ongoing moisture intrusion (leaks, poor drainage) | Address moisture source; reroute water and inspect drainage | Regular maintenance and protective coatings |
| Cracking after curing | Excess epoxy build or rapid temperature change | Sand flush, reapply in thinner layers | Apply at recommended thickness and cure in stable conditions |
Common Mistakes
- Underestimating rot extent—only treating surface rot leads to recurrence.
- Skipping surface preparation or moisture control before bonding agents.
- Using a filler that isn’t rated for exterior or structural wood.
- Failing to seal or maintain drainage around repaired areas.
- Neglecting safety gear or proper ventilation during chemical applications.
Tips For Best Results
- Choose the right epoxy kit for the job: small patches can use standard epoxy filler, while larger rotted areas benefit from dedicated rot repair epoxy kits.
- Test moisture content on multiple spots to determine true moisture exposure rather than relying on a single reading.
- Work in dry, moderate weather; high humidity can extend cure times and affect adhesion.
- Consolidants provide stabilization, but for long-term protection, follow with a high-quality exterior sealant or paint.
- Keep wood away from soil contact and ensure proper clearance to reduce moisture uptake.
Call A Professional
Consider professional help if rot spans more than a few inches, beams are split or sagging, or the structure bears load. Seek immediate assistance if you observe significant structural movement, creaking under load, or if repair involves critical load-bearing components such as main beams or joists. Signs that warrant a pro include widespread soft wood, extensive hollow areas, or drainage and moisture-control challenges that are beyond DIY capabilities.
FAQ
What is the best product for exterior rotted wood?
Exterior rotted wood is best treated with a rot repair epoxy kit or a wood hardener consolidant followed by epoxy wood filler for rotted exterior wood to rebuild texture and strength.
Can I fix wood rot without replacing any wood?
Yes, for minor rot you may stabilize and fill, but extensive rot typically requires replacement of affected sections to restore safety and durability.
How long does epoxy take to cure in outdoor conditions?
Cure time varies by product and weather; expect 24–72 hours under favorable conditions and longer in cool or humid environments.
Is a moisture meter necessary for wood rot repair?
Yes. A moisture meter helps identify high moisture areas and informs the repair approach to prevent reoccurrence.
Should I seal repaired wood immediately?
Yes. Apply a compatible exterior sealant or paint after curing to protect against moisture and UV exposure.
When should I replace a beam instead of repairing?
If rot compromises more than a small portion of a structural member or there is sagging, replacement is recommended for safety and longevity.
Buying Guide
When selecting products to combat wood rot, consider size, moisture considerations, and project scope. For small patches on trim, a standard epoxy wood filler might suffice, while larger exterior repairs benefit from a dedicated rot repair epoxy kit and a wood hardener consolidant. A moisture meter is essential for accurate assessment and ongoing maintenance, especially in damp climates. Look for user-friendly curing times, UV-compatible sealants, and compatible finishes for exterior wood. Consider placement: areas near gutters, shingles, and shaded decks may require more robust moisture control and frequent inspections. Does the project involve beams, decking, or siding? Each category benefits from a slightly different kit combination and sealing approach to ensure durability and weather resistance.