Window air conditioners are a reliable way to cool a room without the complexity of central HVAC. Keeping the filter clean is essential for efficiency, air quality, and unit longevity. This guide walks through a practical, step-by-step method to clean a window unit filter using common tools and readily available supplies.
Regular maintenance helps prevent reduced airflow, higher energy use, and musty odors. Following these steps will help you restore proper filtration and improve cooling performance without professional help.
Quick Answer
Clean the filter every 1–3 months during peak use, remove loose dust with a brush, wash with mild soap, and fully dry before reinstalling. Use a handheld vacuum or a microfiber cloth for stubborn debris, and inspect the cover and seals for wear.
What You’ll Need
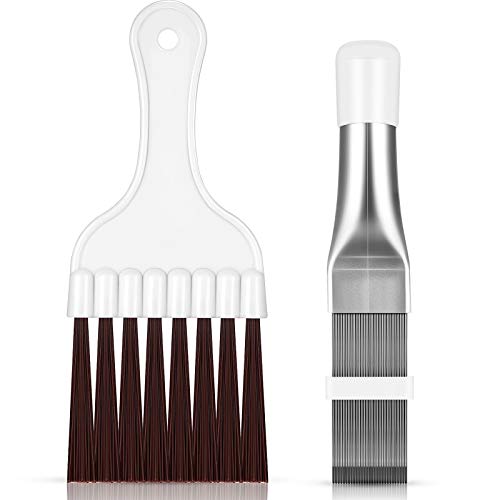
- Window air conditioner filter cleaning brush
- Handheld vacuum for window AC filter
- Microfiber cloth for window air conditioner filter
- Extension wand vacuum attachment for window AC filter
- Screwdriver set for removing window AC cover

Before You Start
Turn off and unplug the unit before any maintenance. If the unit is mounted high or difficult to reach, use a stable ladder and have a second person assist with lifting the cover. Clear the area around the unit to prevent dust and debris from spreading.
Safety cautions include avoiding water contact with exposed electrical components, ensuring the unit is completely dry before reassembly, and never forcing a part that seems stuck. Allow the filter to air-dry completely to prevent mold growth.
Estimated prep time: 10–20 minutes. Cleaning duration: 10–30 minutes depending on debris and accessibility.
Step-By-Step: How To Clean Window Unit Filter
- Power down and access the filter: Unplug the unit and remove the front panel or grill using a screwdriver if needed. Keep track of screws and small parts.
- Remove and inspect the filter: Gently slide the filter out from its slot. Look for warped frames or tears; replace if damaged.
- Shake off loose dust: Take the filter outside or over a trash can and use a long-handle brush or the window air conditioner filter cleaning brush to remove loose particles.
- Vacuum stubborn debris: Use a handheld vacuum for window AC filter with a soft brush attachment or the extension wand vacuum attachment for window AC filter to remove embedded dust. Work from the top down to avoid re-soiling.
- Wash the filter: If the filter is washable, rinse it under lukewarm running water from the clean side to the dirty side. Use a small amount of mild dish soap if needed and avoid harsh cleaners that could damage the filter media.
- Rinse and dry thoroughly: Rinse completely to remove soap residue. Squeeze out excess water gently and let dry completely on a clean rack or towel. Do not reinstall while damp to prevent mold.
- Inspect and reassemble: Ensure the filter is fully dry, then reinsert it the same way it was removed. Replace the front panel or grill and secure screws if used.
- Test the unit: Plug in, power on, and observe airflow. If airflow improves and noise level remains normal, the filter is performing well. If not, re-check seal gaps around the panel.
- Schedule future cleanings: Mark your calendar for a routine maintenance interval based on usage and environment, typically every 1–3 months.
Troubleshooting
| Symptom | Likely Cause | Fix | Prevention |
|---|---|---|---|
| Weak airflow after cleaning | Filter not fully dry or installed incorrectly | Re-dry the filter completely and reseat | Drying time sufficient; confirm seating |
| Musty odor when running | Mold or moisture buildup on filter | Deep clean or replace filter; clean housing | Ensure complete drying; clean regularly |
| Visible damage to filter frame | Filter wear or tearing | Replace filter | Inspect during each cleaning |
| Water leakage or condensation around unit | Excess moisture in filter or improper seal | Recheck seals and ensure filter sits correctly | Proper installation and drying |
Common Mistakes
- Using hot water or harsh cleaners that degrade filter media
- Cleaning the unit while it’s still plugged in
- Forcing the filter into place or bending the frame
- Not allowing the filter to dry fully before reassembly
Tips For Best Results
- Establish a regular cleaning cadence aligned with climate and usage to maintain efficient airflow.
- Consider using a microfiber cloth for quick wipe-downs between full cleanings to extend the filter’s life.
- Keep a small maintenance kit handy: a screwdriver, microfiber cloth, and a soft brush to simplify routine service.
- If the filter is not removable or is difficult to access, consult the unit’s manual for model-specific instructions.
Call A Professional
If you notice persistent odor, persistent condensate issues, unusual noises, or water intrusion after cleaning, stop using the unit and contact a licensed technician. Unresolved electrical or refrigerant issues require professional evaluation.
FAQ
Can I clean a non-washable filter?
Non-washable filters should be replaced according to the manufacturer’s guidelines; do not attempt to wash or soak them.
How often should I clean window unit filters?
Typically every 1–3 months during peak use; adjust frequency for dust levels and room activity.
What if the filter becomes permanently discolored?
Discoloration can indicate buildup or damage; replace the filter for optimal performance.
Is it safe to use sprays or cleaners on the filter?
Avoid harsh chemicals; use mild soap if washable, and ensure complete rinsing and drying before reinstalling.
Buying Guide
When choosing replacement filters or maintenance tools for a window unit, consider size compatibility, filter type, and ease of access. The right tools can simplify routine care and extend unit life.
Key buying factors include:
- Filter size and compatibility: Check the model number and measure the existing filter to ensure a proper fit.
- Filter type: Some units use pleated or foam filters; select a compatible type and replacement schedule.
- Noise and energy considerations: Well-maintained filters contribute to quieter operation and efficient cooling.
- Control and maintenance accessibility: Tools like a small screwdriver or cleaning brush can ease disassembly and cleaning.
- Placement and ease of access: Ensure the unit is accessible for regular filter checks, especially in tight windows or high placements.
Before purchasing, compare factors such as setup ease, expected filter life, and replacement cost. If multiple models meet your needs, prioritize ones with straightforward cleaning steps and common hardware compatibility.