Mildew in the shower is a common household challenge, especially in humid climates or shared bathroom spaces. This guide outlines practical steps, safe products, and proven tools to effectively remove mildew, refresh grout lines, and prevent reoccurrence.
By following a clear, step-by-step approach and choosing the right tools, homeowners can restore a clean, healthy shower environment without harsh, risky procedures.
Quick Answer
Best initial move: spray mildew remover for shower tiles on affected areas, let it dwell per product instructions, then scrub with a dedicated grout cleaning brush with abrasive pad. For stubborn spots, switch to a steam cleaner for bathroom mildew removal or apply a mold and mildew stain remover for shower walls as needed.
What You’ll Need
The following tools and products are commonly effective for cleaning mildew in a shower. Most items align with common household projects and fit typical bathroom setups.
- Mildew remover spray for shower tiles – a ready-to-use solution for surface mildew on tile and grout
- Shower grout cleaning brush with abrasive pad – helps agitate and lift grime from grout lines
- Bathroom mildew remover gel for grout lines – provides a gel formula that clings to vertical surfaces
- Steam cleaner for bathroom mildew removal – uses high-temperature steam to kill mold and loosen debris
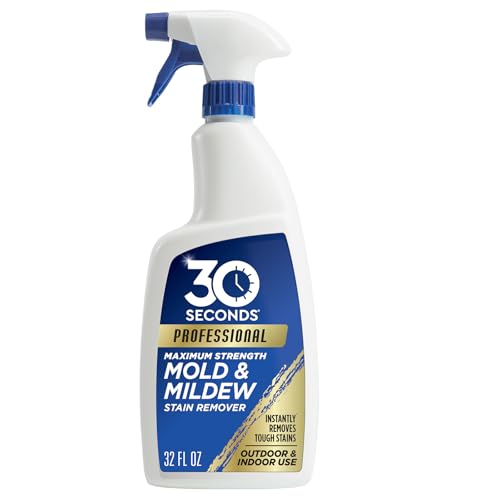
- Mold and mildew stain remover for shower walls – targets tougher staining on drywall or shower panels

Before You Start
Assess the shower area for mold growth, paying attention to corners, grout lines, and under shelves. Ventilate the bathroom well and protect surrounding surfaces with plastic sheeting or towels. Time estimates vary by square footage and severity but plan for 1–3 hours for a thorough refresh, including dwell times and multiple passes. Safety note: use gloves, eye protection, and a mask if mold particles are extensive. Avoid mixing cleaners unless the product instructions explicitly allow it.
Step-By-Step: How To Clean Mildew In Shower
- Ventilate the bathroom and remove loose items from the shower area to create an open work zone.
- Apply mildew remover spray for shower tiles on affected grout lines and tile surfaces. Let it dwell per label instructions to soften mildew.
- Use the shower grout cleaning brush with abrasive pad to scrub grout lines with circular motions, focusing on seams where mildew appears most.
- Rinse the area with warm water to remove loosened debris, then reapply the remover spray if spots remain. Allow another dwell time for stubborn patches.
- For persistent staining, apply bathroom mildew remover gel for grout lines directly onto the grout and let it sit. Scrub again and rinse.
- Optionally, run a steam cleaner for bathroom mildew removal over tile walls and grout to kill residual spores and remove residual residue without harsh chemicals.
- Dry surfaces completely with a towel or squeegee to discourage future mildew growth. Reassess high-humidity zones and consider improving ventilation if mildew recurs quickly.
- If wall surfaces show persistent staining or you notice recurring mildew, apply mold and mildew stain remover for shower walls as directed, then rinse and dry thoroughly.
- Seal grout lines if appropriate for your tile type, using a grout sealer recommended by the product manufacturer or tile installer.
- Schedule routine maintenance: a quick weekly wipe-down and monthly deep clean can prevent future mildew buildup.
- Document any recurring problem areas and adjust cleaning frequency or methods to fit the bathroom’s humidity patterns and usage.
Troubleshooting
| Symptom | Likely Cause | Fix | Prevention |
|---|---|---|---|
| Dull grout after cleaning | Residual soap scum or mineral deposits | Reclean with grout brush and an appropriate gel remover; rinse thoroughly | Use a daily spray or wipe-down after showers |
| Stubborn Mildew in corners | Porous grout or porous tile edges | Apply extended dwell time of remover gel and scrub with heavy-duty pad | Seal grout if compatible with tile |
| Milky film after steam cleaning | Hard water minerals | Wipe with a clean damp cloth; repeat if necessary | Install a water-softening system or use distilled water in steam cleaner |
| Recurring mildew within weeks | Poor ventilation or high humidity | Improve ventilation, run exhaust fan longer | Schedule ongoing maintenance and consider humidity control |
Common Mistakes
- Using bleach on colored grout or certain sealers without confirming compatibility
- Overlooking corners and under-shelf areas where mildew hides
- Rubbing too aggressively and damaging grout or tile glaze
- Relying on a single cleaner for all surfaces without testing compatibility
- Ignoring door and curtain liners that harbor mildew spores
Tips For Best Results
- Test cleaners on a small, inconspicuous area before full application.
- Work from top to bottom to prevent dirty water from re-soiling cleaned zones.
- Use hot water for rinsing to help dissolve mineral buildup.
- Consider a lightweight, long-handled brush for hard-to-reach grout lines.
- Pair chemical cleaners with mechanical action (brushes, steam) for faster results.
- After cleaning, keep a consistent routine to monitor moisture and prevent mildew return.
Call A Professional
Seek professional help if mildew covers more than 10–20 square feet, there is significant mold growth behind walls, or there is a persistent musty odor that doesn’t respond to cleaning. Also contact a pro if you notice structural damage, warped tiles, or persistent water intrusion after cleaning attempts. Safety and thoroughness are the priorities in these cases.
FAQ
Can I use bleach to remove mildew in the shower?
Bleach can be effective on white mildew but may discolor colored grout and surfaces; always test first and follow product guidelines. Never mix bleach with ammonia or other cleaners.
How often should I clean mildew-prone showers?
Weekly surface wipe-downs and a monthly deep clean with appropriate cleaners help prevent mildew buildup, especially in humid bathrooms.
Is steam cleaning safe for all shower surfaces?
Steam cleaners are generally safe for tile and grout but may not be suitable for delicate materials or sealed wood. Check manufacturer guidelines for your surfaces.
What’s the best way to prevent mildew after cleaning?
Ensure good ventilation, reduce humidity, dry surfaces after use, and seal grout where appropriate. Regular maintenance reduces recurrence.
Buying Guide
Choosing the right tools and products for cleaning mildew in the shower involves balancing effectiveness, safety, and ease of use. Consider factors such as the size of the shower, surface materials, and household sensitivities to chemicals.
Key Buying Factors
- <bSize and coverage: Choose mildewcide products that cover your shower area efficiently; larger areas benefit from spray bottles with wide mist or ready-to-use gels for grout lines.
- <bNoise level: Steam cleaners and some electrical cleaning devices produce noise; look for models with lower decibel ratings if noise is a concern.
- <bEnergy efficiency: Manual cleaning tools (brushes, scrapers) require no electricity; electric steam cleaners should be energy-efficient and safe for bathroom use.
- <bControls and ease of use: Simple spray-on bottles, gel tubs, and handheld steamers with easy-to-press triggers reduce hand fatigue during cleaning.
- <bPlacement and storage: Store cleaners away from children and pets; ensure vented containers and upright storage to prevent leaks in bathrooms.
When comparing products, consider whether you prefer a ready-to-use spray, a gel that clings to vertical grout, or a steam-based approach for deeper cleaning. For many households, a combination approach—mildew remover spray for tiles for quick touch-ups, a grout brush for detail work, and a steam option for stubborn areas—delivers reliable results. Always follow label directions and ensure compatibility with your shower surfaces.