Preparing metal surfaces properly is essential for durable, long-lasting paint adhesion. This guide walks American readers through a practical, step-by-step process using common preparation products, safety practices, and handy tools that optimize results while avoiding common pitfalls.
Quick Answer
Clean and degrease the metal, remove rust if present, abrade the surface to create a key, and wipe with a tack cloth before painting. Use the right combination of degreaser, rust remover if needed, abrasive tools, and a tack cloth for best results.
What You’ll Need
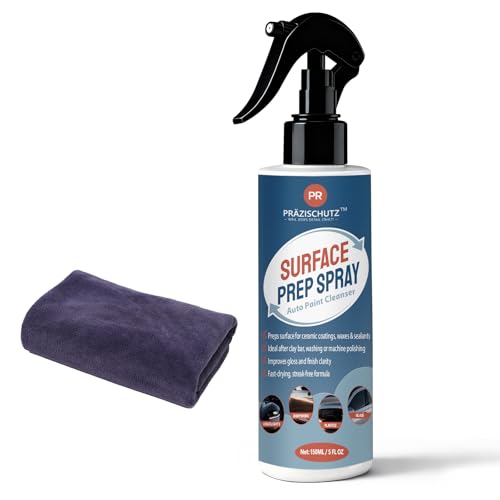
- Metal degreaser spray for painting prep
- Rust remover gel for metal prep before painting
- Tack cloth for metal prep and painting
- Wire brush set for rust removal before painting
- 320-400 grit sanding block for metal surface prep before painting


Before You Start
Assess the metal type and existing coating. Wear safety glasses, gloves, and a mask when using chemical cleaners. Work in a well-ventilated area and protect adjacent surfaces. Plan for a two-step cleanup: degrease, then rust removal or abrasion as needed. Time estimate: 60–120 minutes, depending on rust and surface condition. Avoid using water-based cleaners on oily or freshly oiled surfaces until degreasing is complete.
Step-By-Step: How To Clean Metal Before Painting
- Prepare the work area with drop cloths and adequate ventilation.
- Apply metal degreaser spray for painting prep to the metal surface following label directions.
- Wipe away dissolved oils with a clean rag, repeating as necessary until the surface feels dry and free of residue.
- If rust is present, apply rust remover gel for metal prep before painting to soften and lift corrosion.
- Scrub with a wire brush set to remove loose rust and flaking coatings, focusing on pits and edges.
- Once rust is removed, use a 320-400 grit sanding block to create a uniform, slightly rough surface for adhesion.
- Rinse or wipe the surface again to remove dust and debris from sanding; allow to dry completely.
- Wipe with a tack cloth for metal prep and painting to pick up fine dust before priming or painting.
- Proceed with primer or paint immediately after the tack cloth step to prevent surface contamination.
- Inspect the metal in good lighting; touch up any remaining rough spots with light sanding and re-wipe with the tack cloth.
- Label tools and containers for future maintenance and keep the area clean to maintain surface readiness.
Troubleshooting
| Symptom | Likely Cause | Fix | Prevention |
|---|---|---|---|
| Paint peeling soon after application | Residual oils or moisture on surface | Re-degrease and re-dry thoroughly before painting | Ensure full dry time and proper ventilation |
| Rust reappears after curing | Incomplete rust removal or contaminated prep | Reassess rust spots, reapply rust remover gel, re-sand, and re-clean | Use fresh materials and clean rags each pass |
| Uneven adhesion | Too smooth a surface or inadequate abrasion | Use 320-400 grit for an even key and re-wipe with tack cloth | Avoid over-polishing; maintain shallow bite on the surface |
| Dust or fibers under paint | Dusty prep environment or incomplete cleaning | Thorough tack cloth wipe and inspect air filters | Keep area dust-free during final wipe |
Common Mistakes
- Skipping the degreasing step or rushing through it
- Using water on oily surfaces before degreasing is complete
- Over- or under-sanding; either dulling the surface or creating deep scratches
- Neglecting to dry the surface completely before priming
- Touching the cleaned metal with bare hands after preparation
Tips For Best Results
- Always follow chemical product labels for contact times and safety measures.
- Test a small area first to confirm compatibility with the chosen primer and paint.
- Work in a climate-controlled environment to avoid rapid drying or moisture absorption.
- Use a tack cloth immediately before priming to reduce fine dust adherence.
- Keep tools dedicated to prep tasks to prevent cross-contamination with paints.
Call A Professional
Consider contacting a professional if the metal is heavily corroded, structurally compromised, or if local regulations require specialized rust treatment. Stop and get expert advice if you notice deep pits, pitting that penetrates through the metal, or if rust returns after initial treatment.
FAQ
Is it necessary to remove all rust before painting?
Yes, removing rust creates a clean, stable base and improves paint adhesion and longevity.
Can I use any tack cloth for metal prep?
Use a tack cloth designed for painting to ensure residues are effectively lifted from the surface.
How long should degreaser sit before wiping?
Follow product instructions, typically a brief dwell time to break down oils, then wipe clean.
What if the metal air dries quickly after cleaning?
Re-wipe with a tack cloth and ensure the surface is dry before applying primer.
Buying Guide
Choosing the right prep tools matters for consistent results. Consider the following factors to select the best kit for metal projects in the U.S. market:
- Size and scope: Larger projects may benefit from more expansive degreaser dispersal and stronger rust removers, while small metal fittings need precise application.
- Noise level: Power tools like wire brushes can be louder; opt for manual or low-speed options if noise is a concern.
- Safety and compatibility: Verify that degreasers and rust removers are suitable for the metal type (steel, aluminum, cast iron) to avoid damage.
- Controls and ease of use: Look for spray bottles with even sprayers, gel formulas that cling to vertical surfaces, and comfortable grips on sanding blocks.
- Placement and storage: Store chemicals upright in a cool, ventilated area away from heat and direct sunlight; keep tools organized for quick prep sessions.
- Cost-per-use: Consider how often the kit will be used and whether buy-in from bundles offers better long-term value.
- Compatibility with primers and paints: Ensure the chosen prep products align with the primer and topcoat to prevent adhesion issues.
As a practical rule, select a balanced set that covers degreasing, rust removal, abrasion, and final dust removal, enabling a seamless transition to priming and painting.