Cleaning drywall dust after sanding is a common but crucial step in finishing walls. Proper cleanup prevents staining, minimizes health risks, and prepares surfaces for primer and paint. This guide outlines a practical, step-by-step approach using common tools and safety practices to achieve a clean, dust-free project area.
Quick Answer
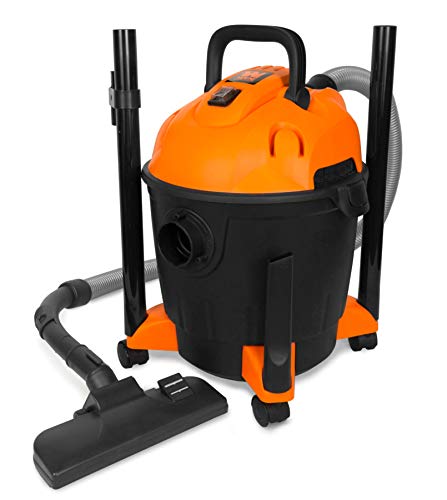
Use a high-efficiency setup with a HEPA shop vacuum drywall dust attached to an adjustable wand, seal off the workspace with a dust containment tent drywall sanding, wipe surfaces with tack cloth drywall dust removal, and wear a half-face respirator drywall dust for air quality protection. Start with large debris and finish with fine dust for best results.
What You’ll Need
- HEPA shop vacuum drywall dust
- Drywall sanding vacuum attachment
- Dust containment tent drywall sanding
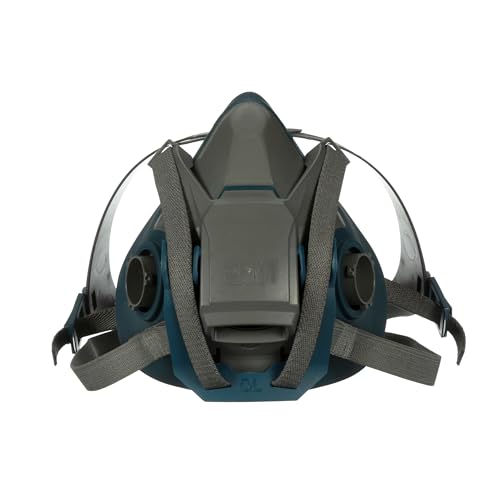
- Half-face respirator drywall dust
- Tack cloth drywall dust removal
- Drop cloths or plastic sheeting
- Masking tape and plastic sheeting for containment
- Ladder or scaffold as needed

Before You Start
Prepare the space to minimize dust spread. Seal off the room with a dust containment tent drywall sanding or plastic sheeting, and cover floors with drop cloths. Remove or wrap furniture, and close doors to reduce cross-contamination. Safety is essential: wear a half-face respirator drywall dust with P100 or HEPA filters, and use eye protection. Plan for a multi-stage cleanup: first remove large debris, then tackle fine dust.
Time estimates vary, but allow a few hours for a small room and longer for larger spaces. Start early in the day to maximize ventilation if indoors. Avoid sweeping dry dust with a broom; it stirs particles. Instead, use a HEPA vacuum attachment and damp methods for the final pass.
Step-By-Step: How To Clean Drywall After Sanding
- Ventilate the area: Open exterior doors or windows if weather permits. Use a fan to push dust toward an exit while keeping airflow away from the breathing zone.
- Remove large debris: Use a sturdy bag or dustpan to collect chunks from the sanding process. Place debris in a designated trash container to prevent re-dispersion.
- Engage the containment system: If you have a dust containment tent drywall sanding, ensure it is securely anchored and sealed at the base to minimize dust leakage.
- Adjust your vacuum setup: Attach the drywall sanding vacuum attachment to a HEPA shop vacuum drywall dust to maximize dust capture at the source while sanding or after sanding.
- Vacuum interior surfaces: Start with walls and ceilings, working from top to bottom. Use slow, overlapping passes to collect dust rather than pushing it around.
- Wipe down surfaces: After vacuuming, use a tack cloth drywall dust removal to pick up remaining fine dust on walls, trim, and fixtures. Do not oversaturate the cloth; a light touch is enough.
- Clean adjacent areas: Vacuum or wipe baseboards, windowsills, and any ledges where dust can settle. Check light fixtures and outlet covers for dust buildup.
- Inspect for missed spots: Revisit problem areas such as corners and behind fixtures. Repeat vacuuming and tack wiping as needed.
- Final seal and prep: Once surfaces are clean, you can prime and paint or apply texture. Keep a dry environment until the finish is complete to prevent dust settling on fresh coatings.
- Store tools properly: Empty and clean the vacuum, replace filters, and store the containment setup in a dry area before the next project step.
Troubleshooting
| Symptom | Likely Cause | Fix | Prevention |
|---|---|---|---|
| Dust settles quickly after cleaning | Insufficient containment or ventilation | Enhance sealing and run a continuous airflow with the containment tent | Maintain negative pressure in the area |
| Vacuum loses suction | Full or clogged filter | Empty debris canister and clean or replace filters | Check filters before each cleanup |
| Dusting on windowsills | Airflow from the work area | Adjust containment setup and use tack cloth on horizontal surfaces | Keep dust path away from windows |
| Residue on paintable surfaces | Over-wetting or too-aggressive wiping | Dust lightly with tack cloth and allow surfaces to dry | Use light pressure and appropriate cloth |
Common Mistakes
- Skipping containment and dispersing dust throughout the home or shop
- Using a broom or dry rag to sweep; this stirs up fine particles
- Forgetting to use a half-face respirator drywall dust or appropriate respirator
- Neglecting to wipe surfaces after vacuuming, leaving fine dust visible
- Opening containment prematurely, letting dust escape into other rooms
Correcting these practices leads to a cleaner finish and healthier air during the project.
Tips For Best Results
- Work from top to bottom to prevent recontamination of cleaned areas.
- Use a high-quality HEPA shop vacuum drywall dust and the corresponding drywall sanding vacuum attachment for maximum dust capture at the source.
- Pair vacuuming with tack cloth wipes for a two-step dust removal method that catches both large and fine particles.
- Keep a dedicated dust trash bag and a separate clean bag to avoid cross-contamination.
- When possible, perform sanding and cleanup in a well-ventilated area to speed up drying and reduce lingering dust.
Call A Professional
Consider contacting a pro if any of these apply: if dust exposure is a recurring issue, if you must sand near electrical fixtures or moisture-prone areas, or if you notice persistent dust trails despite containment and cleaning. Large-scale renovations with extensive drywall work may benefit from professional-grade containment and extraction equipment beyond standard home tools.
FAQ
What is the best way to remove drywall dust after sanding?
Vacuum with a HEPA-equipped vacuum, then wipe with a tack cloth for fine dust removal.
Do I need a dust containment tent for small jobs?
For small rooms, containment helps minimize spread, but even a simple sealed space with plastic sheeting improves results.
Can I reuse sanding dust in any way?
Avoid re-sanding over collected dust; dispose of dust waste properly and clean tools thoroughly.
What safety gear is essential for drywall sanding cleanup?
A half-face respirator drywall dust with proper filters, eye protection, and gloves are recommended.
Buying Guide
When choosing equipment to clean drywall after sanding, consider size, noise, and efficiency. A compact HEPA shop vacuum drywall dust paired with a compatible drywall sanding vacuum attachment is ideal for most homes. A dust containment tent drywall sanding helps control dust in smaller spaces and aligns with good indoor air quality practices. Noise levels are relevant if the workspace is near living areas; look for units with reasonable decibel ratings. Energy efficiency matters for ongoing projects, especially for larger renovations. Controls should be simple to operate with secure attachments. Place containment devices and vacuum units centrally to maximize airflow and minimize dust travel. For multi-room work, plan portable containment and a modular vacuum system to adapt to different room sizes without sacrificing performance.
Thinking about a setup? Compare bundles that combine a HEPA shop vacuum drywall dust with a drywall sanding vacuum attachment and a dust containment tent drywall sanding for comprehensive dust control. Check compatibility with your sanding tools and ensure replacement filters are readily available. A well-rounded kit reduces cleanup time and improves overall project quality, making it worth the initial investment for frequent drywall work.