Moldy grout in a shower is a common household issue that can affect both appearance and hygiene. This guide walks through practical, step-by-step methods using common cleaning tools and safe products to refresh grout and keep bathrooms healthier.
By following these steps, homeowners can tackle stains, prevent regrowth, and restore the bright look of tiled surfaces without heavy scrubbing or harsh chemicals. The focus is on safe, effective methods suitable for typical American bathrooms.
Quick Answer
Best starting approach: choose a combination of a stiff nylon grout cleaning brush with an angled head and a handheld steam cleaner for tough areas, then follow with a grout whitening pen for touch-up. For stubborn mold, apply mold stain remover gel and seal the grout after cleaning to slow regrowth.
What You’ll Need
- Stiff nylon grout cleaning brush with angled head
- Handheld steam cleaner for shower grout
- Grout brush set with replaceable heads for bathroom
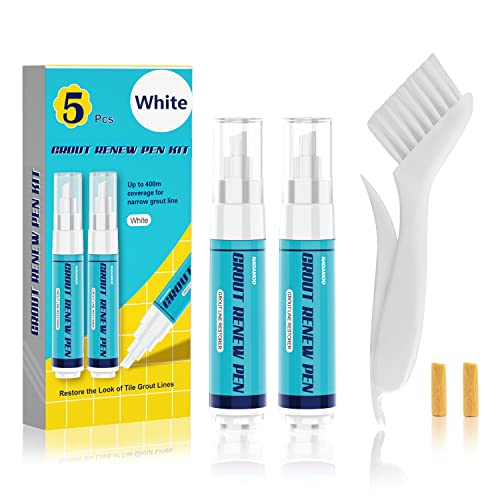
- Grout whitening pen for bathroom grout
- Mold stain remover gel for grout


Before You Start
Assess grout condition: light staining can usually be cleaned, while deep pitting may require regrouting. Ventilate the bathroom and wear gloves and eye protection. Test any cleaner on a small, inconspicuous area first to prevent discoloration. Allow surfaces to dry between steps for best results. Time estimates vary by grout size and stain severity, typically 30–90 minutes for a standard shower area.
Safety cautions: avoid mixing chemicals, especially bleach with ammonia or acids. Do not use abrasive pads on delicate tiles. Keep cleaners away from grout sealers until the final step.
Step-By-Step: How To Clean Shower Grout Mold
- Prepare the area: remove loose debris and place towels to catch drips. Mix or apply cleaner according to product directions.
- Apply a mold stain remover gel to affected grout lines and let it sit as instructed. This helps break down mold deposits and makes scrubbing easier.
- Use the stiff nylon grout cleaning brush with an angled head to scrub the grout in a firm, circular motion. Focus on lines where mold is most evident.
- For stubborn stains, switch to the grout brush set with replaceable heads to target corners and narrow joints. Replace heads as needed to maintain effective scrubbing power.
- Blow steam along the grout with a handheld steam cleaner to lift remaining residue and sanitize surfaces. Hold the nozzle slightly away from the grout to avoid over-wetting.
- Rinse thoroughly with clean water, then inspect. If stains persist, repeat the gel treatment and brushing cycle in the affected areas.
- Apply a grout whitening pen for bathroom grout to even out color differences and brighten lines after cleaning. Follow the product’s drying time for best results.
- Consider sealing grout after it’s fully dry to slow future mold growth. Use a penetrating grout sealer compatible with your tile and grout type.
Troubleshooting
| Symptom | Likely Cause | Fix | Prevention |
|---|---|---|---|
| Dark mold returns after cleaning | Moisture buildup or insufficient sealing | Seal grout and ensure proper bathroom ventilation | Use a humidity controller and run the exhaust fan during showers |
| Rings or staining remains after brushing | Stubborn mineral deposits | Reapply mold stain remover gel and re-scrub with angled brush | Wipe down surfaces after use to reduce moisture |
| Discoloration after whitening pen | Incompatible grout color or improper application | Test pen on a small area first; apply multiple thin coats as directed | Follow product guidelines and allow complete drying between coats |
| Tiles become rough or damaged | Over-scrubbing or abrasive cleaners | Switch to milder cleaners and gentler brushes | Limit scrubbing pressure and use soft tools for fragile areas |
Common Mistakes
- Using bleach-based products on porous grout without ventilation
- Scrubbing too aggressively, causing grout to wear away
- Neglecting to dry tiles after cleaning, inviting quick re-mold
- Skipping a sealant step after successful cleaning
Addressing these pitfalls helps prevent recurring mold and keeps grout looking fresh longer.
Tips For Best Results
- Work in small sections to maintain cleaning rigor and prevent drying stains.
- Combine mechanical scrubbing with chemical aids for optimal mold removal.
- Rinse thoroughly after each step to remove residue that could attract more grime.
- Consider a quarterly grout refresh routine to maintain brightness and hygiene.
Call A Professional
Seek professional help if grout shows extensive cracking, crumbling joints, or persistent mold despite multiple cleaning cycles. Replace severely damaged grout or re-tile sections if mold penetrates deep into the substrate. If the bathroom has persistent humidity issues or mold spanning multiple rooms, a licensed contractor may be required to address underlying moisture problems.
FAQ
What is the best tool for cleaning shower grout mold?
The combination of a stiff nylon grout cleaning brush with angled head and a handheld steam cleaner for shower grout provides effective scrubbing and sanitizing power for most grout lines.
Can I use bleach on grout?
Bleach can work on white grout if used carefully in a well-ventilated area, but test first and avoid mixing with ammonia. For colored grout, opt for dedicated grout cleaners and whitening products that are color-safe.
How often should I seal shower grout?
Sealant is typically applied after a thorough cleaning and drying, and then re-applied per the product’s instructions—usually every 1–2 years, depending on use and humidity.
Is steam cleaning safe for all tile types?
Steam cleaning is generally safe for most ceramic and porcelain tile, but avoid steam on natural stone or highly textured tiles unless the manufacturer’s guidelines approve it.
What if mold returns quickly after cleaning?
Reassess ventilation and moisture controls, reseal grout, and consider using a mold-resistant grout or adding a bathroom dehumidifier to reduce humidity levels.
Should I replace grout or regrout after mold?
Light staining can often be restored with cleaning, but deep mold intrusion, crumbling grout, or cracking usually requires regrouting.
Do I need to remove old grout before whitening?
Whitening pens are most effective on intact, clean grout. If grout is deeply stained or crumbly, cleaning and possible regrouting are recommended before applying whiteners.
Buying Guide
Key buying factors help homeowners select products that address shower grout mold effectively. Consider size and layout of the shower, noise tolerance for steam devices, energy use for electric tools, and control options for ease of use. Placement matters too: handheld tools should be easy to reach in corners and along tile joints.
Size and reach: Choose brushes and replacement heads that fit your shower dimensions and grout depth. A compact grout brush set with replaceable heads covers varied angles and joint widths.
Noise and power: Handheld steam cleaners vary in heat, steam output, and noise. Look for models with adjustable steam settings for sensitive areas.
Energy efficiency and runtime: For steam cleaners, check the power rating and estimated runtime per fill. Longer runs reduce refilling, but consider weight and maneuverability.
Controls and ergonomics: Ergonomic handles and reclining heads reduce strain during scrubbing. A wand-style cleaner can help in tall showers and recessed niches.
Sealing and maintenance: Pair cleaning tools with a grout whitening pen and a compatible grout sealer. Regular maintenance slows regrowth and keeps grout looking bright.
Brand and compatibility: Use products designed for bathroom grout and mold safety. Ensure replacement heads fit the grout brush set you choose.
Answering common questions about your bathroom layout and grout type helps tailor the kit to your needs, delivering practical, long-lasting results.