Sprayers are essential for distributing pesticides, herbicides, fertilizers, and water in homes, gardens, and nurseries. Proper cleaning removes residue that can corrode the pump, clog nozzles, or contaminate future applications. This guide covers practical, step-by-step methods to clean a typical hand-pump or garden sprayer using common tools and a focused cleaning kit lineup.
Careful maintenance extends the life of your sprayer and ensures consistent spray patterns. The steps below apply to most standard pump sprayers used in American households and gardens.
Quick Answer
Rinse with clean water, flush with cleaning solution suited to the previous chemical, scrub the nozzle and wand, inspect seals and O-rings, dry completely, and store in a cool, shaded area. If buildup persists, disassemble and clean parts individually using the recommended brushes and replacement kits.
What You’ll Need
- 1 gallon pump sprayer cleaning kit
- sprayer nozzle cleaning brush set
- garden sprayer filter and nozzle cleaning kit
- pump sprayer O-ring replacement kit
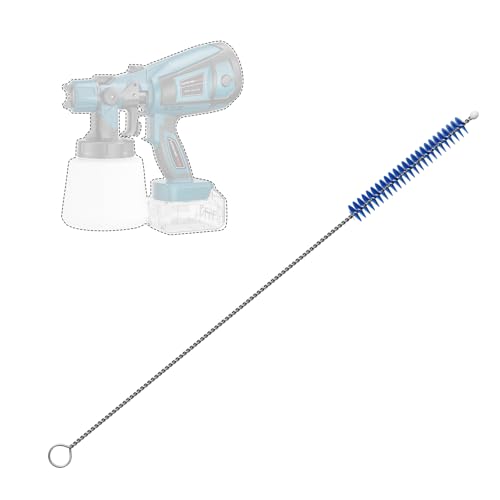
- sprayer wand cleaning brush for spray nozzles


Before You Start
Prepare a well-ventilated workspace and wear gloves to protect skin from chemicals. Empty the sprayer completely and follow the chemical label for safe rinsing practices. Have soap or mild detergent, warm water, and a small container for soaking parts ready. Time estimate: 20–40 minutes for a thorough cleaning; longer if multiple parts require disassembly. Important cautions: never mix cleaners with concentrated chemicals; ensure all components are dry before reassembly to prevent rust or mold growth.
Step-By-Step: How To Clean A Sprayer
- Empty the tank and rinse with clean water until the water runs clear.
- Fill the tank with a cleaning solution appropriate for the residue you cleaned last (water for general rinsing, or a mild detergent for heavy buildup).
- Repressurize the sprayer and spray the cleaning solution through the nozzle to flush the entire system.
- Inspect the nozzle and wand; use the sprayer nozzle cleaning brush set to remove clogs and residue from spray orifice and filters.
- Remove and inspect seals and gaskets; replace any worn pump sprayer O-ring replacement kit components as needed.
- Disassemble accessible components (wand, nozzle, filter) and soak them in warm, soapy water for several minutes, then scrub gently with brushes.
- Rinse all parts with clean water, then reassemble. Repressurize and perform a quick test spray indoors or onto a disposable surface to ensure a clean spray pattern.
- Flush the system again with clean water to remove any remaining detergent or debris.
- Store the sprayer empty and dry in a cool, shaded place. Keep nozzles and wands detached if possible to avoid deformation.
- If buildup recurs, repeat the cleaning cycle or use the garden sprayer filter and nozzle cleaning kit for deeper maintenance.
- Schedule periodic checks of seals and hoses, replacing worn parts with the appropriate components from the pump sprayer O-ring replacement kit.
- Document any persistent issues (leaks, inconsistent spray) for future reference or professional consultation.
Troubleshooting
| Symptom | Likely Cause | Fix | Prevention |
|---|---|---|---|
| Sprayer won’t build pressure | Airtight seal failure or clogged valve | Check O-rings, replace if needed; flush system | Regularly inspect seals; avoid over-tightening |
| Uneven spray pattern | Nozzle blockage or worn nozzle | Clean with nozzle brush; replace nozzle if necessary | Rinse between applications and use proper filters |
| Leaks from connections | Damaged gaskets or fittings | Replace gaskets; reseal connections | Inspect parts before storage; store upright |
| Persistent residue after cleaning | Old residue trapped in filter | Deep clean with filter kit; replace filter | Rinse thoroughly after every application |
Common Mistakes
- Using harsh cleaners that corrode seals or damage plastic components.
- Leaving parts wet and exposed, which can foster mold growth.
- Skipping disassembly when buildup is heavy, leading to incomplete cleaning.
- Neglecting to replace worn O-rings or filters when signs of wear appear.
Tips For Best Results
- Label each spray tank to prevent cross-contamination of products.
- Use a dedicated cleaning container for the solution to avoid contamination of drinking water or soils.
- Keep a parts kit on hand with brushes, gaskets, and replacement nozzles for quick maintenance.
- When storing, run clean water through the system briefly to flush residual cleaning solution.
- Inspect and replace worn components proactively with the appropriate kits to minimize downtime.
Call A Professional
Seek professional help if the sprayer continues to leak after O-ring and gasket replacements, or if you notice cracks in the tank, warped seals, or corrosion in metal fittings. Sudden, dramatic loss of pressure or a persistent odor from residual chemicals may require a technician’s assessment.
FAQ
How often should I clean my sprayer?
Clean after each major use or at least every few uses if switching between chemicals to prevent cross-contamination.
Can I use bleach to clean a sprayer?
Only if the sprayer is rated for bleach; otherwise, use mild detergents and follow the chemical label instructions.
What tools help clean stubborn nozzle clogs?
Use a dedicated sprayer nozzle cleaning brush set and, if needed, a small pin or needle designed for spray orifices.
Are replacement O-rings hard to install?
Not if you follow the kit instructions; ensure the correct size and seating before reassembling.
Is it okay to store a sprayer wet?
Avoid storing wet; dry components completely to prevent mold and degradation.
What’s the best way to prevent future clogs?
Rinse after each use, use the appropriate filters, and replace worn components promptly.
Do I need to disassemble every part for cleaning?
Disassemble the parts most prone to buildup, such as the nozzle, filter, and wand, for thorough cleaning.
Buying Guide
Choosing the right sprayer maintenance gear helps extend life and performance. Consider these buying factors:
- Size and capacity: Larger tanks reduce refills but are heavier to handle. Choose based on workload and storage space.
- Noise level: Some sprayers or cleaning kits operate quietly; this can matter for indoor use or early morning tasks.
- Energy efficiency: Battery-assisted models are efficient, while manual pumps require more effort but fewer components to fail.
- Controls and simplicity: Look for straightforward pressure release, easy disassembly, and accessible replacement parts.
- Placement flexibility: Consider hoses and wand length that fit your workspace, whether a garden, greenhouse, or shed.
- Maintenance kit compatibility: Ensure cleaning kits and O-ring replacements match your sprayer’s model and materials.
Multi-pack sets that cover several maintenance tasks—such as nozzle brushes, filters, O-rings, and wand brushes—provide comprehensive care. If you use a single sprayer for diverse chemicals, consider a robust cleaning kit to keep residues from one product from affecting the next. Always follow product labels and safety guidelines when performing maintenance.