Oak furniture brings timeless beauty to American homes, but proper cleaning and maintenance protect its grain and finish. This guide outlines practical steps to clean oak furniture effectively, from daily dusting to restoring a worn surface. Readers will find a clear, safe approach that minimizes risk to finishes while using commonly available products.
Quick Answer
For routine cleaning, dust with a microfiber cloth, wipe with a mild cleaner designed for oak, and follow with a conditioner or polish. For deeper restoration, use a wood restoration kit and beeswax polish to revive luster. Always test on a hidden area first and avoid harsh chemicals that can damage the oak’s finish.
What You’ll Need
- oak furniture wood cleaner spray
- microfiber cloth kit for oak furniture
- oil-based wood conditioner for oak furniture
- wood restoration kit for oak furniture repair
- microfiber dusting cloth for oak furniture
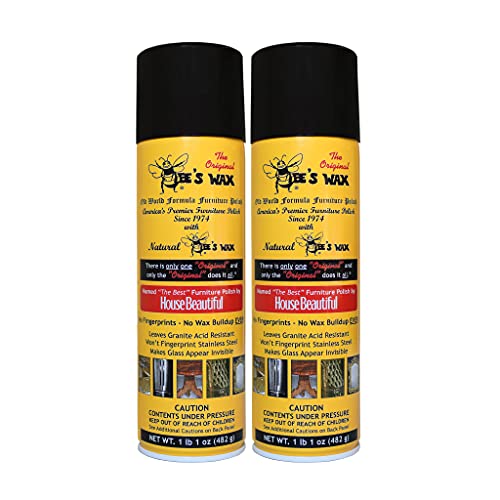
- beeswax wood polish for oak furniture


Before You Start
Prepare a clean, dust-free workspace and place the furniture away from direct sunlight and heat sources. Use a soft, lint-free microfiber cloth to avoid scratching the wood. Do a spot test in an inconspicuous area before applying any product to the entire surface. Wear gloves if using cleaners with solvents, and ventilate the room well during application. Time estimates vary from 15 minutes for a light wipe-down to several hours for a full restoration, depending on the piece’s condition.
Step-By-Step: How To Clean Oak Furniture
- Dust the surface with a microfiber dusting cloth to remove loose dirt and debris.
- Wipe the area with a slightly damp microfiber cloth using a oak-friendly cleaner spray, working with the grain.
- Rinse the cloth or use a fresh one to remove any cleaner residue, then dry the surface thoroughly to prevent moisture damage.
- Inspect for spots, rings, or dull areas. If needed, apply a small amount of oil-based wood conditioner for oak furniture and rub in evenly with a clean cloth.
- Allow the conditioner to penetrate for the time specified on the product label, then buff with a dry microfiber cloth to restore shine.
- If the finish looks worn, use a wood restoration kit for oak furniture repair according to the package directions to address scratches or minor dents.
- After restoration, apply a thin layer of beeswax wood polish for oak furniture for a protective gloss and to seal the surface.
- Buff again with a clean microfiber cloth to achieve an even sheen and remove any excess polish.
- Address hardware and edges separately, using a soft brush or cotton swab to clean crevices without saturating wood.
- Schedule regular maintenance: dust weekly, polish monthly, and deep-clean every few months or as needed based on use.
- Store cleaning products out of reach of children and pets, and label all containers clearly to prevent misuse.
- Dispose of used cloths safely if they have contained oil-based products, as some fabrics can hold flammable residues.
Troubleshooting
| Symptom | Likely Cause | Fix | Prevention |
|---|---|---|---|
| Dull or cloudy finish | Residue left from cleaner or inadequate buffing | Re-wipe with clean, dry cloth; use conditioner and buff thoroughly | Always wipe in the direction of the grain |
| Sticky surface after cleaning | Overuse of cleaner or oil buildup | Remove residue with a damp cloth, then dry completely | Use sparingly and follow product directions |
| Scratches visible after buffing | Insufficient conditioning or aggressive buffing | Apply conditioner, allow absorption, then buff softly with a microfiber cloth | Use gentle motions and appropriate products for oak |
| Water rings reappear | Moisture penetration or finish breakdown | Gently dry and consider a wood restoration kit for repair | Avoid placing wet items directly on wood; use coasters |
| Discolored patches | Sun exposure or uneven maintenance | Evenly recondition affected area and protect from sun | Place away from direct sunlight; rotate furniture |
Common Mistakes
- Using ammonia-based cleaners on oak furniture
- Excess moisture that can warp or stain the wood
- Over-waxing, which can create a buildup and dull finish
- Skipping a test patch before full application
Following careful steps helps avoid common missteps and preserves oak’s natural beauty over time.
Tips For Best Results
- Dust regularly to prevent buildup that dulls the grain.
- Use the smallest effective amount of cleaner and conditioner.
- Buff with a soft, clean cloth after every application for a natural shine.
- Store products away from heat sources; some oils can degrade finishes if exposed to high temperatures.
- Rotate frequently used pieces to ensure even wear across the surface.
Call A Professional
Consider a professional if oak furniture has deep scratches,water damage, or finish failure that does not respond to at-home restoration. Signs to seek expert help include warped panels, extensive staining, or finishes that crack and peel. A pro can assess structural integrity and perform advanced refinishing without compromising the wood.
FAQ
What’s the best way to remove dust from oak furniture?
Use a clean microfiber dusting cloth, moving with the grain to lift particles without scratching the surface.
Can I use oil-based conditioner on all oak products?
Yes, but test in a hidden area first and follow label directions to avoid over-saturation.
How often should I wax oak furniture?
Waxing every few months keeps the surface protected, but adjust frequency based on use and wear.
Is there a risk in using a restoration kit on oak?
Restoration kits can restore damaged areas, but follow instructions carefully to avoid over-sanding or color mismatch.
Buying Guide
When selecting products to clean and care for oak furniture, consider size of the project, the finish type on the piece, and how much routine maintenance is desired. Look for products labeled specifically for oak or for hardwood furniture to ensure compatibility.
Key buying factors include size of the cleaning kit (for multiple pieces or a single table), noise and ease of use for spray applicators, and the presence of a conditioner or beeswax polish for long-term protection. Energy-efficient, simple spray bottles or wipe-on formulas help minimize waste and simplify routines. Placement matters too: keep treated surfaces away from direct sunlight and heat sources to preserve color and finish. For a balanced, long-lasting result, choose a combination kit that includes a cleaner, conditioner, and a wax-based polish, plus a microfiber cloth set for thorough, scratch-free care.