Dust buildup on cabinet tops can affect air quality and the look of a room. This guide provides practical, step-by-step methods to keep high surfaces clean using common tools and safe techniques suitable for most American homes.
With the right supplies and a methodical approach, you can remove dust, clingy grime, and cobwebs without climbing dangerously or using harsh cleaners. The steps below emphasize efficiency, safety, and reusability of materials where possible.
Quick Answer
Best quick method: use a telescoping duster with microfiber head to reach the highest spots, followed by a microfiber cleaning cloth for final wipe-down. For stubborn spots, a long-handled scrub brush with soft bristles can help without moving furniture.
What You’ll Need
- Telescoping duster with microfiber head extendable to reach cabinet tops
- Adjustable length cleaning pole with interchangeable microfiber heads
- 6 ft folding step ladder anti-slip for reaching top of cabinets
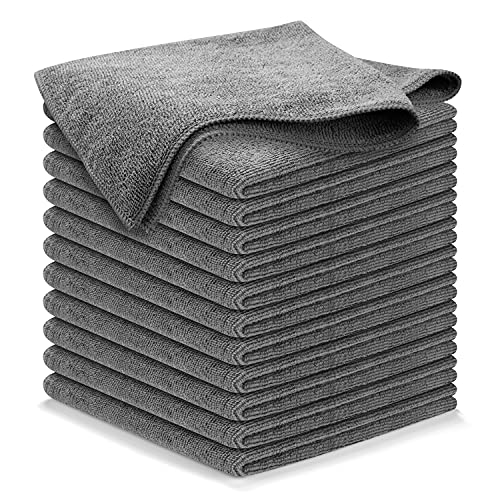
- Microfiber cleaning cloths reusable for dusting cabinets and furniture
- Long-handled scrub brush with soft bristles for high surfaces


Before You Start
Prepare the area by moving lightweight items away from the cabinet edges to prevent accidental spills. Place a drop cloth or old sheet on nearby surfaces to catch falling dust. Always test tools on a small, hidden area first to ensure no surface scratches. Avoid wet cleaning on wooden finishes unless the surface is specifically labeled safe for damp cleaning.
Time estimates vary: a quick top-to-bottom dusting can take 15–25 minutes, while a thorough wipe-down after seasonal cleaning may take 30–60 minutes depending on ceiling height and cabinet design.
Step-By-Step: How To Clean Top Of Cabinets
- Set up the 6 ft folding step ladder securely on a flat surface and test its stability before climbing.
- Attach the telescoping duster with microfiber head and extend it to comfortably reach the cabinet tops. Gently run the duster along the edge to collect loose dust.
- Slide the duster along the front edge and the top surface, working from one side to the other to avoid missing spots.
- Switch to a microfiber cleaning cloth for a final wipe. Dampen the cloth slightly if needed and wipe in the direction of the grain or surface texture.
- If you encounter cobwebs or stubborn dust, use the long-handled scrub brush with soft bristles to loosen particles without scratching finishes.
- For recessed or hard-to-reach corners, extend the microfiber head further or use the adjustable length cleaning pole with a compatible microfiber pad to access tight areas.
- Return the ladder, ensuring all tools are dry and stored away after use. Inspect the tops for any remaining dust and repeat briefly if necessary.
- Clean up the work area by dusting any nearby light fixtures, moldings, or shelves that may have collected dust during the process.
- Wash microfiber cloths after use and air-dry to maintain abrasion softness for future cleanings.
- If staining or residue persists, consult the cabinet manufacturer’s care guide before applying cleaners not intended for the finish.
- Conduct a quick safety check: ensure no tools are left on countertops where they could tip or fall during daily activities.
- Document a routine: plan dusting every 1–2 weeks to maintain a consistently clean top surface.
Troubleshooting
| Symptom | Likely Cause | Fix | Prevention |
|---|---|---|---|
| Dust resettles quickly after cleaning | Stagnant air or nearby fabrics | Ventilate the room and keep fabrics away from the cabinet area during cleaning | Regular, shorter cleanings to prevent heavy buildup |
| Streaks on wood or glossy surfaces | Excess moisture or dirty cloth | Wipe with a barely damp microfiber cloth and dry immediately | Use clean, dry cloths for final wipe |
| Scratches when using brush | Bristles too stiff or pressure applied | Switch to softer bristles and light pressure | Test in a hidden spot before full use |
| Sagging dust on edges | Dust trapped in fabric | Clean or replace microfiber pads regularly | Keep microfiber pads clean and dry |
Common Mistakes
- Using wet cleaners on unfinished wood surfaces
- Pushing dust around with a dry cloth instead of lifting it away
- Overextending the ladder or standing on the top rung
- Neglecting corded tools or leaving damp cloths in contact with wood surfaces
Keep attention on safety and the finish of cabinet materials to avoid damage during routine cleaning.
Tips For Best Results
- Rotate microfiber cloths to ensure clean surfaces. A fresh side reduces smearing.
- Use the telescoping duster to minimize climbing and reduce risk.
- Deep-clean seasonal tasks: remove items from shelves and wipe the interior surfaces too for a comprehensive refresh.
- Store tools in a dedicated cleaning caddy to keep them ready for the next session.
Call A Professional
Contact a pro if cabinet finishes show deep staining, peeling, or warping after cleaning attempts, or if dust buildup appears in hidden or ceiling areas beyond reach. Seek help immediately if a ladder or tool shows structural damage or instability.
FAQ
Can I use household sprays on wood cabinets?
Only if the product is labeled safe for the cabinet finish. Always test in a small area first.
How often should I clean cabinet tops?
Every 1–2 weeks for typical living spaces; adjust frequency for homes with pets or dusty environments.
What tools are best for high ceilings?
A telescoping duster and long-handled scrub brush provide effective reach without climbing on furniture.
Is it okay to use water on wooden surfaces?
Light dampening is acceptable on sealed surfaces; avoid saturating unfinished wood.
Buying Guide
When shopping for cabinet-cleaning gear, consider size, reach, and care needs. A telescoping duster or adjustable cleaning pole helps reach tall tops without heavy lifting. Evaluate the noise and stability of a 6 ft folding step ladder, especially in busy homes with children or pets. Look for reusable microfiber cloths that are easy to wash and maintain. For stubborn grime, a long-handled scrub brush with soft bristles can extend your cleaning reach without risk of scratches. Ensure tools are compatible with your cabinet finishes and that you have a safe storage plan for dried tools and cloths. Consider a kit that combines most or all of the listed items to streamline future cleanings.