Drip pans under stove burners can accumulate grease, burnt-on food, and grime that not only looks unsightly but can affect cooktop performance. This practical guide explains safe, effective methods to clean different drip pans, including aluminum replacements and liners, using common household supplies and purpose-built cleaning tools.
Quick Answer
Remove the drip pans, soak in hot, soapy water or a gel cleaner, scrub with a stiff brush, rinse, and dry completely before reassembling. For stubborn stains, use a gel cleaner or a dedicated scrubber set. Replace damaged pans or liners to maintain safety and efficiency.
What You’ll Need
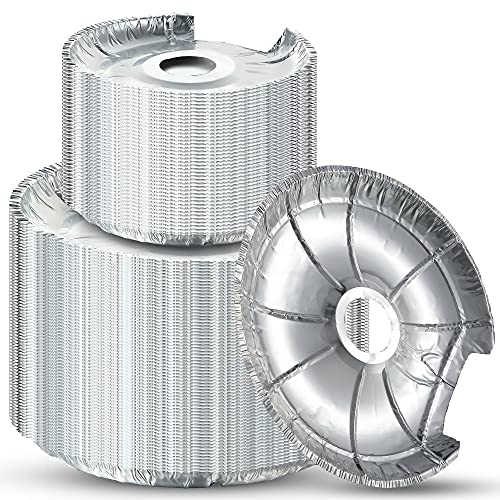
- 8 inch aluminum stove drip pan replacement
- Stovetop drip pan cleaning brush with long handle
- Stove burner drip pan scrubber set
- Oven and stove drip pan cleaner spray gel
- Stovetop drip pan liner replacement aluminum pan


Before You Start
Ensure the stove is completely cool before handling components. Disconnect power to electric stoves or turn off gas burners. Work in a well-ventilated area; use gloves to protect hands from hot water and cleaners. Have a towel or tray ready to collect drips and for drying pans. If a pan is warped or coated with heavy rust, consider replacing it rather than cleaning.
Safety notes: Do not use abrasive cleaners on nonstick or coated surfaces, and avoid harsh solvents on aluminum pans to prevent damage. If staining persists after cleaning, a fresh replacement pan or liner is recommended.
Step-By-Step: How To Clean Stove Drip Pans
- Remove the burner grates and lift out the drip pans from beneath each burner.
- Rinse pans under warm water to loosen loose debris, then blot dry.
- Fill a sink or basin with hot water and add a few squirts of dish soap or a gel-based cleaner. Submerge the pans for 10–20 minutes.
- Use a long-handle brush or the stove burner drip pan scrubber set to scrub away baked-on grease. Pay attention to corners and seams.
- For stubborn stains, apply a small amount of oven and stove drip pan cleaner spray gel directly, let sit for a few minutes, then scrub again.
- Rinse thoroughly with warm water and dry completely with a clean towel before reassembling the stove.
- Inspect each pan for signs of wear, such as warping or pitting. If present, replace with an 8 inch aluminum stove drip pan replacement or a liner replacement aluminum pan as needed.
- Reinstall drip pans and grates. Run the burner briefly to ensure no cleaner residue remains and the area heats evenly.
- Wipe down the surrounding surface to remove any splatter and maintain a clean cooktop for the next use.
- For ongoing maintenance, clean pans after heavy cooking sessions and consider placing liners to simplify future cleaning.
- Store cleaning tools in a convenient location so they’re ready for quick maintenance between meals.
Troubleshooting
| Symptom | Likely Cause | Fix | Prevention |
|---|---|---|---|
| Grease still visible after cleaning | Stubborn stains or residue | Apply cleaner gel, let sit longer, scrub with brush | Clean promptly after cooking to prevent bake-on grease |
| Drip pans are warped | Heat damage or heavy use | Replace with new aluminum pan or liner | Avoid overheating; replace damaged parts promptly |
| Pans turn green or tarnished | Reaction with acidic foods or cleaners | Use a non-abrasive cleaner and thorough rinse | Rinse well after cleaning; dry completely |
| Rusted edges | Older metal pans or moisture exposure | Replace with rust-resistant aluminum pans | Keep pans dry when stored and during cleaning |
Common Mistakes
- Using abrasive scrubs on aluminum pans, which can scratch and dull the surface.
- Leaving cleaner on metal surfaces longer than recommended, which can cause discoloration.
- Forgetting to dry pans completely before reassembly, leading to odor or rust.
- Overtightening clamps or grates, which can damage the drip pan fit.
Tips For Best Results
- Soak pans as soon as possible after cooking to minimize baked-on grease.
- Keep a dedicated long-handle brush on hand to reach tight corners.
- Consider using a liner replacement aluminum pan to simplify future cleanups.
- Label replacement parts if you own multiple stoves to ensure correct fit.
- Combination approach: a gel cleaner for tough spots followed by a thorough rinse yields the cleanest results.
Call A Professional
Contact a professional when drip pans are severely warped, corroded, or if gas burners show irregular flames after reassembly. Signs to seek help include persistent gas leaks, unusual odors, or if you are unsure about safely disassembling components in a gas range.
FAQ
Can I use metal scrubbers on aluminum drip pans?
Avoid metal scrubbers; they can scratch aluminum. Use a stiff nylon brush or a dedicated scrubber set instead.
Is it safe to use oven cleaner on drip pans?
Generally not recommended for aluminum pans; instead, use gel cleaners designed for stovetops and aluminum.
How often should I clean stove drip pans?
Clean after heavy use or spillages, and give pans a quick wipe-down weekly to prevent buildup.
Should I replace liners or pans regularly?
Replace damaged or heavily stained pans or liners to maintain performance and safety.
Can I run the stove without drip pans?
Better to replace damaged pans; missing drip pans can lead to grease buildup on burners and surfaces and pose fire risk.
Buying Guide
When choosing replacement parts or liners for stove drip pans, consider size, material, and compatibility with your stove model. For most single ovens and residential ranges, 8 inch aluminum stove drip pan replacement parts offer durability and heat resistance. Look for liners or aluminum pans designed to resist staining and corrosion. If your stove has unique dimensions or nonstick-coated components, check compatibility before purchasing. Noise level is not a typical concern for drip pans, but easy installation and cleanability are key. Think about placement—replacements should sit securely beneath burners and align with the grease channel for effective cleaning. Compare options by:
- Size compatibility with your burner configuration
- Material quality and ease of cleaning
- Availability of liners to simplify maintenance
- Ease of installation and compatibility with existing grates
- Warranty or return policy for replacements
Would you like help selecting the best kit based on your stove model? A few quick details about your range can guide a precise match, including the model number and whether you use gas or electric burners.