Paint swirls are light, circular scratches that dull a vehicle’s finish. With the right tools and technique, owners can restore a glossy, showroom-like appearance without professional help. This guide outlines a practical approach using common detailing products and safe methods.
Quick Answer
Identify swirl marks, prepare the surface, and use a combination of polish, a dual action polisher, and appropriate pads to lift the swirls. Finish with a microfiber cloth to buff to a high gloss. For stubborn swirls, repeat the steps or move to a clay bar kit before polishing.
What You’ll Need
- Car swirl remover polish 8 oz
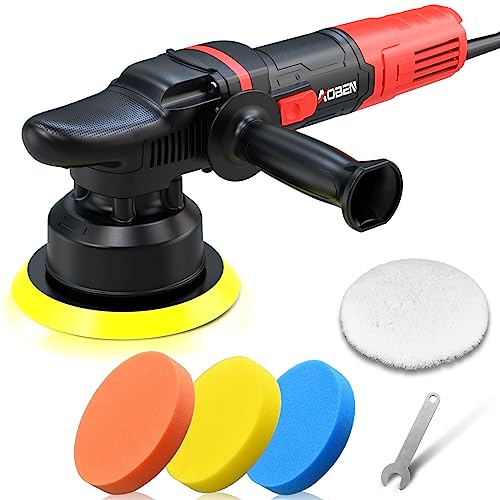
- Dual action polisher 6 inch kit
- 6 inch foam polishing pads for car detailing
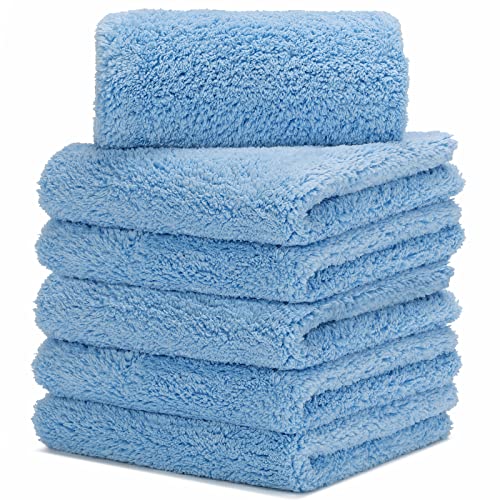
- Microfiber polishing cloth kit for car detailing
- Clay bar detailing kit for removing swirl marks

Before You Start
Prepare a clean workspace in a shaded area to prevent rapid drying. Wash and dry the car thoroughly to remove loose dirt that could cause more scratches. Inspect the paint with indirect light to spot swirls vs. deeper scratches. Always test a small panel first to ensure the polish won’t dull the finish. Expect the process to take a couple of hours for a typical sedan.
Step-By-Step: How To Remove Paint Swirls
- Wash and dry the vehicle completely; remove any tar or grime with a dedicated cleaner.
- Clay the surface with a clay bar detailing kit for removing swirl marks to lift embedded contaminants.
- Wipe down with a clean microfiber cloth to ensure the surface is dust-free and ready for polishing.
- Attach a soft foam polishing pad to the dual action polisher and apply a small amount of car swirl remover polish 8 oz on the pad.
- Set the polisher to a low to medium speed and work in 2ft by 2ft sections, using light, overlapping passes.
- Wipe the area with a fresh microfiber cloth to inspect the gloss; repeat with increasing passes if swirls remain.
- Switch pads or use a fresh pad if the pad becomes loaded with residue during polishing.
- Buff the panel with a clean microfiber cloth until the finish is smooth and glossy.
- Inspect again under lighting; if needed, repeat the polishing process on stubborn areas.
- Remove any residue with a final wipe and apply optional protection like a wax or sealant for longevity.
- Repeat on all panels, working methodically from one end to the other to avoid missed swirls.
- Clean tools and store them properly after use to maintain performance for future detailing.
Troubleshooting
| Symptom | Likely Cause | Fix | Prevention |
|---|---|---|---|
| Swirls remain after first pass | Deep or dense swirl patterns | Increase polishing passes with a fresh pad | Maintain light, consistent pressure during passes |
| Pad loads with residue quickly | Polish too aggressively or pad is worn | Use a smaller amount of product and switch pads | Clean pad frequently and replace worn pads |
| Microfiber cloth leaves lint | Low-quality cloth or moisture | Use high-quality microfiber; ensure cloth is dry between uses | Store cloths in a clean, dry area |
| Hazy finish after polishing | Residue left on surface | Wipe with a damp microfiber and then dry | Use a dedicated paint cleaner before final polish |
Common Mistakes
- Using excessive polish or pressure, which can burnish the paint or create new scratches.
- Polishing in direct sunlight or on hot paint, which causes rapid drying and uneven results.
- Failing to clay the surface first, leaving embedded contaminants that scallop the finish.
- Skipping a test spot to confirm compatibility with the paint system.
Tips For Best Results
- Work in shaded, cool conditions to maintain consistent product performance.
- Choose a dual action polisher 6 inch kit for safer, swirl-free correction.
- Use 6 inch foam polishing pads for car detailing appropriate to the panel size to avoid excessive cutting.
- Maintain a clean, lint-free surface with a microfiber polishing cloth kit for car detailing for final buffing.
- For severe cases, consider using a clay bar detailing kit for a smoother base before polishing.
Call A Professional
Stop and seek a pro if the clear coat is peeled, peeling, or damaged beyond cosmetic swirls. If the paint has deep scratches that reveal primer or metal, or if sanding is suspected, a professional detailer or body shop can assess options and prevent further damage.
FAQ
What is the best method to remove paint swirls?
Start with washing, clay bar treatment, and then polish with a dual action polisher using a suitable car swirl remover polish.
Do clay bars remove all swirls?
Clay bars remove surface contaminants and some swirl marks but may be followed by polishing for deeper correction.
Can I use household polish on a car?
Household polishes are not recommended; use automotive swirl removers designed for clear coats.
How often should I polish my car?
Polishing frequency depends on paint condition and exposure; typically every 6–12 months for maintenance, or as needed for cosmetic swirls.
Buying Guide
When selecting products to remove paint swirls, consider size, compatibility, and user experience. For example, an 8 oz car swirl remover polish provides ample product for multiple panels, while a dual action polisher 6 inch kit offers safer correction with manageable motion. Choose 6 inch foam polishing pads for car detailing that suit your panel sizes to balance cutting and finishing. A microfiber polishing cloth kit for car detailing ensures effective buffing without scratching. If the surface has embedded contaminants, a clay bar detailing kit for removing swirl marks can prep the finish before polishing. Consider noise, weight, and ergonomics of the polisher, as well as storage space and budget.