Kitchen walls can accumulate grease, splatters, and fingerprints from everyday cooking. Proper cleaning helps maintain a fresh, sanitary space and protects paint or wallpaper over time. This guide outlines a practical, step-by-step approach using common cleaning tools and safe methods for American homes.
By following these guidance steps, readers can tackle various wall finishes—from flat paint to tile and backsplash—without damaging surfaces. The methods emphasize safety, efficiency, and minimizing downtime in busy kitchens.
Quick Answer
Best overall method: start with a grease-busting spray, then scrub lightly with a stiff-bristle brush for tough spots, followed by a thorough rinse. For stubborn grime or heat stains, a handheld steam cleaner can lift residue without harsh chemicals. Finish with a microfiber cloth to buff to a shine.
What You’ll Need
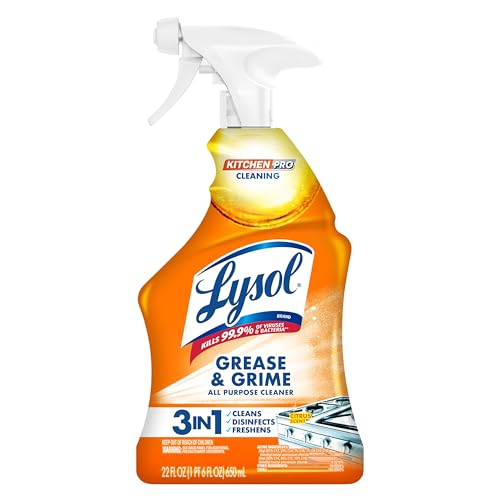
- kitchen wall degreaser spray bottle for cleaning grease
- stiff-bristle wall cleaning brush kitchen grease remover
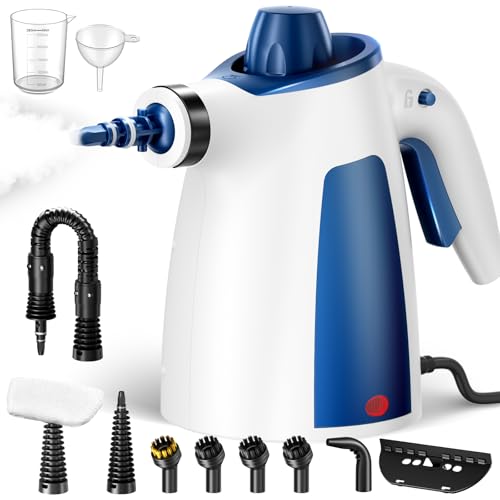
- handheld steam cleaner for kitchen walls
- microfiber cleaning cloths for wall surfaces kitchen
- scrub sponge set for kitchen walls grease removal

Before You Start
Assess wall material and finish before cleaning. Painted walls should be tested in an inconspicuous area for chemical tolerance. For tile or vinyl backsplash, use surfaces-safe cleaners to avoid dulling. Keep children and pets away from the work area. Ventilate the kitchen well and wear gloves to protect skin from cleaning solutions. Time estimates vary by square footage and grease buildup, but plan about 30–60 minutes for a standard kitchen wall section.
Cautions: avoid abrasive scrubbing on delicate wallpapers or freshly painted surfaces. Do not mix cleaners with bleach or ammonia. When using a steam cleaner, maintain a safe distance to prevent moisture from seeping behind wall materials.
Step-By-Step: How To Clean Kitchen Walls Efficiently
- Prepare the area: remove cooking utensils, art, and nearby outlets or switch plates to prevent moisture contact.
- Apply the degreaser: spray a light coat of kitchen wall degreaser spray bottle for cleaning grease on a small, manageable section of the wall.
- Let the product sit: allow 1–2 minutes for grease to emulsify, especially on baked-on splatters near stoves.
- Scrub with a brush: use the stiff-bristle wall cleaning brush kitchen grease remover to work in circular motions on tough spots. Avoid excessive pressure on delicate finishes.
- Rinse and wipe: use a damp microfiber cloth or scrub sponge to wipe away loosened grease and residue. Rinse the cloth frequently to prevent spreading grime.
- Steaming option for stubborn grime: if residue persists, switch to a handheld steam cleaner for kitchen walls. Use low to medium heat and a wide stroke to lift residue without saturating the wall.
- Rinse again: wipe with a clean microfiber cloth to remove any remaining cleaner and loosened dirt.
- Dry and inspect: check for streaks or missed spots. Repeat steps on any stubborn areas, focusing on grease-prone sections such as near the range and sink.
- Finish with a polish: lightly buff with a dry microfiber cloth to restore a uniform sheen and remove fine dust.
- Reassemble the area: return outlets, art, and protective items. Store tools for future touch-ups.
- Maintaining routine: set a monthly or seasonal cleaning plan to prevent heavy buildup and keep walls looking fresh.
Troubleshooting
| Symptom | Likely Cause | Fix | Prevention |
|---|---|---|---|
| Streaks after cleaning | Residue left from cleaner | Wipe with clean water and dry microfiber cloth | Rinse thoroughly after each cleaning |
| Paint dulling or peeling | Harsh chemical exposure or abrasion | Use milder cleaner and soft tools | Test on a small area first; avoid aggressive scrubbing |
| Grease gaps near stove still dirty | Heavy build-up in hard-to-reach areas | Reapply degreaser and use a brush, repeat as needed | Wipe regularly after cooking to prevent buildup |
| Water damage signs | excess moisture during cleaning | Ventilate, let surfaces dry completely | Avoid soaking walls; use damp not soaking wet cloths |
Common Mistakes
- Using abrasive brushes on glossy paint or wallpaper
- Over-wetting walls, especially plaster or wood paneling
- Choosing highly caustic cleaners for delicate finishes
- Skipping a patch test before wide-area cleaning
- Neglecting the area above the backsplash and near vents
Tips For Best Results
- Work from the top down to prevent dirty water from dripping onto cleaned sections.
- Use microfiber cloths for lint-free finishes and rapid drying.
- Keep a consistent cleaning routine to prevent grease from hardening.
- Rotate cleaning tools to avoid cross-contamination between dirty and clean areas.
- Label spray bottles and maintain a dedicated degreaser for kitchen surfaces.
Call A Professional
Consider a professional if walls have extensive grease buildup that does not respond to standard cleaners, if wallpaper is peeling, or if there are signs of water damage or mold. Seek a pro for issues beyond basic cleaning, such as structural concerns or persistent stains that resist conventional methods.
FAQ
Can I use everyday dish soap on kitchen walls?
Yes, mild dish soap with warm water can handle light grease, but for stubborn grime a dedicated degreaser is more effective.
Is steam cleaning safe for painted walls?
Steam can be safe on some painted surfaces, but test first in a hidden spot to avoid moisture damage or paint lifting.
How often should I clean kitchen walls?
Depending on cooking frequency, a light wipe-down weekly and a deeper clean monthly works well for most homes.
What should I do about stubborn grease near vents?
Use the degreaser spray and a stiff brush, then a steam pass if needed, followed by a microfiber wipe.
Can I clean tile backsplashes with the same method?
Yes, tile backsplashes tolerate stronger cleaners; avoid abrasive scrubbing that could scratch grout.
Should I remove outlet covers before cleaning?
Yes, remove outlet covers and clean surrounding areas carefully to prevent moisture intrusion.
What if paint is peeling after cleaning?
If peeling occurs, stop cleaning that area and consult a professional painter to assess touching up or repainting.
Buying Guide
Choosing the right tools and supplies for cleaning kitchen walls involves considering finish, grease levels, and space. When evaluating products, think about size, ease of use, and compatibility with your wall surfaces. The following factors help readers compare options and select effective solutions.
- Size and ergonomics: A spray bottle or handheld applicator should be comfortable for extended use, with a spray that covers a wide area without drips.
- Grease-busting power: Look for products labeled specifically for kitchen grease, as they are formulated to emulsify fats and oils efficiently.
- Surface compatibility: Ensure cleaners and tools are safe for your wall finishes, including painted drywall, tile, vinyl, or wallpaper.
- Sanitizing action: Some products offer additional antimicrobial properties, which can be beneficial in high-traffic kitchens.
- Tool versatility: A stiff-bristle brush, microfiber cloths, and a scrub sponge set provide complementary cleaning power across several wall types.
- Noise and energy use: Steam cleaners vary in noise and power; review decibel levels and energy ratings if available to minimize disruption.
- Storage and replacement parts: Consider how easy it is to replace brush heads or cloths and whether the tools fit standard cleaning caddies.
Is the kitchen ready for a deep clean, or would a quick weekly wipe-down suffice? With the right combination of degreaser, brushes, and soft cloths, kitchen walls can look refreshed without extensive labor. A flexible plan helps homeowners maintain a clean, inviting cooking environment.