Knockdown texture is a common finish on ceilings and walls, but many homeowners prefer a smoother look. This guide walks through practical, paintable methods to remove knockdown texture safely and effectively. It focuses on accessible tools and step‑by‑step procedures that work for typical residential drywall surfaces in the United States.
Quick Answer
For a reliable removal, use a combination of a knockdown texture scraper tool and a drywall scraper knife to loosen the texture, followed by sanding with a drywall sanding block and screens. Address stubborn spots with multiple passes and a fine grit sandpaper, then vacuum and clean thoroughly before repainting.
What You’ll Need
- Knockdown texture scraper tool
- Drywall texture removal scraper knife 6 inch
- Ceiling texture scraper with long handle
- Joint knife drywall scraper 6 inch for texture removal
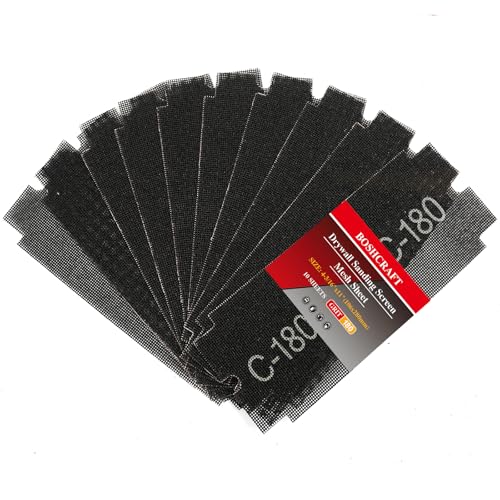
- Drywall sanding block and screens for texture removal


Before You Start
Survey the surface to determine if the texture is vinyl or paper based, as this may affect removal methods. Protect floors and furniture with drop cloths and seal off the room if possible to minimize dust. Work in small sections, and allow for adequate ventilation. Wear eye protection, a dust mask, and hearing protection if using power tools. Expect several hours for a typical room, with more time for larger ceilings.
Step-By-Step: How To Remove Knockdown Texture
- Prepare the area and materials, gathering a knockdown texture scraper tool and a 6 inch scraper knife for texture removal to handle the majority of work.
- Score or lightly mist the texture in the first 2–3 square feet to soften it; this helps the scraper knife penetrate without tearing the drywall paper.
- Using the knockdown texture scraper tool, lift away loose texture in small, controlled motions, keeping the blade at a shallow angle to avoid gouging the drywall.
- Switch to the drywall texture removal scraper knife 6 inch for stubborn areas; work parallel to the ceiling for best control and to minimize marks.
- If the texture is elevated on the ceiling, use the ceiling texture scraper with long handle to reach high spots without a ladder shift; maintain a steady, light pressure.
- For recessed or tight spots, employ the joint knife drywall scraper 6 inch for texture removal to reach corners and ridges without bending the blade.
- After removing the bulk of the texture, switch to a drywall sanding block and screens for texture removal to smooth the surface; use a fine grit (120–150) and light, even strokes.
- Wipe away dust with a damp microfiber cloth and vacuum the area thoroughly; allow the surface to dry completely before priming and painting.
- Inspect for remaining texture and repeat the sanding and scraping steps as needed; apply a thin coat of primer to seal the surface before finishing.
Troubleshooting
| Symptom | Likely Cause | Fix | Prevention |
|---|---|---|---|
| Excessive gouging or paper tear | Blade angle too steep | Reset blade at a shallower angle and use light pressure | Regularly test on a small patch first |
| Dusty, powdery residue after scraping | Drying or over-sanding | Switch to damp cloths and reduce sanding force | Keep room humidity balanced and wipe frequently |
| Uneven finish after sanding | Inconsistent pressure or grit | Use uniform strokes and a finer grit | Progress in a planed, grid pattern |
| Pubbles or peeling primer later | Texture not fully removed | Re-sand and re-prime the affected area | Double-check texture removal before priming |
Common Mistakes
- Rushing the process and causing gouges in the drywall
- Using a dull blade that tears the paper surface
- Neglecting to protect adjacent walls and flooring, leading to dust spread
- Skipping a final sanding pass, leaving ridges or rough patches
- Failing to seal the surface with primer before painting
Taking time to learn the material and technique reduces the risk of damage and yields a smoother final finish.
Tips For Best Results
- Work in well-lit conditions to spot uneven patches and ridges.
- Keep a damp cloth handy to wipe dust between passes and prevent buildup.
- Test a small patch on an inconspicuous area before proceeding widely.
- Use the long-handle scraper for ceilings to minimize ladder use and improve control.
- Prime after the surface is completely dry for optimal paint adhesion and uniform color.
Call A Professional
Consider professional help if the texture covers an extensive area or reveals hidden damage, such as water stains, cracks, or compromised drywall. Signs to seek expert assistance include large sections that crumble, persistent ceiling sagging, or unexpected structural concerns. If you’re unsure about electrical or HVAC interference behind the walls, contact a licensed contractor.
FAQ
Can I remove knockdown texture myself?
Yes, with the right tools and careful technique, many homeowners can remove knockdown texture. Planning and patience reduce risk of damage.
What tools are essential for texture removal?
A knockdown texture scraper tool, a 6 inch drywall scraper knife, a ceiling scraper with a long handle, a joint knife, and a drywall sanding block are commonly used.
Is it necessary to prime after removing texture?
Yes, priming after removal helps seal the surface and improves paint adhesion and finish.
How long does the process usually take?
For a typical room, plan several hours spread across a weekend, depending on ceiling height and texture extent.
What if I encounter water stains or damage?
Address any moisture or structural issues before removal; consult a professional for necessary repairs.
Do I need to repaint after removal?
Yes, repainting is usually required to achieve a uniform look; choose a compatible interior paint and finish.
Are there safer methods than scraping for vinyl textures?
Some vinyl textures can be softened with heat or chemical products, but these methods require careful testing and ventilation. When in doubt, follow manufacturer guidelines.
Buying Guide
When selecting tools for removing knockdown texture, consider size, weight, and grip comfort to reduce fatigue during long sessions. A long-handle ceiling scraper can reduce ladder work, while a 6 inch scraper knife provides precise control for tight areas. Look for durable blades and rust-resistant metal parts for longevity. Noise considerations are usually minimal, but cordless tools may offer more flexibility; ensure you have adequate ventilation when using any power tools. Compare tool sets by included blades, replacement parts, and warranty coverage. Finally, confirm the tools cover both ceilings and walls for future projects.