Disney pins are beloved collectibles that deserve gentle, regular care to keep their luster and value. This guide outlines practical, safe methods to clean enamel and metal pins without risking damage or color fading. Readers will find step-by-step instructions, troubleshooting, and buying tips tailored for American collectors.
Quick Answer
For most Disney pins, use a mild cleaner, a soft-bristled brush, and a microfiber cloth. For stubborn grime, an ultrasonic cleaner on a low setting can help, but test on a hidden area first. Always dry pins completely before storage.
What You’ll Need
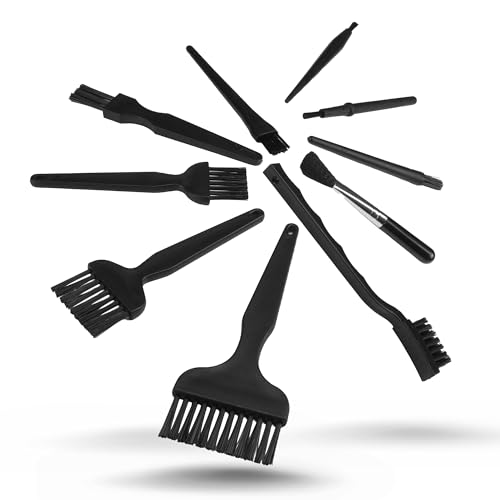
- Enamel pin cleaning brush
- Jewelry cleaning kit soft bristle brush
- Microfiber cloth for jewelry cleaning pins
- Ultrasonic jewelry cleaner small desktop
- Pin cleaning kit brush and cleaning solution set


Before You Start
Before cleaning, inspect pins for loose backs, chipped enamel, or exposed metal. If any backings are loose, secure or replace them to prevent loss during cleaning. Use lukewarm water and a gentle cleaner to avoid scratches. Avoid harsh chemicals, bleach, or abrasive pads, which can damage finish and enamel. Allocate 15–30 minutes for a thorough process and consider cleaning in a bowl to contain splashes.
Step-By-Step: How To Clean Disney Pins
- Remove the pin from any display or card, detaching the clasp if possible to access both sides safely.
- Rinse under lukewarm water to loosen surface grime; never use hot water on enamel pins, which can warp or discolor.
- Apply a tiny amount of mild soap or a dedicated pin cleaning solution to the soft bristle brush.
- Gently brush the metal edges and enamel surfaces in small circular motions, avoiding aggressive scrubbing that could wear enamel.
- Rinse again with lukewarm water to remove all soap residues. Hold the pin at an angle to let water drain away from the pin backs.
- Pat dry with a microfiber cloth, then let air dry completely on a clean surface before reattaching backings.
- For stubborn spots, use the ultrasonic cleaner on a low setting for 2–3 minutes; remove, rinse, and dry thoroughly.
- Inspect the pin for remaining grime. Repeat brushing lightly if needed, focusing on recessed areas of the enamel.
- Reassemble with clean backs and store upright in a soft-lined display or storage tray to prevent scratches.
- Record cleaning dates for routine maintenance and to establish a cleaning schedule aligned with wear and display conditions.
Troubleshooting
| Symptom | Likely Cause | Fix | Prevention |
|---|---|---|---|
| Discoloration on enamel | Aged coating or chemical exposure | Gently re-clean with mild cleaner; avoid strong solvents | Store away from direct sunlight and harsh cleaners |
| Scratches on surface | Rough brushing or abrasive cloth | Switch to softer tools; use microfiber cloth | Handle with care; keep separate from rough items |
| Loose backing after cleaning | Back or clasp damaged | Replace backing or secure with pin back stabilizer | Check backs during cleaning and avoid forcing |
| Enamel chipping near edges | Impact or aggressive scrubbing | Stop cleaning that area; consider professional assessment | Handle pins gently; separate during storage |
Common Mistakes
- Using abrasive pads or bleach on enamel surfaces
- Soaking pins for extended periods, especially with delicate enamel
- Using hot water which can warp metal or loosen enamel
- Brushing too hard on detailed or recessed areas
To avoid damage, stick with gentle methods and test any new cleaner on a hidden area before full cleaning.
Tips For Best Results
- Always dry pins completely before storage to prevent tarnish or rust on metal backs.
- Schedule routine light cleanings to prevent grime buildup rather than deep cleaning from time to time.
- Store pins in a padded container or a pin display with individual slots to minimize rubbing.
- Use a dedicated, small ultrasonic cleaner on low power for best results with minimal risk.
- Label pins by rarity or display area to preserve the value and condition for collectors.
Call A Professional
Seek professional help if a pin has extensive chipping, significant enamel loss, or a damaged clasp that affects wearability. Do not attempt complex repairs at home, especially if the pin is a high-value or vintage Disney piece.
FAQ
Can I clean Disney pins with household soap?
Yes, use a mild dish soap with lukewarm water and a soft brush for routine cleaning.
Is ultrasonic cleaning safe for all pins?
Generally safe on low, short cycles; test first on a hidden area and avoid delicate or heavily enameled pins.
How often should I clean my Disney pins?
Light cleaning every few months and deeper cleanings as needed based on wear and display conditions.
What should I do if enamel is missing or damaged?
Preserve the pin as-is if possible and consider professional restoration options.
Buying Guide
When choosing cleaning tools for Disney pins, consider size, material compatibility, and safety for delicate enamel. A small enamel pin cleaning brush is ideal for tight details, while a jewelry cleaning kit with soft bristles helps on tougher grime. An ultrasonic cleaner provides deeper cleaning but requires careful use to avoid damage. A microfiber cloth helps finish and dry without scratching. For frequent collectors, a dedicated pin cleaning kit with solution offers convenience. Compare sets for included brushes, compatibility with jewelry cleaners, and whether the solution is safe for enamel.
Key Buying Factors
- Size and reach: Compact brushes reach tight spots on small pins.
- Bristle softness: Soft bristles prevent enamel scratching.
- No harsh chemicals: Look for kid-friendly or enamel-safe cleaners.
- Microfiber cloth quality: Lint-free cloths prevent residue.
- Ultrasonic compatibility: Small desktop units are convenient but require caution with pins.
- Backings and storage: Aftercare includes secure backings and padded storage.