Yellow spots in a lawn can be caused by a variety of issues, from nutrient deficiencies to compacted soil or fungal infections. A systematic approach—testing soil, adjusting care, and using targeted tools—helps restore color and health. This guide provides practical steps for American lawns, with simple equipment and safe practices.
By following a structured routine, homeowners can address common causes of yellowing and maintain vibrant turf. The plan emphasizes accurate diagnosis, appropriate applications, and proactive prevention to keep grass looking green and lush year-round.
Quick Answer
Identify the cause (nutrient deficiency, thatch buildup, soil compaction, or disease), test soil pH, and apply targeted treatments. Aerate to relieve compaction, dethatch if thatch is excessive, fertilize as needed with the correct balance, and treat diseases with a suitable fungicide when required. Regular mowing and proper watering complete the routine.
What You’ll Need
- lawn aerator core plug lawn tool
- grass/yard fertilizer spreader granular spreader
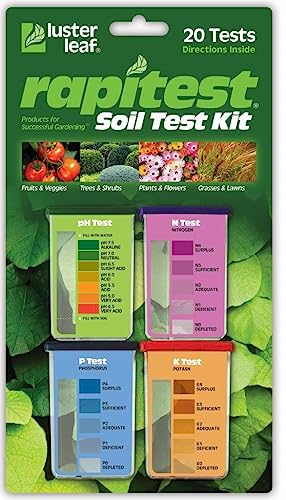
- soil test kit for lawn and soil pH
- lawn dethatcher rake thatch remover
- handheld lawn sprayer for fungicide herbicide


Before You Start
Assess the affected area and plan to work during moderate weather to avoid stress on stressed grass. Wear gloves and protective eyewear when handling chemicals. Clear debris from the lawn and mark irrigation heads to prevent accidental spray. A rough time estimate: testing and diagnosing can take 1–2 hours; treatment and recovery may unfold over several weeks, depending on conditions. Critical cautions: do not apply fertilizer or herbicides during drought, and follow label directions exactly to prevent damage to the lawn and surrounding plants.
Step-By-Step: How To Restore Yellow Grass
- Conduct a soil test to evaluate pH and nutrient levels using the soil test kit for lawn and soil pH. Collect samples from multiple spots, mix, and send or analyze per the kit instructions.
- Identify symptoms: uniform yellowing across the lawn often points to nutrient deficiency or chlorosis, while irregular patches may indicate disease or soil issues.
- Apply a soil amendment if the test shows pH imbalance. Use lime or sulfur as directed to adjust pH toward the optimal range for the grass type in your region.
- Aerate the lawn with a lawn aerator core plug lawn tool to relieve compacted soil. This improves water, air, and nutrient movement to grassroots.
- Remove excess thatch with the lawn dethatcher rake thatch remover if the thatch layer exceeds about half an inch. Reducing thatch helps water and nutrients reach the root zone.
- Apply a balanced fertilizer using the grass/yard fertilizer spreader granular spreader, following the label for rate and timing. Favor a formula appropriate for cool-season or warm-season grasses in your area.
- Water deeply after fertilizing to help nutrients reach the roots. Aiming for about 1 inch of water per week (from rainfall and irrigation) generally supports recovery.
- If yellowing persists in patches, inspect for fungal disease. Use the handheld lawn sprayer for fungicide herbicide to treat affected areas, applying as directed and avoiding overspray on desirable plants.
- Monitor progress over 2–6 weeks. Adjust care by rechecking soil pH and nutrient levels if color improvement stalls or if new yellowing appears.
- Maintain ongoing lawn care: regular mowing at the proper height, timely watering, periodic dethatching if needed, and seasonal soil tests to prevent recurrence.
- For stubborn or widespread yellowing, consider repeating aeration and fertilization cycles, especially after periods of heavy traffic, drought, or winter stress.
- Seasonal adjustments: apply corrective treatments in the growing season when grass readily absorbs nutrients and recovers from stress.
Troubleshooting
| Symptom | Likely Cause | Fix | Prevention |
|---|---|---|---|
| Uniform yellowing across the lawn | Nutrient deficiency or chlorosis | Test soil; adjust nutrients and pH; fertilize as recommended | Annual soil tests; balanced fertilization |
| Patchy yellowing with brown edges | Fungal disease | Apply appropriate fungicide; avoid overwatering | Water at ground level, improve drainage |
| Thick yellow thatch layer | Excess thatch | Use dethatcher to reduce thatch to <1/2 inch | Overseeding and balanced fertilization |
| Soil feels compacted | Soil compaction | Aerate to relieve pressure | Avoid heavy traffic when wet |
Common Mistakes
- Applying fertilizer without knowing soil pH and nutrient needs
- Overwatering after fertilizer or fungicide application
- Waiting too long to address compacted soil or thatch buildup
- Using the wrong fertilizer for the grass species
Tips For Best Results
Plan fertilization around your grass type and growing season to maximize uptake. Aeration and dethatching are most effective when soil is moist but not soggy. Apply lime or sulfur only after confirming pH needs, and follow label directions strictly for any chemical products. Regular lawn maintenance—mowing at the proper height, consistent irrigation, and seasonal soil checks—helps prevent yellow spots from returning.
Call A Professional
Seek professional help if yellowing covers more than half of the lawn, if signs of root rot or severe disease appear, or if the soil tests show severe nutrient imbalances that require specialized amendments. Sudden, extensive yellowing despite basic care may indicate deeper issues such as root pathogens, irrigation system problems, or pesticide sensitivities that warrant expert evaluation.
FAQ
What causes yellow spots on grass?
Yellow spots can result from nutrient deficiencies, pH imbalance, soil compaction, thatch buildup, overwatering, or fungal infections. Correct diagnosis is essential for effective treatment.
How often should I test my lawn soil?
For most lawns, testing once a year in the early spring or fall provides a good baseline. In new or stressed lawns, consider more frequent checks.
Can overseeding help with yellow patches?
Yes, overseeding after addressing soil conditions and thatch can help fill thin or bare areas and promote a healthier lawn recovery.
Do I need to water after applying fertilizer?
Most fertilizers require watering to move nutrients into the root zone. Follow the product label for the recommended amount of water.
When should I apply fungicide?
Apply fungicide only when a disease is diagnosed or strongly suspected based on symptoms and weather conditions. Overuse can harm the lawn and select for resistant strains.
Buying Guide
When selecting tools and products to address yellow spots, consider size, performance, and fit for your lawn. Important factors include:
- <bSize and lawn type: Choose an aerator and dethatcher suitable for your yard size and soil type. Larger, durable tools speed up work on medium to large lawns.
- <bNoise level: If you live in a quiet neighborhood, look for quieter electric or manual options, especially for early morning or evening sessions.
- <bEnergy efficiency: For powered tools, select energy-efficient models and rechargeable batteries with longer life for weekend projects.
- <bControls and usability: Simple controls, adjustable depth for aeration and dethatching, and easy maneuverability improve results and reduce fatigue.
- <bPlacement considerations: Plan your process to avoid irrigation heads, flags, and nearby landscaping beds. Proper spacing ensures even treatment and minimizes damage to existing plants.
- <bAccess to consumables: Spreader compatibility with various granular fertilizers and ease of refilling affects workflow and accuracy.
- <bMaintenance: Regular cleaning and rust prevention extend tool life and keep performance consistent.
Pairing tools with the right consumables—soil testing supplies, fertilizers, and appropriate treatments—helps achieve reliable results. A measured, systematic approach reduces guesswork and supports a healthier, greener lawn over time.