Keeping cupboard doors clean improves the overall look of a kitchen and helps maintain the longevity of finishes. This guide covers simple, effective methods using common household tools. It emphasizes safe surfaces and efficient workflows to minimize effort and disruption.
Quick Answer
Use a microfiber cloth for gentle dusting, then dampen a microfiber cloth with a mild cleaning solution to wipe surfaces. For stubborn grime, employ a plastic scraper tool with care, followed by a squeegee for glass panels. Finish with a spray bottle for targeted spot cleaning and a nylon scrub brush for non-scratch scrubbing on tough spots.
What You’ll Need
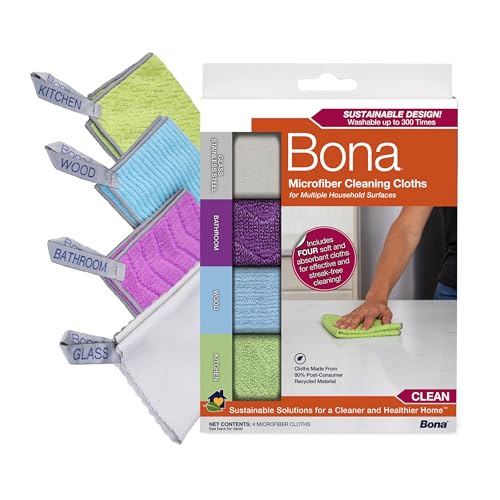
- Microfiber cleaning cloth set for cabinet doors
- Nylon scrub brush for kitchen cabinet doors non-scratch
- Plastic scraper tool for cabinet door grime
- Squeegee for glass cabinet doors cleaning
- Trigger spray bottle for cleaning solutions cabinet maintenance


Before You Start
Before cleaning, remove items from shelves to give full access to doors. Test any cleaner on a hidden area to ensure it does not damage finishes. Work in a well-lit area and use warm water for better grime removal. Protect surrounding surfaces and avoid excessive moisture that can seep into joints. Estimate 20–40 minutes for a standard kitchen, longer for larger spaces or intricate door profiles.
Step-By-Step: How To Clean Cupboard Doors
- Dust the doors thoroughly with a dry microfiber cloth to remove loose dirt before wet cleaning.
- Prepare a mild cleaning solution in the spray bottle—water with a small amount of gentle dish soap is usually sufficient.
- Lightly mist the door surface and wipe with a microfiber cloth, moving in the direction of the grain if wood or along the door panels.
- For stubborn smudges, use a nylon scrub brush for kitchen cabinet doors non-scratch on small, inconspicuous areas, then wipe away residue with a clean cloth.
- Use a plastic scraper tool for cabinet door grime to lift away stuck-on grime without scratching the finish. Hold the scraper at a shallow angle and work gently.
- For glass cabinet doors or panels, finish with a squeegee for glass cabinet doors cleaning to remove streaks and moisture, pulling from top to bottom.
- Wipe down any moisture with a dry microfiber cloth to prevent water spots, especially on wood finishes or painted surfaces.
- Apply spot cleaner to a cloth and treat any remaining marks or fingerprints with a targeted approach.
- Rinse your cloth frequently and repeat steps as needed to maintain a spotless look across all panels.
- Return items to the shelves once doors are fully dry to prevent new grime from forming on damp surfaces.
- Inspect hinges and hardware during the process for any signs of wear or looseness and address afterwards if necessary.
- Keep a routine schedule, such as a light weekly wipe and a deeper clean every 4–6 weeks, to preserve the finish.
Troubleshooting
| Symptom | Likely Cause | Fix | Prevention |
|---|---|---|---|
| Streaks after cleaning | Water spots or soap residue | Wipe with a dry microfiber cloth after each pass | Rinse cloth often; use minimal cleaner |
| Scratches appear on wood or painted doors | Rubbing too hard with rough tools | Switch to softer cloths and avoid metal scrapers | Test cleaners first; follow grain direction |
| Grime resists removal | Built-up grease | Apply a slightly stronger, mild cleaner and let it sit briefly before wiping | Clean regularly to prevent buildup |
| Finish dulls over time | Harsh cleaners or moisture damage | Use mild cleaners; wipe dry after cleaning | Limit moisture exposure; use appropriate products for wood vs. laminate |
Common Mistakes
- Using abrasive scrubbers that scratch surfaces
- Over-wetting doors, especially on wood or veneer finishes
- Choosing strong solvents that may break down paints or finishes
- Neglecting to dry surfaces after cleaning
By avoiding these missteps, homeowners can keep cabinet doors looking fresh without damaging the finish or hardware.
Tips For Best Results
- Establish a quick daily wipe routine using microfiber cloths to prevent grime buildup.
- Keep a dedicated spray bottle filled with a mild solution for fast spot cleaning.
- Use the squeegee mainly on glass doors to achieve streak-free results.
- Rotate cleaning tasks to cover all door faces, edges, and hardware during each session.
- Store cleaning tools in a labeled kit for easy access during maintenance.
Call A Professional
Consider calling a professional if cabinet doors show extensive water damage, bubbling veneer, peeling paint, or loose hinges that require adjustment. Stop cleaning if finishes appear discolored or swollen, or if hardware is corroded and needs replacement.
FAQ
Can I use vinegar to clean cabinet doors?
Vinegar is a mild cleaner that works on many surfaces, but test first on finished wood and avoid prolonged exposure to avoid possible damage.
Should I remove doors for cleaning?
Removing doors can help access all surfaces, but a full wipe-down with doors in place is often sufficient for routine cleaning.
How often should I deep clean cabinet doors?
A deep clean every 4–6 weeks is common for high-use kitchens, with lighter weekly wipe-downs in between.
What’s the best way to clean glass cabinet doors?
Use a microfiber cloth with a light cleaning solution and finish with a squeegee to remove streaks.
What if doors are squeaky after cleaning?
Lubricate hinges with a suitable product and tighten any loose screws to restore smooth operation.
Buying Guide
Choosing cleaning tools and accessories for cabinet doors depends on door material, finish, and layout. Consider size and accessibility, noise level, energy efficiency of tools (where applicable), controls, and placement. For example, microfiber cloths are gentle on finishes and versatile for most surfaces, while a nylon scrub brush provides targeted scrubbing on stubborn grime without scratching. A plastic scraper offers controlled removal of stuck-on grime, and a squeegee is ideal for glass panels. A reliable trigger spray bottle keeps cleaning solutions ready for quick jobs. When selecting tools, prioritize durability, ease of use, and compatibility with your cabinet material. Think about your typical cleaning area (under-sink, pantry, or island) to choose a kit that minimizes trips and maximizes coverage.
Since cabinet surfaces vary—laminate, wood veneer, painted MDF, or glass—matching cleaning tools to the surface helps maintain long-term beauty. For high-traffic kitchens, consider a slightly stronger but still gentle cleaner and regularly inspect hardware for wear. If you’re unsure about a product’s safety for your finish, test on a small, inconspicuous area before full use. Finally, keep your kit organized in a bin or caddy for quick access during routine cleaning.