Wax mishaps can happen in kitchens, living rooms, and craft spaces. A quick, methodical cleanup protects surfaces and fabrics while preventing staining. This guide covers practical steps, the right tools, and common mistakes to avoid when removing candle wax, paraffin, or drips from various materials.
Whether you’re dealing with a small dribble on a table or a larger spill on upholstery, the following approach helps restore surfaces without damage.
Quick Answer
Contain the spill by letting the wax cool and solidify, then scrape excess wax with a safe tool, use a heat source to soften remaining wax, and finish with spot cleaning to lift stains from fabrics or hard surfaces.
What You’ll Need
Gather tools and supplies designed for wax cleanup. The items below cover most situations, from hard surfaces to fabrics.
- candle wax spill cleanup kit with scraper and towels
- paraffin wax removal scraper tool
- high temperature heat gun for wax removal
- microfiber cloths for wax spill cleanup
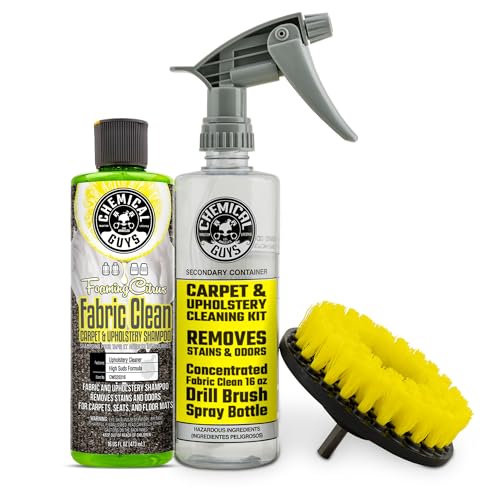
- wax stain remover kit for fabrics and upholstery

Before You Start
Prepare the area by protecting nearby surfaces with newspaper or a drop cloth. Ventilate if you’re using heat tools. Test any cleaner on an inconspicuous spot first to avoid damage. Time estimate: 15–45 minutes for minor spills, longer for large stains. Important cautions: hot tools can burn skin and damage heat-sensitive surfaces; never leave a running heat gun unattended.
Step-By-Step: How To Clean Wax Effectively
- Let the wax harden naturally or chill with a few minutes of cold packs. This makes removal easier and minimizes spreading.
- Scrape away excess wax gently using the paraffin wax removal scraper tool or a plastic card. Hold the blade flat to avoid gouges on the surface.
- Apply a heat source to the remaining wax. Move the high temperature heat gun for wax removal slowly in a sweeping motion at a safe distance to soften wax without scorching the surface.
- Blot with a microfiber cloth to lift softened wax. Press gently, avoiding rubbing which can push wax deeper into fabric fibers or porous surfaces.
- Repeat as needed until most of the wax is gone. If residue remains on fabric, switch to a wax stain remover kit for fabrics and upholstery and follow product directions.
- Clean the area with a suitable cleaner for the surface. For fabrics, apply a stain remover and blot; for hard surfaces, wipe with a damp microfiber cloth and a mild cleaner.
- Rinse and dry thoroughly. Ensure no cleaner residue remains, then let air dry. For upholstery, blot with a dry towel to remove moisture.
- Inspect for dull spots or stains. If needed, repeat treatment on fabrics or apply a small amount of the stain remover kit to the affected area.
- Protect the area after cleaning by applying a conditioner or fabric protector if appropriate for the material, especially on porous wood or natural fibers.
- Dispose of waste responsibly by sealing used wipes and wax fragments in a bag and discarding them with regular trash.
- Store tools properly in a cool, dry place away from children and pets to prevent accidents during future spills.
Troubleshooting
| Symptom | Likely Cause | Fix | Prevention |
|---|---|---|---|
| Wax left on fabric after cleaning | Deep set stain or heat applied too long | Use wax stain remover kit for fabrics and upholstery per directions and repeat | Test in a hidden area first; apply minimal heat |
| Streaks or hazy film on wood or glass | Chemical residue or improper drying | Wipe with a damp microfiber cloth, then dry; use appropriate cleaner for the surface | Rinse thoroughly and dry promptly |
| Rubbing spreads wax further | Too much force or rubbing with cloth | Switch to light blotting motions with clean cloth | Work from the outer edge toward the center |
| Heat gun causes discoloration | Overheating sensitive surfaces | Lower the heat setting or move farther away; test first | Use painter’s tape to shield nearby areas |
Common Mistakes
- Using aggressive rubbing on fabric, which embeds wax deeper
- Relying solely on heat without blotting and cleaning residues
- Not testing cleaners on hidden areas before broad application
- Waiting too long to address spills, which makes stains harder to remove
By avoiding these missteps, wax cleanup becomes significantly more predictable and less messy.
Tips For Best Results
- Proceed in layers: cool, scrape, heat, blot, clean, and repeat as needed.
- Keep the heat gun moving to prevent scorching. Maintain a safe distance from the surface.
- For upholstery, always check fabric care labels before applying cleaners or heat.
- Use microfiber cloths for their high absorbency and gentle texture on delicate surfaces.
- Store wax-cleaning products with clear instructions and safety warnings for quick access during future spills.
Call A Professional
Contact a professional if any of the following apply: a large spill on hardwood finished floors, significant wax intrusion into upholstery cushions, or persistent staining after multiple cleanup attempts. If a surface is cracked, warped, or if cleaning could affect structural integrity, seek expert help promptly.
FAQ
What should I do first when a wax spill happens?
Allow the wax to cool and harden, then carefully remove with a scraper before addressing any stains.
Can I use a hairdryer instead of a heat gun?
Hairdryers provide lower heat and slower results; a dedicated heat gun gives better control for wax removal on most surfaces.
Is it safe to use cleaners on wood or laminate after removing wax?
Yes, but choose a cleaner appropriate for the finish and test on a hidden spot first.
How do I prevent wax from staining fabrics?
Use a dedicated wax stain remover kit for fabrics and upholstery after the initial wax removal steps.
Are wax stains permanent on dark fabrics?
Some stains may be stubborn; repeat treatment with the stain remover kit and consider professional cleaning if needed.
Buying Guide
When selecting products for wax cleanup, consider size, effectiveness, and surface compatibility. Key buying factors include:
- Size and portability: A compact kit with a scraper and towels is convenient for quick spills, while larger kits handle bigger messes.
- Effectiveness on fabrics: A dedicated wax stain remover kit for fabrics and upholstery ensures better stain lifting without fiber damage.
- Heat tool performance: A high temperature heat gun offers controlled heat for faster wax softening on various surfaces.
- Surface compatibility: Tools should be safe for wood, glass, fabric, and upholstery; avoid tools that can scratch or warp surfaces.
- Cleaning towels and cloths: Microfiber cloths provide excellent absorption and residue-free cleanup.
- Ease of use and safety features: Look for ergonomically designed scrapers and safety guards on heat tools.
For best results, compare kits that provide a balanced mix of scraping tools, heat application options, and fabric-safe cleaners. Consider your typical spill scenarios—kitchen drips, candle mishaps near furniture, or fabric messes in living spaces—and choose a setup that covers those needs. Is a single multi-tool kit sufficient, or do you prefer specialized items for fabric and hard surfaces? Your answers guide the right purchase choice.