Keeping kitchen floor grout clean can dramatically improve the look of ceramic tiles and extend the life of the grout itself. This guide provides practical, step-by-step methods using common cleaning tools and products that are readily available in American homes.
Quick Answer
Best overall method: combine a grout brush with a reliable grout cleaner spray, then finish with steam if stubborn stains remain. For metal-heavy kitchens or epoxy grout, consider a dedicated epoxy grout cleaner kit. Regular maintenance prevents deep staining and protects tile integrity.
What You’ll Need
- Grout cleaning brush with long handle for kitchen
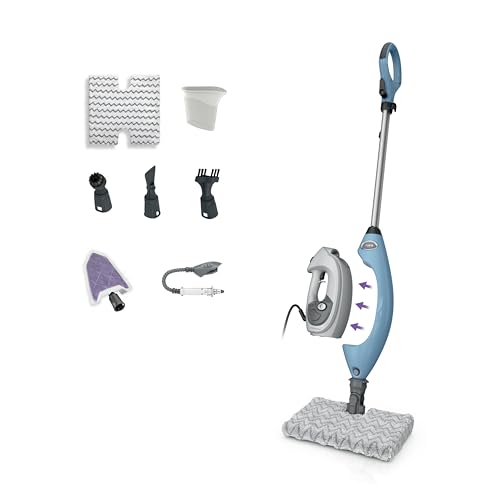
- Steam mop grout cleaner for kitchen floor
- Grout cleaner spray for ceramic tile and grout
- Tile and grout cleaning kit with scrub brushes
- Epoxy grout cleaner kit for kitchen floor


Before You Start
Assess the grout type and tile surface before cleaning. Most ceramic and porcelain tiles use cementitious grout, which responds well to standard cleaners, but epoxy grout requires gentler, specialized products. Always test a small, inconspicuous area first to avoid discoloration. Work in sections to prevent solution evaporation from reducing effectiveness. Time estimate: 30–90 minutes for a typical 12×12 foot area, depending on grout condition. Avoid acidic cleaners on marble or natural stone; follow manufacturer recommendations for sealers.
Safety notes include wearing gloves and ensuring good ventilation. If the kitchen floor area is larger or heavily soiled, plan for multiple sessions rather than rushing the job.
Step-By-Step: How To Clean Kitchen Floor Grout
- Prepare the area by sweeping or vacuuming loose dirt and debris from the floor to prevent grinding particles into the grout.
- Dip the grout brush with a long handle into a warm cleaning solution or apply grout cleaner spray directly to the grout lines.
- Scrub grout lines with a firme, circular motion, focusing on discolored sections first. Maintain a steady grip to avoid scuffing tiles.
- For stubborn stains, let the cleaner sit for 5–10 minutes. Reapply and scrub again to break down embedded dirt.
- Use a steam mop grout cleaner for a deep clean on sealed grout. Run the steam head along grout lines slowly to lift grime.
- Wipe up wet cleaning solution with a clean microfiber cloth or towel to prevent new dirt from re-attaching to grout.
- Rinse the area with clean water and re-scrub any remaining spots. Ensure grout lines are dry to prevent mold growth.
- Optionally apply a grout sealer after the grout dries completely, following product directions for best results.
Troubleshooting
| Symptom | Likely Cause | Fix | Prevention |
|---|---|---|---|
| Dull or chalky grout after cleaning | Residual cleaner or mineral deposits | Rinse thoroughly; repeat cleaning with clean water | Rinse frequently during cleaning |
| Discoloration returning after a week | Porous grout absorbing oils or spills | Apply a grout sealer suitable for the grout type | Seal grout after cleaning and re-seal as recommended |
| Scrubbing wears away grout | Overly aggressive cleaning or harsh chemicals | Switch to gentler cleaners and use a softer brush | Regular, light maintenance |
| Mold or mildew on grout | Moist environment and insufficient drying | Use a mold-inhibiting cleaner and ensure floors dry well | Improve ventilation and dry floors after cleaning |
Common Mistakes
- Using acidic cleaners on epoxy grout or sensitive tile surfaces
- Letting solution sit too long, which weakens grout integrity
- Using hard-bristled brushes that abrade grout
- Skipping a rinse step, leaving residue that attracts more dirt
Tips For Best Results
- Test cleaners on a tiny grout section before full application to avoid staining.
- Work in small, manageable sections to keep the process efficient.
- Pair brushing with a steam mop for tough kitchens with heavy grime buildup.
- Consider a grout sealing product after a thorough cleaning to extend freshness.
Call A Professional
Seek professional help if grout is severely cracked, crumbling, or stained beyond routine cleaning. Stop and contact a pro if:
- Large areas of grout show extensive deterioration or crumble
- Tiles are lifting or there is slipping/grout failure underfoot
- Stubborn stains persist after multiple cleaning attempts
FAQ
Can I use bleach to clean kitchen grout?
Bleach can brighten grout but may damage colored grout or underlying tiles. Use diluted bleach solutions with caution and rinse thoroughly.
Is steam cleaning safe for all grout types?
Steam is effective on many cementitious grouts, but check product guidelines for epoxy grout and sensitive tiles.
How often should grout be cleaned in a busy kitchen?
Clean grout every 1–3 months, or more often if heavy cooking spills are common.
Should I seal grout after cleaning?
Yes, sealing helps protect grout from stains and moisture. Follow the sealant’s instructions for cure time and reapplication intervals.
What if grout color changes after cleaning?
Color changes can result from cleaner residues; rinse well or try a color-safe cleaner made for grout.
Does epoxy grout require special cleaners?
Yes, epoxy grout is more resistant but needs gentler, epoxy-specific cleaners to avoid dulling or damage.
What tools work best for large kitchens?
A long-handle grout brush combined with a steam mop can speed up coverage while protecting your back.
Buying Guide
Choosing the right grout-cleaning setup depends on tile type, grout composition, and kitchen conditions. Consider these factors to help select the best tools and products.
- Grout type and tile material: Cementitious grout vs epoxy grout; different cleaners suit each type.
- Cleaning power vs. tile safety: Look for products that remove grime without scratching or discoloring tiles.
- Tools and ergonomics: A long-handled grout brush reduces bending; a steam mop speeds up deep cleaning.
- Sealing and maintenance: A good sealer adds protection after cleaning; plan for periodic reapplication.
- Noise, energy use, and runtime: Evaluate steam mop noise levels and energy efficiency when choosing models.
- Placement and layout: Choose tools that fit around cabinets and appliances without crowding the workspace.
- Safety and skin sensitivity: Use gloves and ensure ventilation; avoid harsh chemicals on sensitive skin.
- Budget and availability: Compare kits that include brushes, cleaners, and stains inhibitors to maximize value.
Are you balancing convenience with performance? A combined approach—grout brush, spray cleaner, and optional steam mop—often delivers the cleanest, most consistent results for a typical kitchen floor. For homes with persistent staining or epoxy grout, consider specialized kits designed specifically for that grout type. By selecting the right tools and following a routine, grout can stay bright and resilient for years.