Leather seats with holes or tears require a careful approach to cleaning and restoration. This guide outlines practical steps to clean, protect, and repair leather upholstery in cars, using common repair kits and color-matching dyes. The goal is to maintain appearance, extend life, and prevent further damage while avoiding overuse of fillers or heat that might damage the leather.
Readers will learn how to assess damage, prep the area, apply repairs, and restore color with compatible dyes. The methods emphasize safety, proper materials, and a balanced routine for routine maintenance and emergency fixes.
Quick Answer
Clean first, repair second, color match last. Gently remove surface grime, then apply targeted patches or filler for holes, followed by heat-activated patches or dye kits to blend color and seal repairs. Always test color on a hidden area before full application.
What You’ll Need
Gather tools and materials in advance to keep the process smooth. The list below combines essential items with product options designed for car leather care and repair.
- Leather cleaning and conditioning kit for car seats
- Leather upholstery repair kit with heat-activated patches
- Car leather repair kit with patches and filler
- Hole patch repair kit for leather car seats
- Color-matching leather dye kit for car seats
- Soft microfiber cloths and applicators

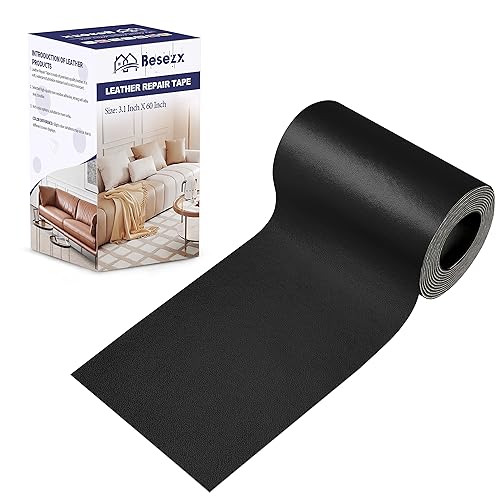
Before You Start
Review the following prerequisites to reduce risk and improve results. Protect the surrounding area with a drop cloth and work in a well-ventilated space. Use gloves and test cleaners on a hidden spot to ensure no dye or filler reacts negatively. Expect a multi-step process: cleaning, repairing, and color matching. Time estimates range from 1 to 3 hours depending on damage depth and kit type.
Step-By-Step: How To Clean Leather Seats With Holes And Minor Damage
- Clean the surface: Use the leather cleaning and conditioning kit for car seats to remove dirt and oils. Wipe with a soft microfiber, then let dry completely.
- Assess damage: Inspect holes to determine size, depth, and whether backing material is exposed. Light scuffs can be treated differently from deeper holes requiring patches.
- Choose repair method: For small holes, use hole patch repair kit for leather car seats or leather repair kit with patches and filler. For larger areas, consider heat-activated patches to bond effectively.
- Apply filler or patch: If using filler, follow kit instructions to apply evenly, pressing to fill voids. For patches, cut to shape, align edges, and press firmly to seat surface until secure.
- Let set and cure: Allow the filler or patch to cure as directed, often 15–60 minutes. Avoid heavy use during this period.
- Color match: Use color-matching leather dye kit for car seats. Test color on an inconspicuous area, then apply gradually with a fine brush or sponge, blending where edges meet intact leather.
- Seal and protect: After color dries, apply conditioner to restore suppleness and add a protective top coat if the kit includes one.
- Inspect final result: Look for uniform color, smooth texture, and no adhesive edges showing. If needed, lightly retouch with dye and seal again.
- Clean transitions: Wipe with a clean cloth to remove excess dye and ensure a consistent finish across the seat surface.
- Maintain ongoing care: Schedule regular cleaning and conditioning every 3–6 months to prevent new cracks and keep color vibrant.
- Document process: Take photos before and after repairs to track progress and guide future touch-ups.
- Evaluate seating comfort: Confirm that repaired areas don’t stiffen or creak under pressure; reapply conditioner if necessary.
Troubleshooting
| Symptom | Likely Cause | Fix | Prevention |
|---|---|---|---|
| Color looks uneven | Inadequate dye coverage or wrong shade | Reapply dye in thin layers, blend edges | Test shade on hidden area first |
| Filler cracks after drying | Over-thinning or rapid drying | Apply thicker layer or slower-drying formula | Follow cure times precisely |
| Patch edge visible | Edge not pressed firmly or incorrect patch size | Re-secure patch, trim edges to blend | Cut patch slightly larger than hole for overlap |
| Leather feels sticky | Excess dye or sealant | Wipe with clean cloth and light conditioner | Test small area first |
Common Mistakes
- Using a dye shade that’s too dark or too light for the seat color
- Overfilling holes, creating raised patches
- Skipping the curing time, resulting in weak bonds
- Neglecting conditioning after dyeing, causing stiffness and cracking
- Improper patch alignment, leaving visible edges
Sticking to gradual steps and testing in hidden areas helps avoid these issues and yields a more professional finish.
Tips For Best Results
- Work in small, controlled sections to maintain color continuity
- Keep a consistent grip and angle when applying dye for uniform coverage
- Choose dye and patch materials that are specifically designed for automotive leather
- Condition after every repair to restore flexibility and extend longevity
- Document color codes or kit batch numbers for future touch-ups
Call A Professional
Seek professional help if the holes are extensive, the seat leather is severely cracked, or color adherence is unreliable. Stop and contact a pro if:
- The hole is larger than a few inches or multiple holes are present
- There is leather tearing from stitching or structural backing
- Color repair requires multiple dye shades to match complex tones
- There is unfamiliar odor, excessive dye bleed, or heat damage during curing
FAQ
Can I repair a hole in leather without removing the seat?
Yes, most patches and fillers are designed for in-situ application, but ensure you have good access and enough room to work on the area.
Will color matching always be perfect?
Color matching is highly dependent on the existing finish and lighting. Test on a hidden spot and expect minor blending work.
How long does a typical repair take?
Most repairs take 1–3 hours including curing and color matching, depending on damage complexity.
Is it safe to use heat-activated patches on all leather types?
Heat-activated patches work with many automotive leathers but test first on a hidden area and follow kit instructions for heat exposure.
Should I replace the seat cover if holes are extensive?
Extensive damage may require professional assessment for possible seat panel replacement or full reupholstery.
Buying Guide
Choosing the right tools and products for leather seat repair involves considering size, color range, and compatibility with automotive interiors. Here are key factors to evaluate:
- Size and scope: For multiple small holes, a patch-and-filler kit may suffice; for large damaged areas, consider heat-activated patches and a color-matching dye kit that covers broad tones.
- Noise and odor: Look for low-odor cleaners and fast-drying dyes to minimize fumes inside the cabin.
- Energy efficiency and ease of use: Kits with simple application steps save time and reduce waste; choose those with clear instructions and included applicators.
- Controls and consistency: A reliable dye kit should offer a consistent color match across the entire seat; check for color codes and swatch options.
- Placement considerations: Ensure kits are designed for automotive interiors and can be used safely on seat seams, contours, and patches without affecting airbags or seat mechanisms.
For most readers, a combined approach using a leather cleaning and conditioning kit along with a color-matching dye kit and a leather repair kit with patches provides a comprehensive, versatile solution. If color and texture vary significantly across a seat, consider consulting a professional for a seamless blend and durable protection.