Cleaning walls can refresh a room without expensive products. Vinegar offers a biodegradable, streak-free option that dissolves dirt and grease while being gentle on most painted surfaces. This guide covers safe methods, tools, and common issues when using vinegar to clean interior walls.
Quick Answer
Mix equal parts white vinegar and water in a spray bottle, test a small area, wipe with a microfiber cloth, and rinse with a clean damp cloth. For tougher marks, use a soft-bristle brush or non-scratch scrub sponge, then dry with a microfiber cloth.
What You’ll Need
- vinegar wall cleaner spray bottle — for easy, controlled application
- microfiber wall cleaning cloths set — gentle on paint, lint-free
- soft bristle wall cleaning brush — tackles textured surfaces
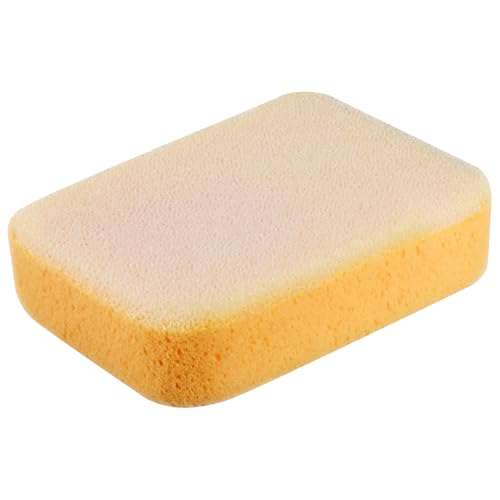
- scrub sponge for walls microfiber — for stubborn stains
- extendable wall duster for cleaning walls — reach high or vaulted areas


Before You Start
Prepare a small, inconspicuous test area in case of dye transfer or color fading. Use low-pressure spray to avoid saturating the wall, especially on drywall or unsealed surfaces. Work in sections, start from the top and move downward to prevent streaks. Ventilate the room and protect nearby furniture or floors with a drop cloth. Time to complete depends on wall size, typically 30–60 minutes for standard rooms.
Step-By-Step: How To Clean Walls With Vinegar
- Fill a vinegar wall cleaner spray bottle with a 1:1 solution of white vinegar and water.
- Test the solution on a hidden area; wait 1–2 minutes and blot dry to assess any color change.
- Lightly mist the wall in a small section, beginning at the top corner, to dampen dust and grime.
- Wipe with microfiber wall cleaning cloths set, using gentle, circular motions to lift dirt.
- For stubborn marks, switch to the soft bristle wall cleaning brush or scrub sponge for walls microfiber and apply light pressure.
- Rinse the area with a clean, damp microfiber cloth to remove vinegar residue.
- Dry the wall with a dry microfiber cloth to prevent drips and streaks.
- Move to the next section and repeat until all walls are clean.
- For high ceilings or hard-to-reach spots, extend your reach with the extendable wall duster for cleaning walls.
- Inspect for missed spots; treat only those areas with the damp cloth, then dry again.
- Store vinegar and tools in a cool, dry place away from sunlight to preserve effectiveness.
Troubleshooting
| Symptom | Likely Cause | Fix | Prevention |
|---|---|---|---|
| Streaks after wiping | Over-wetting or uneven drying | Wipe with a dry microfiber cloth and ensure even dampness | Wipe in smaller sections; use a consistent motion |
| Discoloration on painted walls | Acid sensitivity or dye bleed | Test area first; dilute vinegar more or reduce frequency | Limit vinegar frequency on delicate finishes |
| Persistent grease marks | Grease buildup | Apply a stronger concentration of vinegar or a light scrub with the sponge | Regular light cleaning to prevent buildup |
| Walls feel sticky after cleaning | Residue from soap or cleaners | Rinse thoroughly with clean water and dry | Always rinse after vinegar cleaning |
Common Mistakes
- Using vinegar on waxed or heavily painted surfaces without testing first
- Soaking walls or allowing standing liquid to sit on surfaces
- Using abrasive tools on delicate walls or wallpaper
- Neglecting to dry walls, leading to water stains or mold growth in damp areas
Tips For Best Results
- Always start with a small test patch to confirm compatibility with paint and finish.
- Work in a cool, shaded room to prevent quick drying and streaks.
- Combine microfiber cloths with gentle pressure for efficient dirt removal.
- Use extendable tools to minimize ladder work on high walls and ceilings.
- Label and separate cleaning tools used on walls from those used on highly soiled areas to avoid cross-contamination.
Call A Professional
Consider a pro if walls have extensive grease, smoke damage, or stains that vinegar cannot remove. Seek help for large water damage, peeling paint, or suspected mold growth. If you notice bubbling, cracking, or paint detachment after cleaning, stop and consult a professional painter or remediation specialist.
FAQ
Can vinegar remove grease from walls?
Yes, a vinegar and water solution helps dissolve grease and fingerprints on many painted surfaces.
Is vinegar safe for wallpaper?
Test first on an inconspicuous area; some wallpapers may be damaged by moisture or acidity.
How often should I clean interior walls with vinegar?
Light cleaning every few months is usually enough; increase frequency in kitchens or high-traffic areas.
What if vinegar leaves a scent?
Ventilate the room and wipe with a clean damp cloth; the scent should dissipate quickly.
Buying Guide
When selecting products to clean walls with vinegar, consider size, compatibility, and ease of use. Key buying factors include:
- Vinegar Wall Cleaner Spray Bottle: A dedicated bottle with measured spray ensures even coverage and reduces waste.
- Microfiber Wall Cleaning Cloths Set: Choose lint-free fabrics that won’t scratch paint or wallpaper.
- Soft Bristle Wall Cleaning Brush: Helpful for textured surfaces and corners where dust accumulates.
- Scrub Sponge For Walls Microfiber: Effective for stubborn marks without damaging surfaces.
- Extendable Wall Duster For Cleaning Walls: Reaches high walls, ceilings, and alcoves without ladders.
Additional considerations: surface type (painted, wallpaper, tile), finish sensitivity, storage space, and user comfort with handle length and grip. For most homes, a simple 1:1 vinegar solution with these tools provides reliable results, while higher-traffic areas may benefit from a slightly stronger solution or targeted brushing. Compare items based on build quality, reusability, and warranties where available.