Venetian blinds add crisp, clean lines to rooms, but keeping them dust-free can be a challenge. This guide provides practical, step-by-step methods using common tools and specifically recommended cleaning tools to simplify the process for American households.
Quick Answer
Best initial approach: Start with a dry dusting using a long, extendable tool to reach both sides of the slats. For stubborn grime, a light damp wipe with a microfiber sleeve is effective. Vacuum attachments can remove loose dust and grit without taking blinds down.
What You’ll Need
Gather these items to cover most cleaning scenarios for Venetian blinds:
- Extendable duster for Venetian blinds
- Vacuum attachment for blinds cleaning
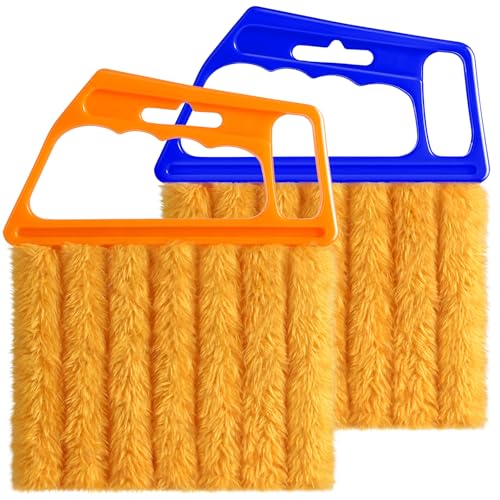
- Slat brush for Venetian blinds
- Microfiber blind cleaning kit
- Telescoping blind duster with microfiber sleeves


Before You Start
Prepare the area by taring back or covering furniture and floors to catch falling dust. Close the blinds to expose the slats evenly. Start with a dry approach to minimize moisture on wood or faux-wood blinds. Important safety note: unplug nearby electrical devices if you plan to use a powered vacuum and avoid wetting any window frames aggressively to prevent damage.
Step-By-Step: How To Clean Venetian Blinds
- Prepare your tools: choose an extendable duster or a telescoping blind duster with microfiber sleeves for the widest reach and gentle cleaning.
- Dust the top and bottom edges: begin at the top slats and work downward, sweeping along both front and back sides to remove loose dust.
- Slam-dusting technique for stubborn dust: for tight spaces, use a slat brush to dislodge dust trapped between slats without bending them.
- Spot-clean areas with grime: for oily or greasy spots, lightly dampen a microfiber sleeve and wipe; avoid saturating the blinds.
- Vacuum for a thorough pass: use the vacuum attachment to capture loosened dust from each side if you see residual grit before lowering the blinds.
- Flip and repeat: raise and lower the blinds or flip to the other side and repeat the cleaning motion to address all surfaces evenly.
- Dry the blinds: allow any damp spots to air-dry, or run a dry sleeve over them to wick moisture away.
- Finish with a final dusting: complete a second pass with a dry extendable duster to pick up any remaining particles.
- Periodic deep clean: remove the blinds for a more thorough wash if the slats accumulate sticky residue or heavy grime over time.
- Reassemble and inspect: once dry, rehang and check for areas that may require another light pass.
- Maintenance cadence: perform a light weekly dusting and a deeper clean monthly to maintain brightness and airflow.
Troubleshooting
| Symptom | Likely Cause | Fix | Prevention |
|---|---|---|---|
| Blinds remain dusty after cleaning | Residue in hard-to-reach gaps | Use a slat brush along each groove and repeat with an extendable duster | Regular quick dust passes, especially in high-traffic rooms |
| Slats warp or bend while cleaning | Excessive moisture or rough scrubbing | Use a dry or barely damp microfiber sleeve and gentle strokes | Limit moisture and avoid aggressive scrubbing |
| Streaks on slats after damp wipe | Water marks or cleaning solution residue | Wipe with a clean, dry microfiber cloth after damp cleaning | Rinse microfiber sleeves regularly |
| Allergies flare after cleaning | Dust particles released during cleaning | Wear a mask and use a vacuum with a HEPA filter attachment | Seal off the area temporarily and dust before vacuuming |
Common Mistakes
- Over-wetting the slats, especially wood or faux-wood types, which can cause warping or finish damage.
- Using abrasive brushes that scratch the surface of the slats.
- Skipping the back side—dust collects on both faces and can be dusty from one side only.
- Forgetting to clean the window frames and surrounding ledges, where dust can re-settle onto blinds.
Tips For Best Results
- Work methodically by window: clean one blind at a time to avoid dust spreading to open areas.
- Leverage reach: extendable tools help clean high or hard-to-reach blinds without ladders.
- Protect surfaces: place a drop cloth or towels under blinds during any damp cleaning.
- Choose the right sleeve: microfiber sleeves trap dust effectively and are washable for repeated use.
- Schedule maintenance: set a monthly reminder to perform a basic dust and wipe to maintain brightness.
Call A Professional
Consider professional help if blinds are severely stained, extensively warped, or if you plan to remove and reinstall heavier blinds. Seek a pro if the blinds are fixed to window frames or have integrated motorized components that require electrical handling or specialized tools.
FAQ
How often should Venetian blinds be cleaned?
Light monthly dusting is recommended; perform a deeper clean every 1–3 months depending on dust levels and room use.
Can I use water to clean wooden Venetian blinds?
Light damp cleaning is acceptable, but avoid soaking to prevent damage; always dry thoroughly afterward.
What tools are best for top-down and bottom-up blinds?
Extendable dusters and telescoping sleeves work well for both orientations and maximize reach without removing blinds.
Are vacuum attachments safe for all blinds?
Yes, when used on low suction and with soft brush heads; avoid high suction that may bend or damage slats.
Buying Guide
When selecting tools for Venetian blinds, consider factors such as size, ease of reach, and material compatibility. A flexible cleaning kit that includes an extendable duster, a microfiber sleeve, and a slat brush generally covers most needs. Look for lightweight handles, washable sleeves, and compatible vacuum attachments for combined dry and wet cleaning. Noise level matters with vacuum attachments in quiet living spaces; choose low-suction options or models designed for delicate cleaning. For homes with multiple blinds, a telescoping tool with interchangeable sleeves reduces the number of tools needed. Finally, ensure compatibility with your blind material (wood, faux wood, or aluminum) to avoid damage. A practical setup balances speed, effectiveness, and care for blinds in typical U.S. households.