Cleaning a faucet head to remove mineral buildup and restore flow can be simple with common household ingredients. This guide explains a practical, step-by-step method using vinegar and baking soda, along with a focused set of tools to speed up the process and prevent future clogs.
Quick Answer
Pour white vinegar into a bag or container that fits over the faucet aerator, secure it so the aerator soaks, then rinse. If stubborn mineral deposits remain, create a paste with baking soda and water, apply, scrub with a descaling brush, and rinse. Dry and reinstall the aerator for best results.
What You’ll Need
- Faucet aerator cleaning brush set
- Faucet aerator cleaning kit
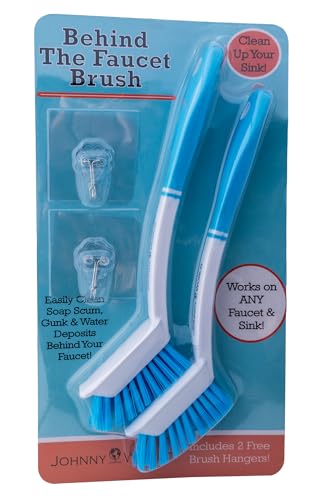
- Descaling brush for faucet aerator mineral buildup
- Vinegar baking soda faucet cleaner kit
- Bathroom faucet lime scale remover kit
- White vinegar (5% acidity)
- Baking soda
- Soft cloth or microfiber towel


Before You Start
Turn off the water supply to the sink to prevent splashes. If the aerator is in place, place a towel beneath to catch any drips. Soaking times vary: plan for 15–60 minutes for vinegar soak, plus 5–10 minutes for baking soda scrubs. Avoid mixing vinegar with bleach or ammonia, and never attempt to disassemble a faucet beyond the aerator without proper instructions.
Step-By-Step: How To Clean Faucet Head With Vinegar And Baking Soda
- Remove the faucet aerator using the appropriate wrench or by hand, noting the order of any small parts.
- Rinse the aerator under running water to loosen loose debris before soaking.
- Submerge the aerator in a container filled with white vinegar, ensuring all metal parts are covered. Soak for 15–30 minutes to dissolve mineral deposits.
- Check the aerator for remaining buildup. If deposits persist, place the aerator back in vinegar and add a small amount of baking soda directly on stubborn spots to form a fizzing scrub.
- Prepare a baking soda paste with water and apply to the inner screens and threads using a descaling brush for faucet aerator mineral buildup.
- Gently scrub all surfaces with the descaling brush, paying attention to small holes and the screen.
- Rinse the aerator thoroughly with warm water. Reassemble the aerator components in the correct order and reinstall onto the faucet.
- Turn the water back on and run both cold and hot cycles to flush residual particles. If water flow remains low, repeat soaking and scrubbing steps once more.
- Wipe external surfaces with a damp cloth and dry with a soft towel to prevent water spots and further mineral buildup.
- Test by turning on the faucet fully and observing for smooth spray and full flow. If needed, repeat the process with fresh vinegar solution.
- Consider routine maintenance using a vinegar solution every few months to minimize future lime scale buildup.
Troubleshooting
| Symptom | Likely Cause | Fix | Prevention |
|---|---|---|---|
| Low water flow after cleaning | Partial clogging in aerator holes | Remove, soak again, scrub with descaling brush | Clean every 3–6 months |
| Persistent mineral buildup | Stubborn lime scale | Extend vinegar soak time or repeat with baking soda paste | Wipe dry after use to reduce mineral adhesion |
| Corrosion spots on aerator | Age or sensitive finishes | Inspect for wear, replace if necessary | Avoid harsh cleaners; use mild solutions |
| Odd odors after cleaning | Stagnant water in aerator housing | Rinse thoroughly and run water for several minutes | Dry components after cleaning |
Common Mistakes
- Using overly abrasive brushes that scratch metal surfaces
- Using hot water too soon after finishing, which can loosen seals
- Over-tightening the aerator during reinstallation
- Rinsing with only cold water if mineral deposits are thick
These missteps can prolong the process or damage the aerator’s seals and coatings. Patience and proper tool use lead to shinier results with fewer repairs.
Tips For Best Results
- Schedule regular maintenance to prevent heavy mineral buildup.
- Use a dedicated descaling brush designed for faucet aerators for best cleaning action.
- Always rinse thoroughly after vinegar treatment to prevent lingering acids on metal.
- Store a small kit with a brush, vinegar, and baking soda for quick maintenance between deep cleanings.
Call A Professional
If repeated cleaning fails to restore flow, or if the faucet shows signs of seal leakage, corrosion, or damaged threads, it is wise to contact a professional plumber. Seek immediate assistance if there is any uncertainty about disassembly or if the faucet is installed in a difficult-to-access space.
FAQ
Can I clean the faucet aerator without removing it?
Yes, you can rinse the aerator with a vinegar hold or soak while still in place if the design allows, but removing it typically yields a deeper clean.
Is vinegar safe for all faucet finishes?
White vinegar is gentle on most metals, but some finishes may react. Always test a small inconspicuous area first.
How often should I clean a faucet aerator?
Aim for every 3–6 months, or sooner in hard-water areas with heavy mineral deposits.
What if I don’t have baking soda?
Replace with a mild paste using water and a little dish soap worked into a paste for careful scrubbing.
Will this method work for all faucet types?
Most standard kitchen and bathroom faucets benefit from this approach, though specialty or high-end fixtures may require manufacturer-approved methods.
Buying Guide
When choosing tools and cleaners for faucet maintenance, consider size, compatibility, and ease of use. A dedicated faucet aerator cleaning kit can simplify maintenance, especially if the unit contains varied thread sizes or non-standard screens. Look for descaling brushes with soft, stiff bristles that won’t scratch finishes. A vinegar-based cleaner kit paired with baking soda offers a safe, effective option for mineral buildup without harsh chemicals.
Size And Setup
Check the aerator’s thread size and the space around the faucet to ensure the tools fit. Kits typically include adapters for common sizes and a compact handle that works in tight spaces.
Noise, Efficiency, And Controls
Properly cleaned aerators restore consistent spray patterns and water flow, improving perceived efficiency. Some kits include lime-scale removers that help maintain quiet operation by preventing mineral buildup that can cause gurgling or clogs.
Placement And Compatibility
For dual-sink setups, a single kit can service multiple fixtures if the aerators share hardware. Verify that replacement parts or brushes match your faucet brand or model to avoid compatibility issues.
Maintenance Schedule
Establish a routine: quick monthly rinses and a deeper clean every 3–6 months. In areas with very hard water, consider more frequent maintenance to keep spray patterns steady and prevent deposits from forming.