Cleaning drapes without removing them from the rod can save time and keep your windows looking fresh. This guide walks through safe methods and practical tools that work for most fabric types, from light sheers to heavier velvet curtains. By following these steps, homeowners can reduce dust buildup, remove light stains, and maintain fabric longevity with minimal disruption.
Quick Answer
Use a handheld fabric steamer or portable garment steamer to lift dust and wrinkles while drapes stay in place. Pair with a vacuum cleaner attachment kit for curtains to suction loose dust, followed by an extendable microfiber duster for delicate fringe or edges. For stubborn spots, use an upholstery brush vacuum attachment to lift grime without soaking the fabric.
What You’ll Need
- Handheld fabric steamer for curtains
- Extendable microfiber duster for drapes
- Vacuum cleaner attachment kit for curtains
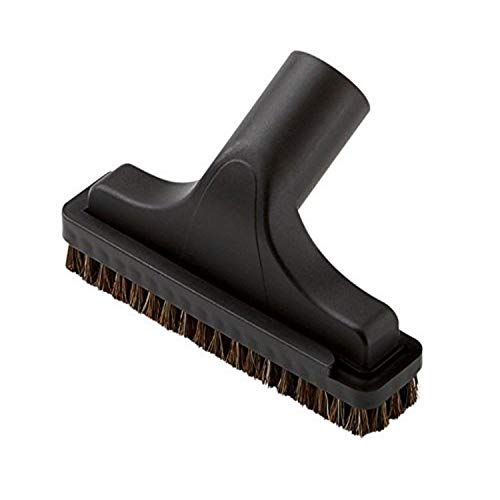
- Upholstery brush vacuum attachment for curtains
- Portable garment steamer for drapes


Before You Start
Prepare a clean, well-ventilated space. Close the curtains to minimize drafts and protect nearby surfaces. Test any tool on a small inconspicuous area to avoid heat damage or color bleed. Avoid using water directly on delicate fabrics unless the manufacturer allows it. Expect a quick session to take 15–30 minutes for typical rooms, depending on curtain length and fabric type.
Step-By-Step: How To Clean Drapes Without Removing Them
- Inspect the fabric label for care instructions and test a hidden corner with your chosen tool to confirm compatibility.
- Attach the vacuum cleaner attachment kit for curtains and set to a low suction. Gently run along the top edge and inner folds to remove loose dust without pulling on the fabric.
- Use the extendable microfiber duster to reach high sections and the outer surfaces of the drapes. Keep the duster at a slight angle to avoid snagging.
- Switch to the handheld fabric steamer for curtains. Hold the steamer a few inches from the surface and glide downward to smooth wrinkles and release embedded dust. Do not press hard against delicate fabrics.
- For stubborn spots or wrinkles, use the portable garment steamer for drapes as an alternative or supplementary step. Move steadily to prevent water spots and ensure even heat distribution.
- Run the upholstery brush vacuum attachment along the lower hems and any fringe to collect additional dust and prevent transfer to other surfaces.
- Finish with a light pass of the vacuum attachment on the upper sections to remove any loosened particles and confirm a clean appearance along the entire length.
- Reassess for missed areas and repeat as needed. Allow drapes to air briefly if humidity was introduced during steaming.
- Document any fabric concerns for future cleaning plans, especially if you notice color fading or texture changes after steaming.
- Store tools in a ready-to-use position so you can repeat a quick refresh as needed between full drops.
Troubleshooting
| Symptom | Likely Cause | Fix | Prevention |
|---|---|---|---|
| Water spots after steaming | Overly close steam or lingering moisture | Increase distance; pause and air-dry | Test heat on hidden area first |
| Fabric snagging on edges | Rough cleaning strokes or coarse duster | Use gentle, feather-light sweeps | Choose softer microfiber and keep away from sharp trims |
| Dust reappears quickly | Heavy dust accumulation in high-traffic rooms | Increase frequency of quick cleanings | Consider a protective top layer or HVAC filtration |
| Color fading after steam | Excessive heat on delicate fabrics | Switch to lower heat or distance; test first | Avoid prolonged steaming on same spot |
Common Mistakes
- Using too much water or steam on delicate fabrics, which can lead to damp spots or color bleed.
- Rubbing or pressing hard with brushes, risking fiber damage.
- Skipping a test patch on a hidden area, causing unexpected results.
- Overloading the vacuum suction on delicate drapes, which can distort hems.
Tips For Best Results
- Work from top to bottom to prevent dust from resettling on cleaned sections.
- Keep tools clean and free of prior residue to avoid transferring dirt.
- Choose tools that match fabric type: lighter fabrics respond well to steam; heavier fabrics benefit from vacuum-assisted brushing.
- Use a lint roller for quick, dry maintenance on lint-prone fabrics between deeper cleanings.
- If curtains have a dry-clean only label, skip steam and use a dry-cleaning compatible method or consult a professional.
Call A Professional
Consider professional help if drapes are silk, velvet, or have intricate trims that may be damaged by heat or improper suction. Stop immediately if you notice fraying, color bleeding, or any signs of fabric distortion that worsens with cleaning. Seek a pro when unsure about fabric care labels or if the drapes are heavily soiled from smoke or grease.
FAQ
Can I clean all drapes with a handheld steamer?
Most common fabrics respond well, but always check care labels and test a hidden area first.
Is it safe to vacuum drapes while they’re hanging?
Yes, with low suction and a soft attachment to avoid snagging or pulling the fabric.
How often should I clean drapes without removing them?
For high-traffic rooms, a quick weekly refresh plus a deeper clean every 3–6 months is common.
What should I do if a steam spot appears on my drapes?
Pause steaming, move the steam away and allow the area to air-dry; test on a hidden spot before resuming.
Buying Guide
Choosing the right tools for cleaning drapes without taking them down depends on fabric type, room conditions, and maintenance goals. Consider the following factors to make an informed purchase.
Size and Reach
Opt for an extendable microfiber duster with a long reach to reach from ceiling to floor. A compact handheld steamer is convenient for quick touch-ups on multiple window locations.
Noise Level
Garment steamers and vacuum attachments vary in noise. If the living area is used during cleaning, choose models labeled as quieter or with adjustable power.
Energy Efficiency
Energy-efficient steamers use less water and power while delivering effective heat and steam. Look for energy-saving settings and auto shutoff features.
Controls and Ease of Use
Simple controls, clear indicators, and ergonomic handles reduce fatigue during extended cleaning sessions. A fuss-free wand and nozzle design helps in tight spaces.
Placement and Compatibility
Check compatibility with your existing vacuum system and whether you primarily clean lightweight fabrics or heavy drapery. A modular setup with interchangeable heads offers flexibility.
Durability and Warranty
Durable materials and a solid warranty reflect long-term value. If you clean frequently, invest in sturdier attachments designed for regular use.
Brand and Support
Choose reputable brands with accessible customer support and replacement parts for extensions, brushes, and nozzles.
With the right combination of tools, cleaning drapes without removing them becomes a practical, efficient task that keeps rooms looking bright and fresh. Are you ready to assemble the optimal kit for your windows?