Introduction
Paint chips are common for vehicles that endure daily driving and off-road adventures. Left untreated, chips can worsen, exposing metal and accelerating rust. This guide provides a practical, step-by-step approach to remove chips, fill and blend repairs, and protect the finish using commonly available car care products.
The process combines surface prep, chip repair materials, and careful polishing to restore a smooth, uniform appearance without extensive bodywork. Readers will learn essential techniques and safe practices for DIY touch-ups and minor repairs.
Quick Answer
Identify the chips and choose a compatible chip repair kit, apply filler or touch-up paint as needed, lightly sand for a smooth transition, and finish with a detailing routine to seal and protect the repair area.
What You’ll Need
- Car paint chip repair kit auto body filler resin sanding tools
- Dual action polisher car detailing kit 5 inch pads
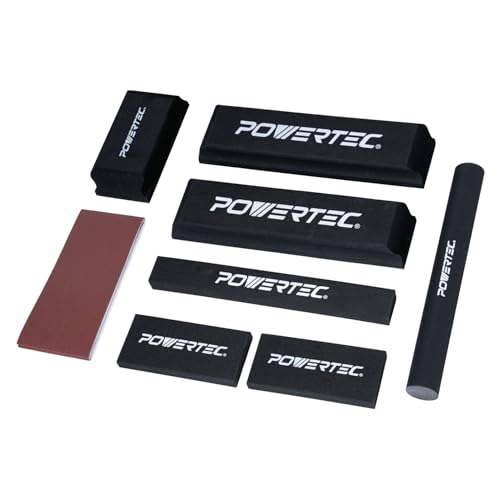
- Auto body sanding block set for paint chip repair
- Car clay bar detailing kit with lubricant for paint prep
- Paint touch up paint pen and repair tools for cars


Before You Start
Assess the extent of the chips: small, superficial chips can usually be repaired at home, while larger chips or deep rust may require professional attention. Prepare a clean, well-lit workspace and protect nearby surfaces from dust. Wear gloves and eye protection as needed. Time estimates vary by chip size and product choice, typically ranging from 1 to 3 hours for a careful DIY repair. Critical cautions include avoiding over-application of resin, ensuring complete drying between layers, and not attempting repairs on moving parts or panel edges where heat or flex could compromise adhesion.
Step-By-Step: How To Get Rid Of Paint Chips On A Car
- Clean the area around the chip with mild soap and water to remove dirt and grime.
- Use a clay bar detailing kit with lubricant to lift embedded contaminants from the paint surface.
- Assess the chip’s depth. For shallow chips, a touch-up paint pen can fill the void; for deeper chips, apply a thin layer of auto body filler resin or repair resin from the chip repair kit.
- With a small applicator, apply resin or touch-up paste flash-drying as directed by the product instructions. Build in thin layers to avoid runs.
- Allow each layer to cure fully. Lightly sand the repaired area with the auto body sanding block set, using fine grit for a feathered edge.
- Polish the area with a dual action polisher and 5 inch pads to blend the repaired spot with the surrounding paint. Maintain a shallow orbit to avoid creating new scratches.
- Wipe the panel and inspect for uniformity. If needed, repeat resin touch-up and sanding to achieve a smooth finish.
- Apply a finishing coat of paint touch up around the chip, matching color as closely as possible. Use a clear coat if your vehicle uses one.
- Buff the area with a clean pad to even gloss across the repaired section. Remove any residue with a microfiber cloth.
- Seal the repair by applying a protective wax or sealant and perform a final wipe-down for a consistent shine.
- Document the repair and schedule periodic checks to maintain finish quality and prevent new oxidation at the repaired site.
Troubleshooting
| Symptom | Likely Cause | Fix | Prevention |
|---|---|---|---|
| Chip reappears or shows a rough edge | Thick resin buildup or poor feathering | Lightly re-sand and reapply thin resin layer | Proper feathering and curing between layers |
| Paint looks dull or uneven | Inconsistent polish or improper pad pressure | Re-polish with fresh pad and controlled pressure | Use flap disks appropriate for clear coat and color |
| Color mismatch | Inaccurate color match of touch-up paint | Re-apply with matching tint; consider spray can for better blend | Consult color code and test on a discreet area first |
| Scratch lines after repair | Excess sanding or too-rough abrasive | Switch to finer grit and light, even strokes | Check guest abrasives are compatible with your clear coat |
Common Mistakes
- Using too much resin in a single pass, causing fish-eyes or runs
- Skipping clay bar prep, which can trap contaminants under the repair
- Over-sanding the surrounding paint, leading to visible halos
- Mismatching paint color or clear coat layer
- Rushing curing times, resulting in brittle repairs
Tips For Best Results
- Test color matching on a hidden panel before applying to the chip
- Work in a shaded, dust-free area to minimize debris sticking to fresh resin
- Use a dual action polisher to avoid swirling marks while blending
- Keep edges of the repair slightly smaller than the chip to avoid masking the surrounding paint
- Follow product instructions for dry and cure times to maximize adhesion
Call A Professional
Consider professional help if chips are numerous, clustered on a single panel, or located near edges or trim where repairs may affect vehicle aesthetics or structural integrity. Signs that require a pro include extensive rust, peeling clear coat, or paint lift that reveals bare metal. If you notice a wide area of damage or corrosion expanding despite at-home repairs, consult an auto body shop for an expert assessment.
FAQ
Can I fix chips on any car paint?
Most modern clear coats and base coats can be repaired with appropriate kits, but very large or rusted chips may require professional service.
Will touch-up paint match exactly?
Color matching can be tricky; use manufacturer color codes and test before full application.
How long does a DIY chip repair take?
Most repairs take 1–3 hours depending on chip size and curing times between steps.
Is waxing safe after a chip repair?
Yes, applying wax or sealant after the repair helps protect the surface and sustain gloss.
What if the chip is on a curved panel?
Extra care with feathering and polishing is needed to maintain a uniform look across contoured surfaces.
Buying Guide
When selecting products for repairing paint chips, consider size, compatibility, and finish outcomes. For example, choose a car paint chip repair kit auto body filler resin sanding tools that includes resin, applicators, and compatible sanding blocks. A dual action polisher car detailing kit 5 inch pads helps blend repairs with consistent swirl-free polishing. A auto body sanding block set for paint chip repair ensures precise feathering on edges, while a car clay bar detailing kit with lubricant for paint prep removes surface contaminants before repair. A paint touch up paint pen and repair tools for cars provide color-matched coverage for minor chips. Consider the vehicle’s paint system, including base coat and clear coat, and ensure tools are suitable for the panel type. Noise level, energy efficiency of tools, and ease of replacement parts should factor into long-term use. Think about placement: work in a well-ventilated area, with surface protection nearby, and store materials in a cool, dry place to preserve bond strength and color stability.