Quick Answer
To clean grout effectively without causing damage, start with gentle, non-abrasive tools and avoid harsh acids. Use a mild cleaning solution, a soft-bristle or nylon brush, and test a small area first. For tough stains, consider a steam cleaner or an electric grout cleaner scrubber, but avoid soaking overly porous grout and always seal after cleaning.
What You’ll Need
- Angled grout cleaning brush nylon bristles
- Electric grout cleaner scrubber machine
- Steam cleaner for grout and tile
- Non-scratch grout cleaning pad set
- Grout sealing brush applicator kit
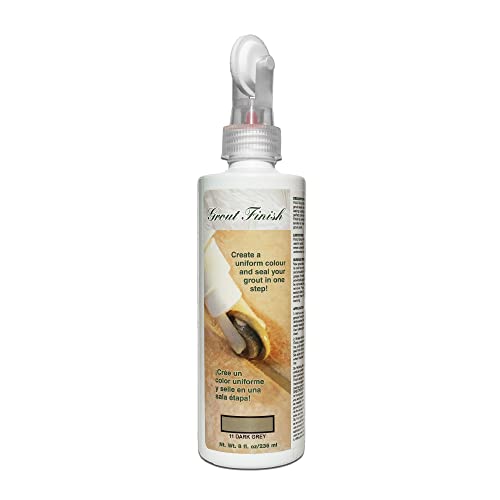


Before You Start
prepare the area by removing loose debris and protecting surrounding surfaces with a damp cloth. Use a mild cleaning solution such as a pH-neutral tile cleaner or a mixture of baking soda and water for stubborn grout stains. Avoid acidic cleaners like strong vinegar or bleach on highly colored grout, which can erode seals over time. Allow the area to dry between steps to prevent mold growth. Plan 20–40 minutes for smaller areas and up to an hour for large layouts. Critical cautions: never use metal brushes that can scratch porcelain or ceramic tiles, and always test a hidden corner first to confirm grout integrity.
Step-By-Step: How To Clean Grout Without Damaging It
- Inspect grout lines for cracks or crumbling sections that may need repair before cleaning.
- Vacuum or wipe away loose dirt from the grout to prevent grinding it into the surface.
- Apply a mild, pH-neutral cleaner to the grout lines and let it sit for 5–10 minutes to loosen grime.
- Use the angled grout cleaning brush nylon bristles to scrub along the grout lines with steady, diagonal motions.
- For stubborn stains, work in small sections using the electric grout cleaner scrubber machine at a low to medium setting.
- Optionally, employ a steam cleaner for grout and tile to lift embedded dirt, keeping the nozzle moving and not dwelling on one spot too long.
- Rinse thoroughly with clean water, ensuring no soapy residue remains, which can attract more dirt.
- Dry the area with a microfiber cloth to prevent water spots and mold growth between tiles.
- Inspect grout after cleaning; if needed, repeat the gentle cleaning process on persistent areas.
- After drying, apply a grout sealing brush applicator kit to seal the grout lines for easier future cleaning.
- Allow the sealant to cure per product instructions before exposing grout to moisture.
- Establish a regular maintenance routine: light cleaning every two weeks and deep cleaning every 3–6 months depending on use.
Troubleshooting
| Symptom | Likely Cause | Fix | Prevention |
|---|---|---|---|
| Grout remains discolored after cleaning | Stubborn stains or mineral deposits | Try a paste of baking soda and water; scrub with non-scratch pads | Regular sealing and periodic deep cleaning |
| Grout looks rough or crumbles after cleaning | Worn or damaged grout | Spot-repair damaged sections; reseal after repair | Avoid aggressive brushes on fragile grout |
| Excess moisture causes mold growth | Poor drying or trapped moisture | Dry thoroughly; improve ventilation | Use a dehumidifier in humid spaces |
| Sealer beads up or flakes | Cleaner residue or improper prep | Clean and dry thoroughly before sealing; reapply sealer | Follow manufacturer instructions for prep |
Common Mistakes
- Using overly harsh or acidic cleaners on lighter grout
- Scrubbing with metal or stiff brushes that scratch grout
- Neglecting to seal grout after cleaning, leading to quicker staining
- Rinsing insufficiently and leaving soap residue behind
Tips For Best Results
- Always test cleaners on a small, inconspicuous area first
- Work in small sections to prevent cleaner from drying on grout
- Combine mechanical cleaning with steam cautiously to avoid over-wetting porous grout
- Choose a compatible sealer for your grout type and tile material
- Keep grout lines dry between cleanings to deter mold
Call A Professional
Consider hiring a pro if grout has extensive cracking, crumbling, or if staining persists after multiple cleaning attempts. Seek a professional if you notice recurring mold that does not respond to cleaning, if grout color is significantly darkened, or if tile substrates show structural issues. Do not delay in cases of potential water damage or high-risk areas like bathrooms and kitchens with persistent moisture.
FAQ
Can I use bleach to clean grout?
Bleach can disinfect but may erode sealers and lighten colored grout; use cautiously and only on white grout if recommended by the sealer manufacturer.
How often should grout be sealed?
Most grout benefits from sealing every 1–2 years, depending on wear, cleaning frequency, and tile location.
Is steam cleaning safe for all grout types?
Steam is effective for many grout types but avoid prolonged exposure on epoxy grout or very old, fragile grout; always test first.
What’s the best tool to clean grout without damaging it?
A combination of a nylon-bristle angled brush and non-scratch cleaning pads paired with a mild cleaner typically yields the best results without damage.
Should I reseal grout after every cleaning?
Not necessarily; resealing depends on the grout type and wear. Follow the sealant’s guidelines and assess grout after cleaning for signs of porosity or staining.
Buying Guide
When selecting tools and products to clean grout without damaging it, consider several factors to balance effectiveness with preservation of grout integrity.
Size and scope
For small bathrooms, compact grout brushes and handheld scrubbers may suffice. Large kitchens or tiled floors benefit from an electric grout cleaner scrubber machine for faster coverage.
Cleaning power and conduct
Look for devices with adjustable agitation levels and compatible cleaning pads. A steam cleaner can boost stain removal but may require careful use near heat-sensitive substrates.
Noise and energy use
Electric grout cleaners vary in noise and power consumption. If sound levels or electricity use matters, compare decibel ratings and energy-efficient models.
Controls and ease of use
Choose tools with intuitive controls, easy pad changes, and clear instructions. A modular kit with a grout sealing brush applicator can streamline sealing after cleaning.
Surface compatibility
Verify that the tools are suitable for the tile material (ceramic, porcelain, stone) and grout type (cementitious, epoxy). Some cleaners are better for grout lines and not for stone surfaces.
Placement and storage
Consider how you will store tools. Wall-mount hooks or compact carts help keep cleaning supplies organized and accessible for regular maintenance.