Cleaning electric stove burners can restore their shine and improve cooking efficiency. This guide provides a practical, step-by-step method using common household materials, with an emphasis on safety and minimal scrubbing. The focus is on restoring burnt-on residue while protecting delicate surfaces.
Quick Answer
Mix baking soda with water to form a paste, apply to burner elements and grates, let sit, then scrub with non-scratch tools. Rinse thoroughly and dry before reassembling. For stubborn spots, use a glass top stove scraper for burnt-on residue and finish with microfiber pads and cloths.
What You’ll Need
- Stovetop burner cleaning brush non-scratch nylon
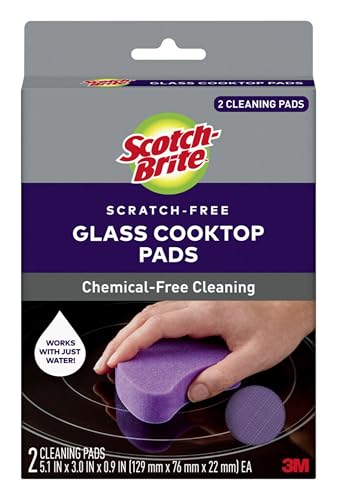
- Stovetop scrub pads non-scratch microfiber
- Glass top stove scraper for burnt-on residue
- Heat resistant cleaning gloves kitchen cleaning
- Microfiber cleaning cloths for stove and oven


Before You Start
Unplug the stove and ensure the surface is cool before beginning. Remove burner caps and grates to access all surfaces. Wear heat resistant cleaning gloves to protect hands from splashes and sharp edges. Work in a well-ventilated area and test a small inconspicuous spot first to avoid scratching enamel or glass.
Step-By-Step: How To Clean Electric Stove Burners With Baking Soda
- Detach the burner components: remove caps, grates, and any removable flame tipes if applicable, placing them on a towel.
- Dust loose debris: wipe away loose crumbs with a dry microfiber cloth to prevent grinding during scrubbing.
- Prepare a baking soda paste: mix baking soda with a small amount of warm water until it forms a thick paste.
- Apply the paste: cover burnt-on areas on burners and grates with the paste, avoiding electrical contacts. Let it sit for 15–20 minutes.
- Gentle scrubbing: use a stovetop burner cleaning brush non-scratch nylon or microfiber pad to scrub in circular motions, focusing on crusted spots.
- Rinse and wipe: dampen a microfiber cleaning cloth and wipe away the paste residue completely; repeat as needed.
- Target stubborn residue: for tough spots, carefully use a glass top stove scraper for burnt-on residue, applying light pressure and keeping the blade angle shallow.
- Dry and reassemble: wipe dry with a clean microfiber cloth and replace caps and grates securely before heating again.
- Final polish: buff the surface with a dry microfiber pad to remove any remaining streaks and restore shine.
- Optional routine: perform this cleaning monthly or as needed to prevent heavy buildup and maintain performance.
- Safety check: ensure all components are dry before plugging back in or turning on heat to avoid electrical hazards.
- Quality control: inspect for even gaps around burner elements to ensure proper airflow and flame distribution.
Troubleshooting
| Symptom | Likely Cause | Fix | Prevention |
|---|---|---|---|
| Burnt-on residue remains after paste | Insufficient sitting time | Reapply paste and let sit 15–20 minutes longer | Clean spots as soon as possible after cooking |
| Scratches appearing on surface | Using metal tools or abrasive pads | Switch to non-scratch nylon brush and microfiber | Follow gentle scrubbing technique, avoid metal edges |
| Streaks after rinse | Residue trapped in crevices | Rinse with warm water more thoroughly and wipe dry | Wipe in a single direction with clean cloths |
| Discoloration on burner caps | Heat exposure or chemical reaction | Soak caps in warm soapy water, scrub with microfiber | Regular cleaning after use |
Common Mistakes
- Using harsh abrasive pads on enamel or glass tops
- Letting baking soda paste dry completely before scrubbing
- Scrubbing too aggressively around electrical components
- Not drying components before reassembly
Tips For Best Results
- Always start with cool, unplugged appliances to minimize risk
- Apply paste only to stained areas to prevent budget-friendly damage
- Combine microfiber cloths with non-scratch scrub pads for efficient cleaning
- For heavy buildup, repeat the process in stages rather than all at once
- Keep a dedicated cleaning cloth set for kitchen surfaces to avoid cross-contamination
Call A Professional
Stop and consult a professional if: scorching or bubbling enamel reappears, heavy corrosion is visible, or you notice damaged wiring around burners. Do not operate a stove with damaged electrical components. If unsure about disassembly of burner assemblies, seek expert service to avoid safety risks.
FAQ
Can baking soda damage my stove?
When used as a paste on burnt-on residues and rinsed thoroughly, baking soda is generally safe for most stovetops, including enamel and glass. Avoid prolonged contact on unfinished metal or exposed circuit areas.
Is it necessary to remove burner caps?
Removing burner caps and grates helps access all surfaces and ensures a thorough clean. Reassemble carefully to preserve proper alignment.
How often should I clean stove burners?
Regular light cleaning after cooking and a deeper baking soda-cleaning session monthly helps prevent heavy buildup and keeps burners working efficiently.
What tools are safest for burnt-on residue?
Non-scratch nylon brushes, microfiber pads, and glass top scrapers designed for non-abrasive use are safest for enamel and glass surfaces.
Buying Guide
Choosing the right tools for cleaning electric stove burners involves considering material compatibility, size, and ease of use. A set of non-scratch nylon brushes pairs well with microfiber cloths for daily upkeep. A dedicated glass top stove scraper handles stubborn burnt-on residue without scratching. Heat-resistant gloves add a safety buffer during scrubbing, while microfiber pads offer versatile cleaning power for both the burners and surrounding surfaces.
Key buying factors include size and fit for your stove model, noise level during scrubbing, and energy efficiency implications of keeping burners clean and functioning well. Look for durable construction, comfortable grips, and reusable cloths that resist staining. Evaluate whether you want a compact, targeted kit or a broader kitchen-cleaning set that includes cloths, pads, and gloves for ongoing maintenance.
Would you like a tailored recommendation based on your stove type (coil, radiant, or glass)? Considering where you store the cleaning supplies and how often you clean can help optimize your choice and keep your stove looking and performing at its best.