Unlacquered brass has a natural, warm patina that many homeowners admire. Cleaning it requires products and methods that preserve the metal’s finish while removing tarnish and oils. This guide provides practical steps, recommended tools, and safety tips for American households looking to restore shine without damaging the brass.
Quick Answer
Use a mild brass polish or unlacquered brass cleaner to remove tarnish, then buff with a soft cloth until the patina shines evenly. For stubborn spots, a gentle patina remover can help, followed by a light application of mild brass polish. Always test a small, inconspicuous area first.
What You’ll Need
- Unlacquered brass cleaner
- Brass polishing cloth unlacquered
- Brass polishing kit for unlacquered brass
- Patina remover for unlacquered brass
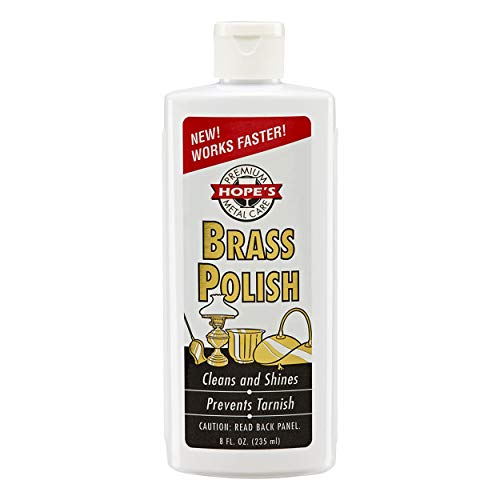
- Mild brass polish for unlacquered brass


Before You Start
Before cleaning, identify whether the piece is truly unlacquered. If it has a lacquer coating, removing it can expose the brass to rapid tarnish. Wear gloves to avoid skin oils transferring to the metal, and work in a well-ventilated area. Protect surrounding surfaces with a soft cloth or newspaper. Time estimate: 20–60 minutes depending on tarnish level. Critical cautions: avoid aggressive abrasive tools that could scratch the brass, and never use ammonia-based cleaners on certain finishes, as they may dull the surface.
Step-By-Step: How To Clean Unlacquered Brass
- Remove loose dirt with a soft microfiber cloth to prevent scratching during polishing.
- Apply a small amount of unlacquered brass cleaner to a clean, soft cloth and rub gently in circular motions.
- For stubborn tarnish, use a patina remover for unlacquered brass following the product instructions, then wipe clean.
- Rinse or wipe away cleaner with a damp cloth, ensuring no residue remains that could dull the finish.
- Buff the surface with a brass polishing cloth unlacquered or a soft cotton cloth until a warm shine appears.
- If desired, apply a thin layer of mild brass polish for unlacquered brass for added protection and luster, then buff again.
- Repeat as needed on intricate areas with a soft brush or cotton swab to reach crevices.
- Polish exterior surfaces evenly to prevent odd patches and ensure uniform patina enhancement.
- Wipe dry and inspect. If the piece is part of household items, reassemble and place away from moisture to reduce future tarnish.
- Store polishing supplies in a cool, dry place for future touch-ups.
- Maintain by regular light cleaning to prevent heavy tarnish buildup.
- For high-value items, test each product on an inconspicuous area first to avoid unexpected damage.
Troubleshooting
| Symptom | Likely Cause | Fix | Prevention |
|---|---|---|---|
| Dull, streaky finish after polishing | Residual cleaner or wax buildup | Wipe with a clean microfiber and buff | Test cleaner first; use only small amounts |
| Uneven tone or blotches | Uneven application or high humidity | Reapply in thin coats, buff evenly | Work in controlled conditions |
| Scratches or micro-scratches | Abrasive tools or harsh scrubbing | Switch to softer cloths; avoid steel wool | Gentle cleaning routines |
| Rapid re-tarnish after cleaning | Exposure to oils or moisture | Lightly wax or seal with compatible product | Keep dry and clean |
Common Mistakes
- Using harsh abrasive cleaners that scratch unlacquered brass
- Assuming all brass is lacquered and removing a protective coating unnecessarily
- Applying excessive polish, which can create buildup or change the finish
- Over-wetting items with water in porous or detailed areas
Prevent these by choosing products labeled for unlacquered brass and following the manufacturer’s directions precisely.
Tips For Best Results
- Always test any cleaner on a hidden area first to confirm safe interaction with the metal.
- Use a dedicated brass polishing kit for unlacquered brass for consistent results.
- Maintain a regular cleaning schedule to prevent heavy tarnish accumulation.
- Carefully dry items after cleaning to minimize water spots and future tarnish.
- Store cleaning supplies away from sunlight and heat to preserve their effectiveness.
Call A Professional
Consider a pro if the item is antique, heavily tarnished, or has intricate inlays that could be damaged by DIY methods. Stop and consult a craftsman if the brass has signs of significant wear, corrosion, or you notice flaking lacquer that may require professional refinishing. Seek professional help for valuable or irreplaceable pieces to preserve their integrity and value.
FAQ
Can I use ordinary metal polish on unlacquered brass?
Yes, but choose a mild polish designed for unlacquered brass and test first to avoid over-polishing or discoloration.
Is it safe to clean brass with vinegar or lemon juice?
Acidic cleaners can etch or dull brass; use vinegar or lemon juice only if the cleaner specifically states compatibility with unlacquered brass.
How often should I clean unlacquered brass?
Light cleaning every few weeks helps maintain shine and prevent heavy tarnish buildup.
Will cleaning remove a patina I want to keep?
Some methods remove patina; if a patina is desired, use gentler products and test on a hidden area before proceeding.
Can I seal unlacquered brass after cleaning?
Yes, applying a light protective sealant or wax can slow tarnish, but ensure the sealant is compatible with unlacquered brass and does not hide the natural look.
Buying Guide
When purchasing products for unlacquered brass, consider several factors to choose the right kit and cleaners.
- Size and scope: For heavy hardware or large fixtures, a full brass polishing kit may be more efficient than individual items.
- Noise level: Buffing wheels and drills can be loud; manual polishing is quieter and suitable for home use.
- Energy efficiency: Manual cleaning uses no electricity; if using powered tools, opt for energy-efficient options and low RPM settings.
- Controls and application method: Look for simple applicators, pre-measured solutions, and clear instructions.
- Placement considerations: For items on walls or delicate shelves, choose gentle products and soft cloths to avoid scratches.
- Durability: A protective sealant or wax can extend the time between cleanings, especially in humid environments.
- Brand compatibility: Use unlacquered brass cleaners and polishes designed for bare metal to protect the finish.
- Pricing and availability: Compare kits that include multiple tools with separate purchases to find the best value.
With the right kit and proper technique, unlacquered brass can regain a warm, even glow without compromising its natural beauty. If in doubt, start with a small test area and follow the product directions closely. Would you like recommendations aligned with your specific project, such as hardware, lighting fixtures, or decorative pieces?