Tiger stripes in paint—those uneven, wavy lines that appear when walls dry or when repair work isn’t seamless—can detract from a room’s finish. This guide outlines practical steps using common DIY tools to smooth surfaces, apply new coats, and achieve a uniform look on interior walls.
The goal is a durable, visually even finish that stands up to daily wear. By following these steps and using the right materials, homeowners can restore a smooth, professional-looking wall without a full repaint.
Quick Answer
To fix tiger stripes, sand the area lightly to smooth texture, apply a ready-made spackling compound or lightweight patch, then prime and repaint with even, steady strokes. Use a fine-grit sanding block and appropriate sanding sheets, and finish with a quality mini roller for a uniform coat.
What You’ll Need
- 6 inch sanding block for paint prep fine grit
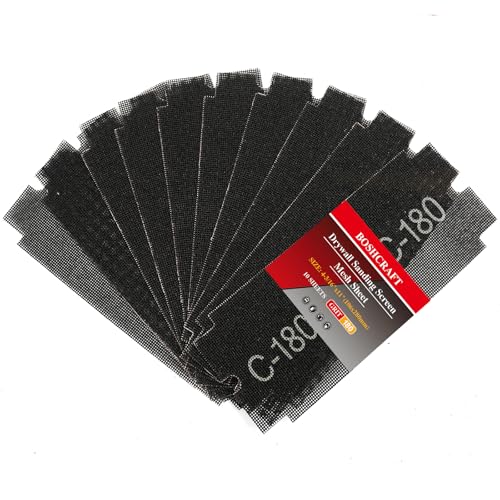
- 120-180 grit sanding sheets for walls paint repair
- 3 inch plastic putty knife drywall repair
- 4 inch mini paint roller with 3/8 inch nap
- spackling compound lightweight patch for walls


Before You Start
Inspect the wall to determine whether stripes are due to texture, old paint layers, or surface damage. Wear a dust mask and eye protection during sanding. Move furniture away from the wall and cover surfaces to catch dust. Time estimate: 2–4 hours for prep and repair + drying time per coat. Avoid rushing primer or paint layers; proper drying ensures a smooth finish.
Prepare the area by laying drop cloths and taping off adjacent surfaces. If the wall has extensive texture or cracking, consider sealing large areas with a bonding primer before patching.
Step-By-Step: How To Fix Tiger Stripes In Paint
- Assess the affected area and clean the wall with a damp cloth to remove dust and oils.
- Lightly sand the striped area with a 120–180 grit sanding sheet using a 6 inch sanding block to create a smooth, uniform base.
- Wipe away sanding dust and inspect for any remaining ridges or uneven spots.
- Apply a thin coat of spackling compound lightweight patch for walls with a 3 inch plastic putty knife, feathering the edges beyond the damaged area.
- Let the patch dry according to product directions, then sand the patched area with fine grit until flush with surrounding wall.
- Prime the repaired section with a compatible primer to seal the patch and improve paint adhesion.
- Apply the first coat of paint with a 4 inch mini paint roller, maintaining a light, even pressure to prevent new texture.
- Allow the first coat to dry completely, then inspect for texture differences and touch up any low spots with additional light sanding if needed.
- Apply a second coat of paint using the same rolling technique to achieve uniform color and finish.
- Remove tape and guards, clean up edges with a small brush if necessary, and reseal the area if humidity or temperature changes are a concern.
- Review the entire wall in different lighting to ensure a smooth, even appearance without visible tiger stripes.
Troubleshooting
| Symptom | Likely Cause | Fix | Prevention |
|---|---|---|---|
| Visible streaks after painting | Inadequate sanding or primer | Re-sand lightly and re-prime before another coat | Seal patch areas with primer before painting |
| Paint lifts or peels at repaired area | Incorrect surface preparation or moisture | Ensure dry surface and correct primer | Address moisture issues before painting |
| Ridges remain after patching | Thick patch or uneven sanding | Re-sand smooth; apply thin patches | Use light even strokes and thin layers |
| New texture appears uneven | Inconsistent roller technique | Use steady, overlapping strokes and proper nap length | Practice on a scrap area before final coat |
Common Mistakes
- Over-sanding the wall, which can damage drywall edges.
- Using a heavy-handed paint stroke that recreates texture.
- Applying thick patches that dry with a ridged surface.
- Skipping primer on patched areas, reducing adhesion.
Tips For Best Results
- Choose the right grit: start with 120–180 grit for smoothing, then finish with very fine grit for a seamless look.
- Feather patch edges to blend into the surrounding wall, avoiding hard lines.
- Use a high-quality primer suited to the wall material to optimize paint adhesion and uniform color.
- For large areas, a 4 inch mini roller with 3/8 inch nap provides better control and a consistent finish.
- Test paint on a small, inconspicuous section to ensure color and sheen match after drying.
Call A Professional
Seek professional help if the wall shows persistent cracking, moisture damage, or if patches repeatedly fail to bond. Stop and contact a pro when:
- There is ongoing dampness or musty odor in the wall.
- Repair requires large sections or structural assessment.
- Paint continues to blister after multiple patch attempts.
FAQ
What causes tiger stripes in paint?
Tiger stripes often result from uneven texture, incomplete sanding, or patches that don’t blend with the surrounding surface.
Can I fix tiger stripes without repainting the entire wall?
Yes, in many cases you can patch, sand, prime, and repaint just the affected area for a seamless look.
Which tools are essential for patching walls?
A sanding block, fine-grit sheets, a putty knife, a lightweight patch compound, and a small roller are all useful.
How long does it take for patches to dry?
Drying times vary by product but generally range from 1–4 hours for patches, plus additional time for primer and paint layers.
Should I prime before repainting?
Yes, priming improves adhesion and uniform color, especially over repaired areas.
Buying Guide
When selecting products for removing tiger stripes and achieving a smooth finish, consider size, texture, and compatibility with existing paint. For sanding, opt for fine-grit sheets and a comfortable 6 inch block. Look for spackling compounds labeled lightweight or for walls to ensure easy sanding and minimal shrinkage. A 4 inch mini roller with a 3/8 inch nap provides better control on mid-sized areas and reduces texture transfer. Primers should be compatible with both the existing paint and the repair compound to ensure a seamless finish. Consider the wall’s material—drywall, plaster, or masonry—and choose tools and compounds rated for that surface. Finally, assess the room’s lighting and viewing angles; a second coat may be necessary to achieve a uniform appearance under various lighting conditions.